Wiki
Clone wikiEspecWeb / Factory Setup
Purpose
This document is part of the T-series Web Controller Mounting and Installation Procedure (104766 REV. 00) which picks up from Step 6.21. It covers the required setup procedure for ESPEC Web Controller, Version 3.2.0 and later, to connect to a T-series chamber and complete Mender registration. This procedure must be completed on all Web Controller devices prior to shipment.
1. Web Controller Setup Options
With T-series chambers, there are two options to complete ESPEC Web Controller setup.
- Configure ESPEC Web Controller via the touch display. Refer to Section 2.1 for this option.
- Configure ESPEC Web Controller via a Web browser on a PC. Refer to Section 2.2 for this option.
2. Accessing ESPEC Web Controller
2.1 Using Touch Display
With the touch display, there is no need to access ESPEC Web Controller. However, the Web Controller must be connected to our network in order to complete the factory setup. After applying power to the Web Controller, the system will display its user interface (UI) on the touch display with the login screen. Proceed to Section 3 to complete the setup.
2.2 Using Web Browser
ESPEC Web Controller can be accessed via its hostname or its IP address on our network. The default hostname is ESPEC-default (with its URL: http://ESPEC-default.local/). Two existing methods can be used to locate the new Web Controller.
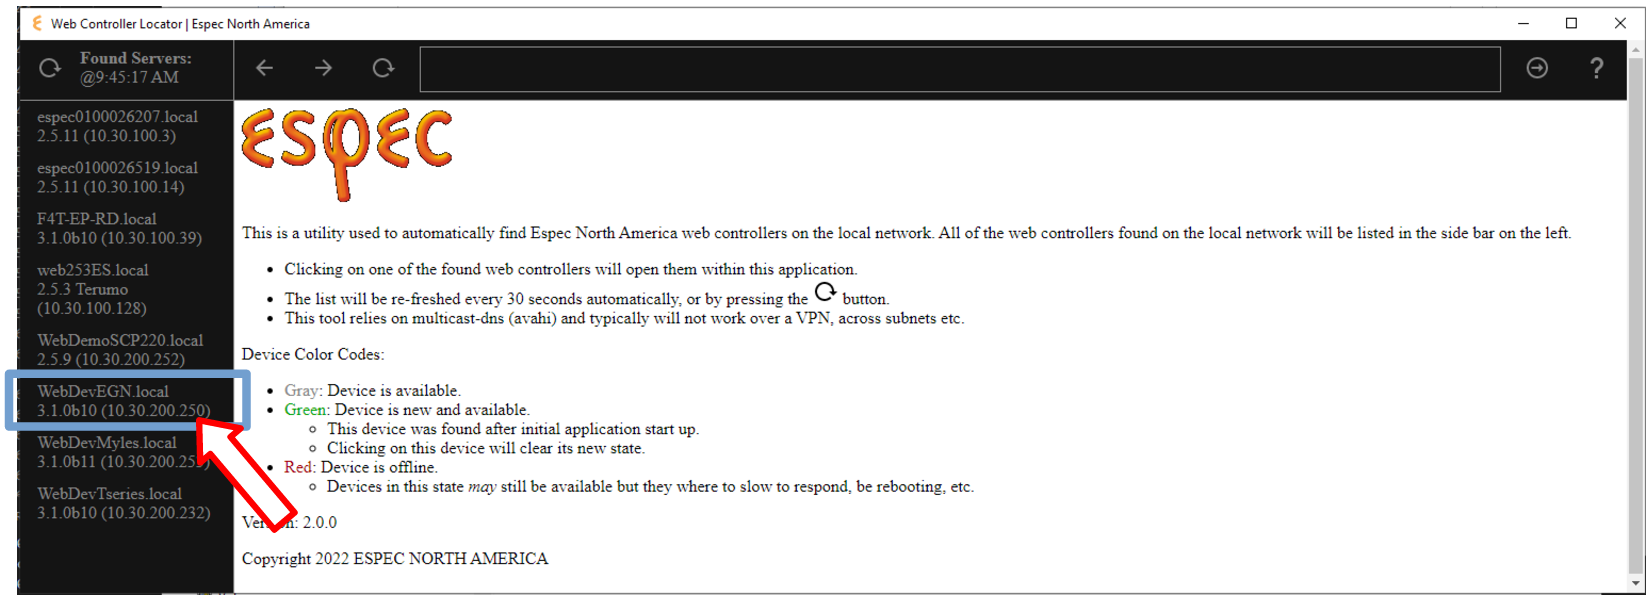
Launch the Locator Utility on your computer to scan our network for all the Web Controllers. The following figure depicts a typical list of Web Controllers on our network.
- Search the list for the new Web Controller by its hostname: ESPEC-default
- Click on its hostname/IP-address to connect to the Web Controller
- Proceed to Section 4 (Configuring Web Controller)
3. Configuring Web Controller: Setup Wizard
Production must perform this Setup Wizard on all Web Controllers, including service orders, prior to shipping. The procedure of this Setup Wizard has changed (compared to the previous Web Controller); it involves registering the Web Controller and Chamber serial number.
Note: Anytime the Web Controller page is refreshed at the factory, the Setup Wizard will restart. It must be closed using the X button in the top right after the second step indicated by "(2) Terms of Service" appears; otherwise, the user will be logged out.
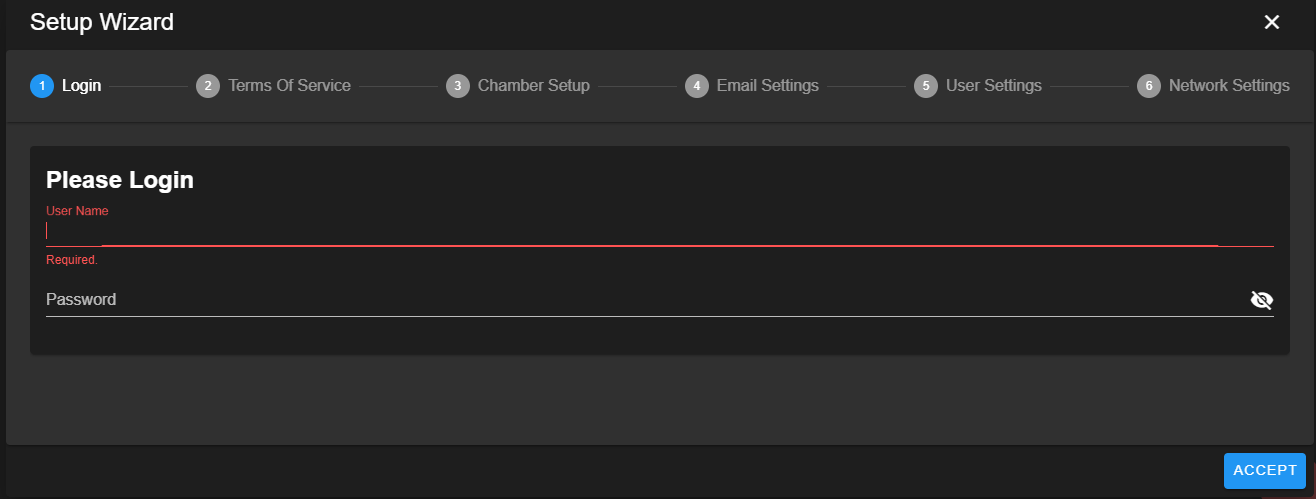
3.1 Login
Login with the following credentials.
- User Name: "admin"
- Password: "admin"
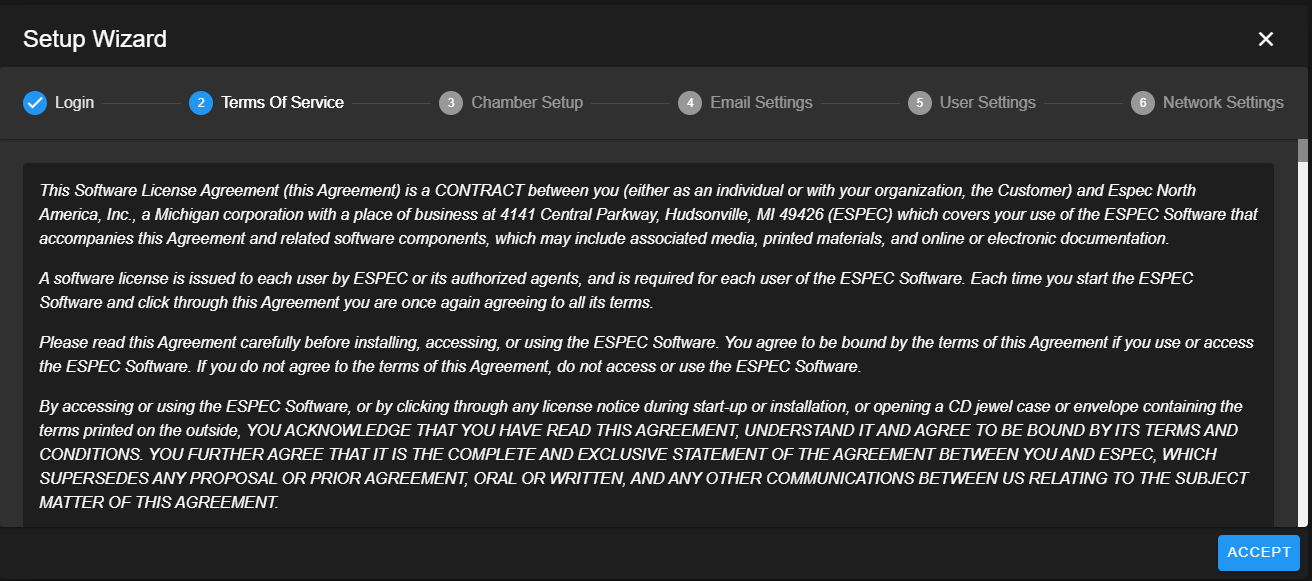
3.2 Terms of Service
Click Accept to accept terms of service. This is different from the previous Web Controller versions where "Terms of Service" is always present until the Setup Wizard is completed by the customer.
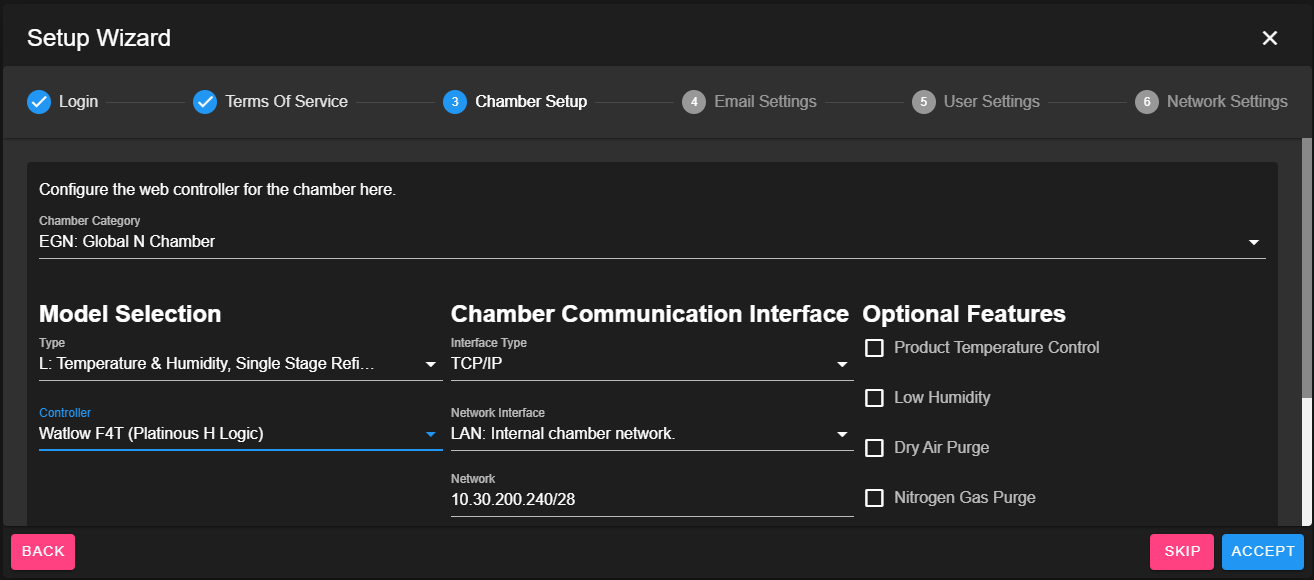
3.3 Chamber Setup
Configure the Web Controller for the chamber based on the applicable work order: chamber category, model selection and controller, shown below as an example.
- Factory Install: For factory installed Web Controller, configure the Web Controller for the target chamber and click ACCEPT.
- Service Replacements: For service replacements, configure the Web Controller for the chamber and click ACCEPT.
- U-Web Kit: For U-WEB-KIT setup, click the SKIP button
3.4 Device Registration and Verification
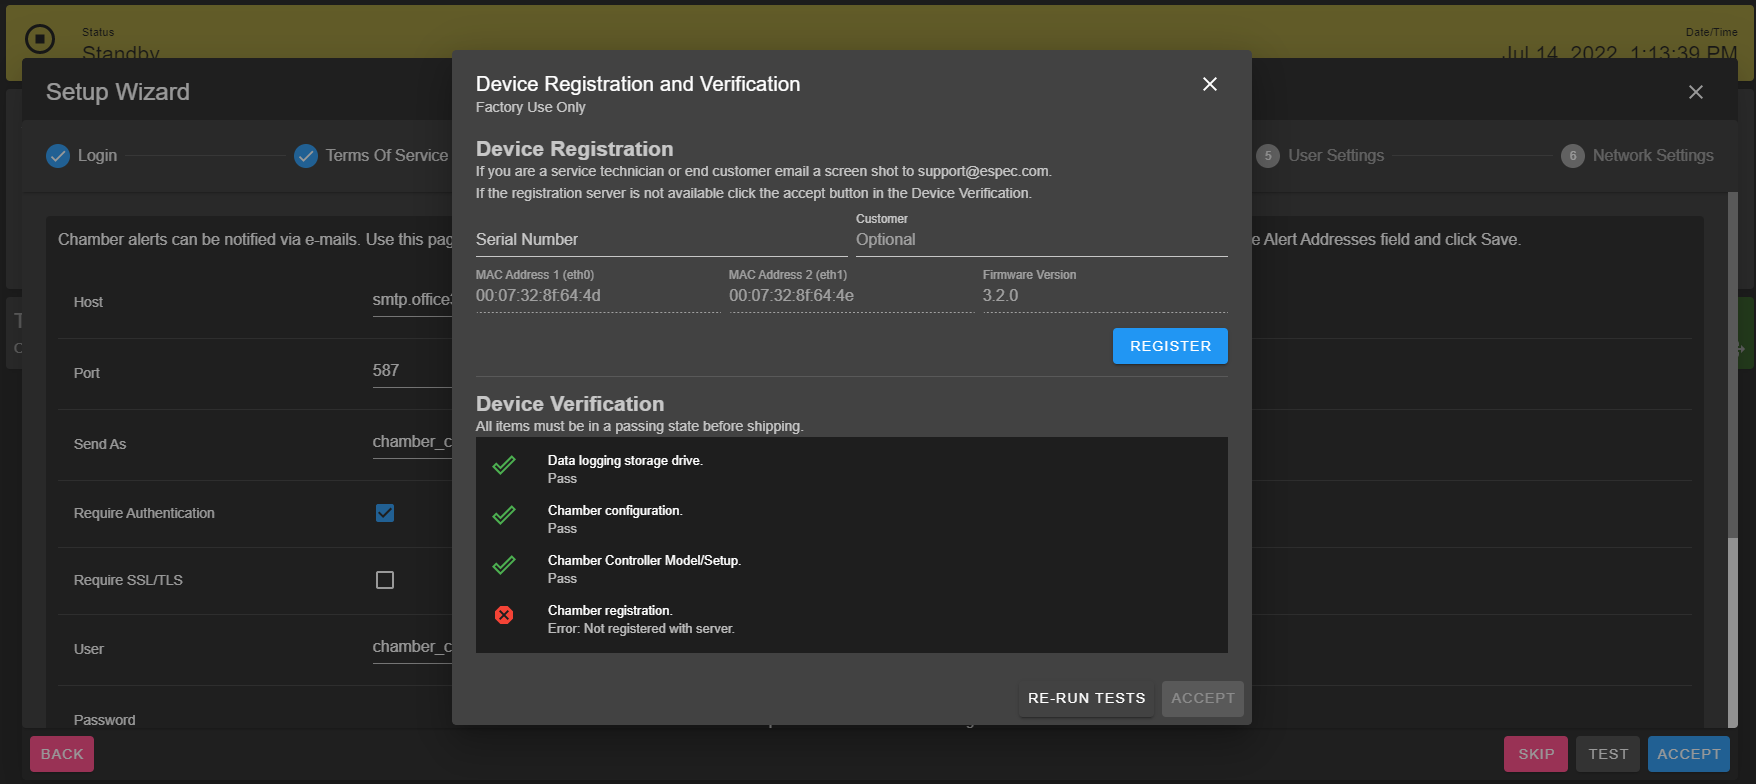
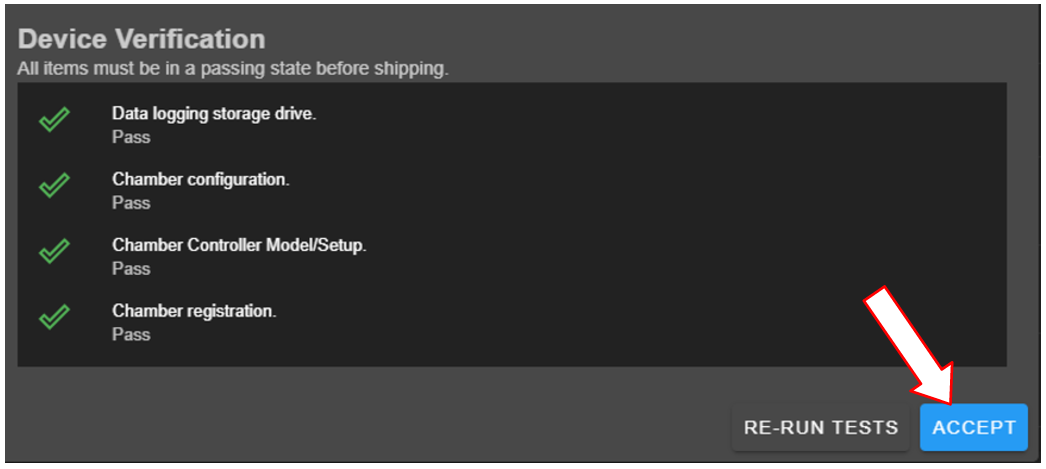
Registration of the Web Controller device must be completed before it leaves the factory. Otherwise, there is a strong possibility that particular Web Controller device will return to the factory to complete the configuration. The following figure shows Device Verification is not yet complete. All four check marks must be completed and confirmed on every Web Controller device. The figure shows that the registration is not yet performed, with the red X in front of it. Section 4.4.1 illustrates how to register the Web Controller.
3.4.1 Check List of Device Verification
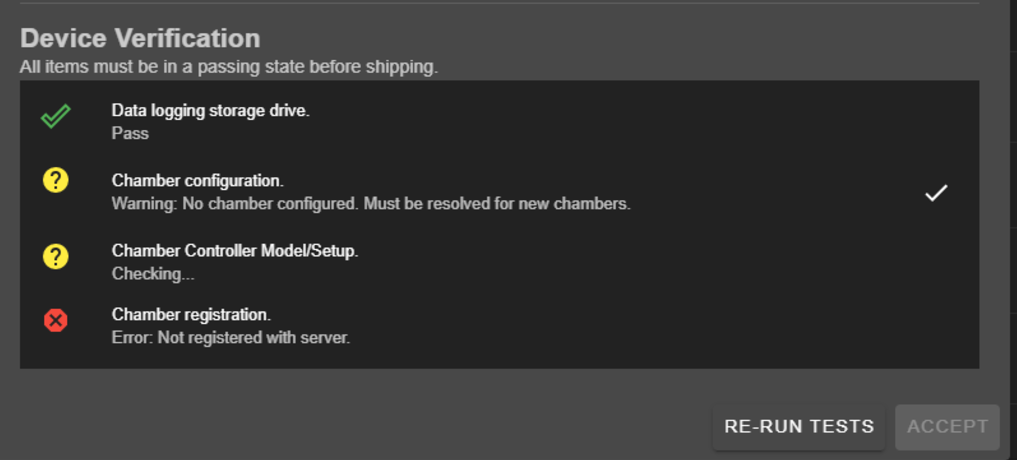
All entries in the Device Verification list must have green checkmarks. The following figure shows Device Verification issues and their description.
-
Data logging storage drive: If this does not have a green checkmark the possible causes are:
- The mSATA drive is not installed correctly.
- Steps 7 through 11 of the Flashing Firmware to the Hardware may not be performed correctly, or the SSD device may be faulty.
-
Chamber configuration: If this does not have a green checkmark the possible causes are:
-
The Web Controller is intentionally being shipped without a chamber configuration, in this case press the check mark on this list entry.
-
The skip button was accidentally pressed on the previous screen.
- Close this screen with the X button on the top right.
- Press the BACK button on the setup wizard.
- Configure the chamber and press ACCEPT.
-
The web controller is having trouble connecting to the chamber:
-
You may press the refresh button on this line to retry the test as the errors may be related to startup delays.
-
Ensure the correct configuration is setup on the previous screen.
-
There is a communication problem between the web controller and chamber, that must be diagnosed to resolve this issue.
-
-
-
Chamber Controller Model/Setup: The purpose of this checkmark is to ensure the target chamber has been configured correctly with all the required features (or options) selected. The possible causes of the red X are:
- Chamber configuration met the minimum requirement for this chamber when item 2 (above) has a green checkmark. Refer to the work order sheet for information about all the required features on the target chamber. For example, the chamber has a PTCON but it has not been selected.
- If the red X also appears on item 2 (above), the target chamber is incorrectly configured. Refer to the work order sheet for information about all the required features on the target chamber.
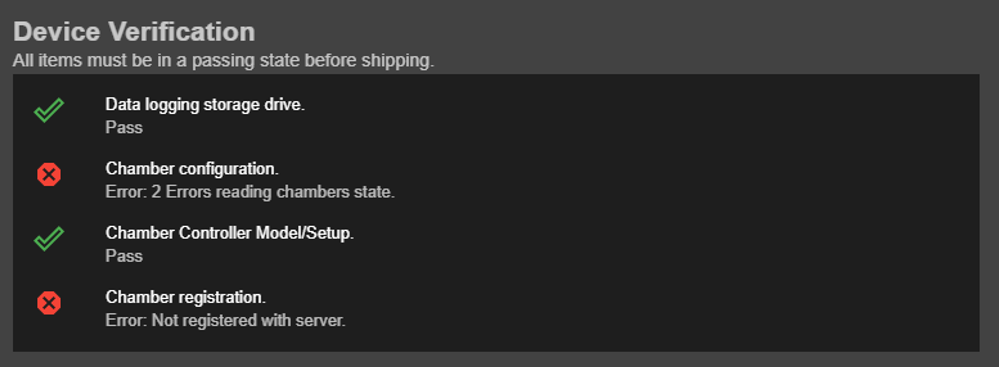
- For F4T: If a green checkmark is on but item 2 (above) has a red X (indicating chamber configuration error), as illustrated in the following figure, there is a possibility that the Web Controller is expecting a limit card on F4T (the error message will indicate a reading error). Contact Paul or Myles for assistance.
-
Chamber registration: If this does not have a green checkmark the possible causes are:
-
The device has not been registered yet, perform that and this will resolve.
-
The web controller is not connected to the ESPEC network and the registration must be performed manually. In this case ensure the setup was completed via scanning the QR code and press the check mark on this row to validate it.
-
3.4.2 Registration with Web Controller on our Main Network
If you accessed the Web Controller from your PC on our main ESPEC network, complete the registration as follows:
-
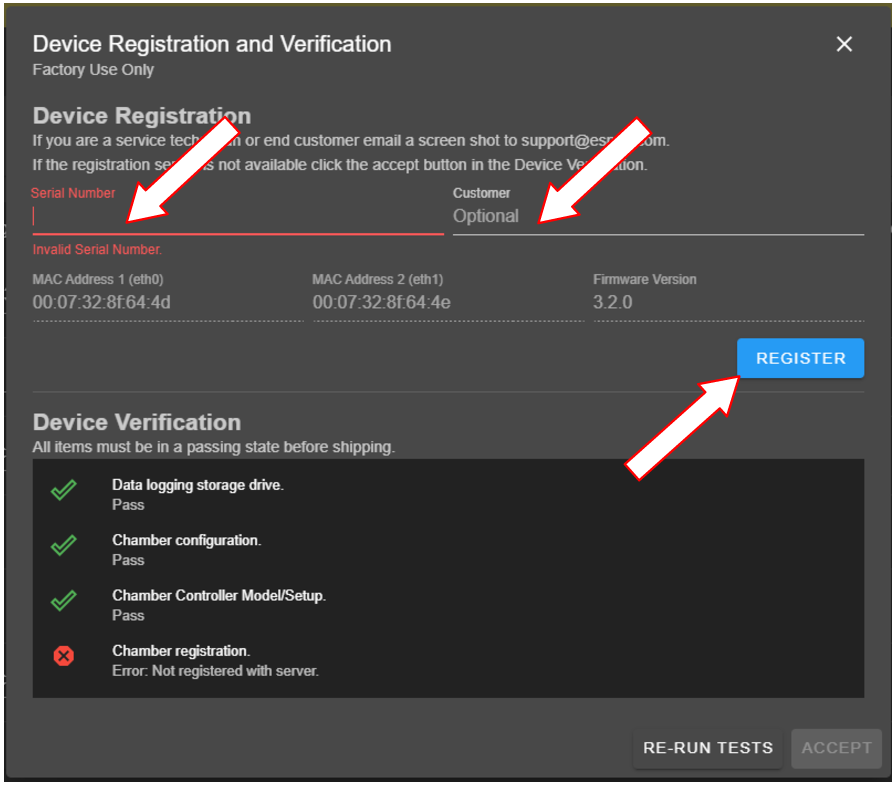
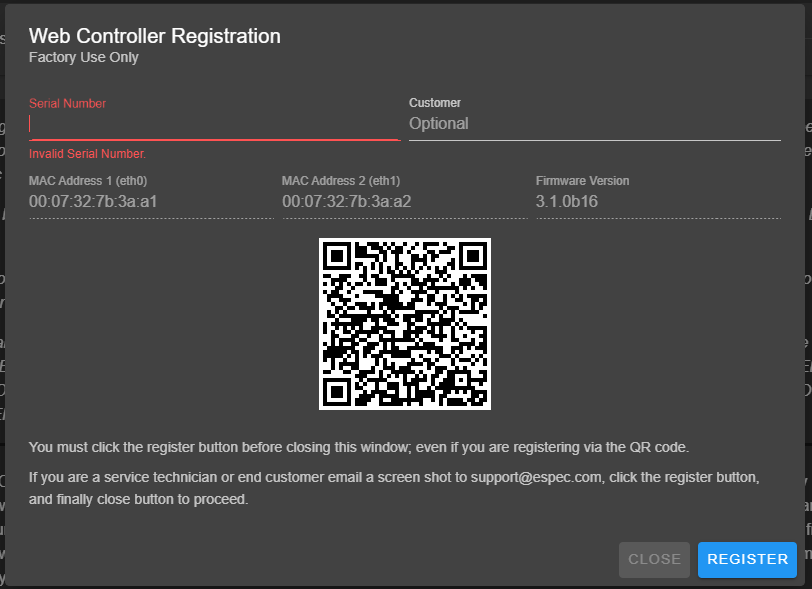
Required: Click the Serial Number field (as shown by the arrow) and enter the serial number of the chamber (from the serial tag or work order, as shown below)
-
Optional: Enter customer's name (company name) in the Customer field
-
Click REGISTER. Device registration and verification is complete as shown in the following figure.
-
Click ACCEPT to proceed to the next step in the Setup Wizard for Email, Section 4.5. Note: If any pop-up warning appears, such as data corruption, click the Clear button.
3.4.3 Manual Registration: Web Controller Not Connected to ESPEC Network
If the Web Controller is not on our main network, registration must be completed manually since the Web Controller cannot access the registration server on ESPEC network. A QR code may be scanned to complete the registration process. The device that scans the QR code must be on the ESPEC network in order for the process to work. It is strongly recommended that the Web Controller is connected to the ESPEC network for a smooth registration process, since manual registration is more difficult.
3.5 Email, User and Network Settings
The factory setup is complete, close the Setup Wizard by click the X button on the top right. Do not advance past this stage.
Updated
