Wiki
Clone wikiExperimentTool / A1a Setup using Eclipse and Windows
Preparing your workspace
Follow these steps to get started with Brownie:
- Download & install the latest Eclipse IDE for Java Developers (http://www.eclipse.org/downloads/) ** Recommended versions Luna/Kepler and above.
- Download & install Java version later than SE 1.8, for example Java SE Development Kit 8u73 (http://www.oracle.com/technetwork/java/javase/downloads/jdk8-downloads-2133151.html)
There are two possible ways to import the Brownie project. One by using the Eclipse plug-in EGit, another by using SourceTree:
##Import using Eclipse plug-in Egit ##
-
Start eclipse. If you have EGit already installed in eclipse, proceed to step 2. Otherwise open the Eclipse Marketplace in eclipse (Help -> Eclipse Marketplace), search for EGit using the search field and scroll down to EGit - Git team Provider. Click install and follow the installation instructions.
-
Navigate to File -> Import.
-
As import source select Git -> Projects from Git and click Next.
-
Select Clone URI as the repository source and click Next.
-
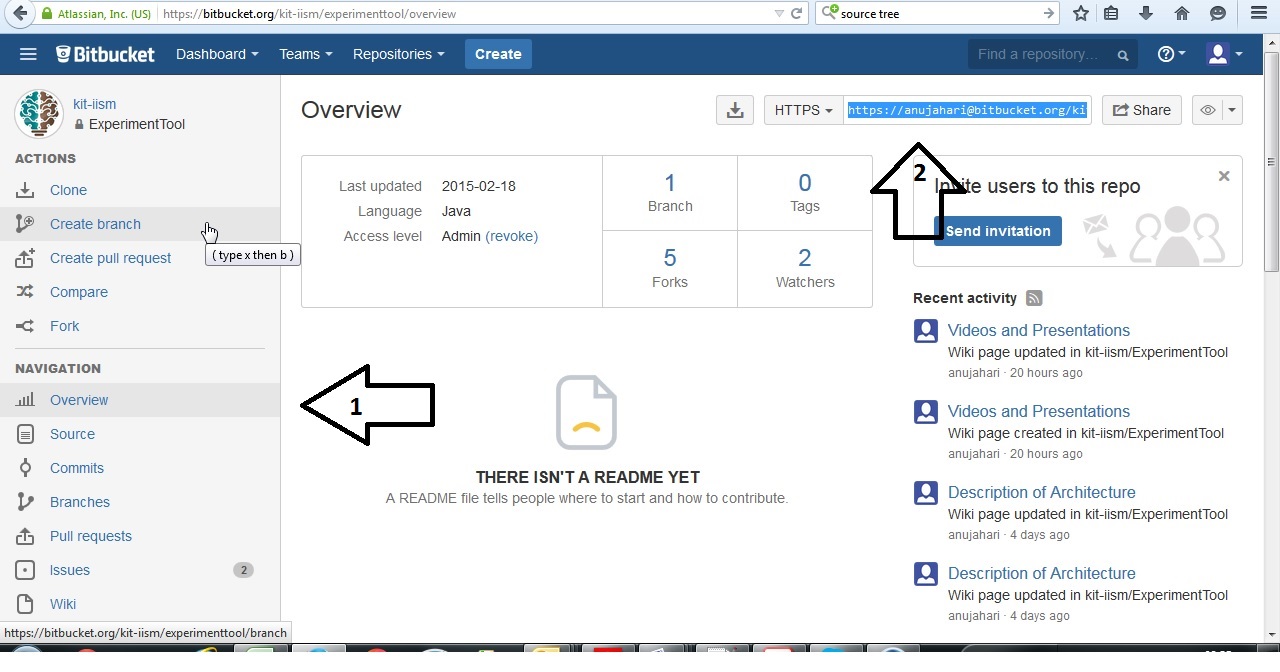
Under Overview (1) in Bitbucket copy the URI (2)
-
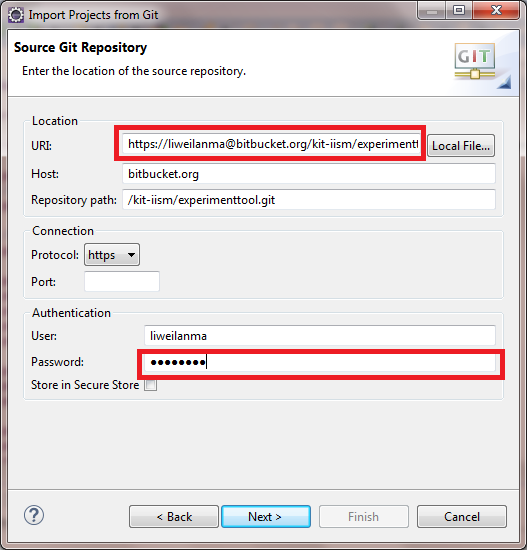
Paste the URI into the designated field in eclipse. Host, Repository path and User will be filled in automatically. Enter your Bitbucket password and click Next.
-
In Branch selection click Next. (There is only one branch.)
-
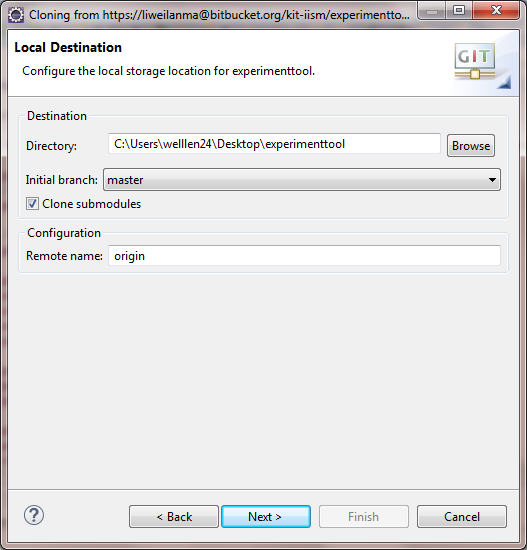
Choose a destination folder on your hard drive, check the box “Clone submodules” and then click Next.
-
Choose "Import existing eclipse projects" and click Next.
-
Wait for the project to be imported.
*If you need information on how to use EGit, take a look at the User Guide (http://wiki.eclipse.org/EGit/User_Guide). *
Import using SourceTree
- Download sourcetree (http://www.sourcetreeapp.com/)
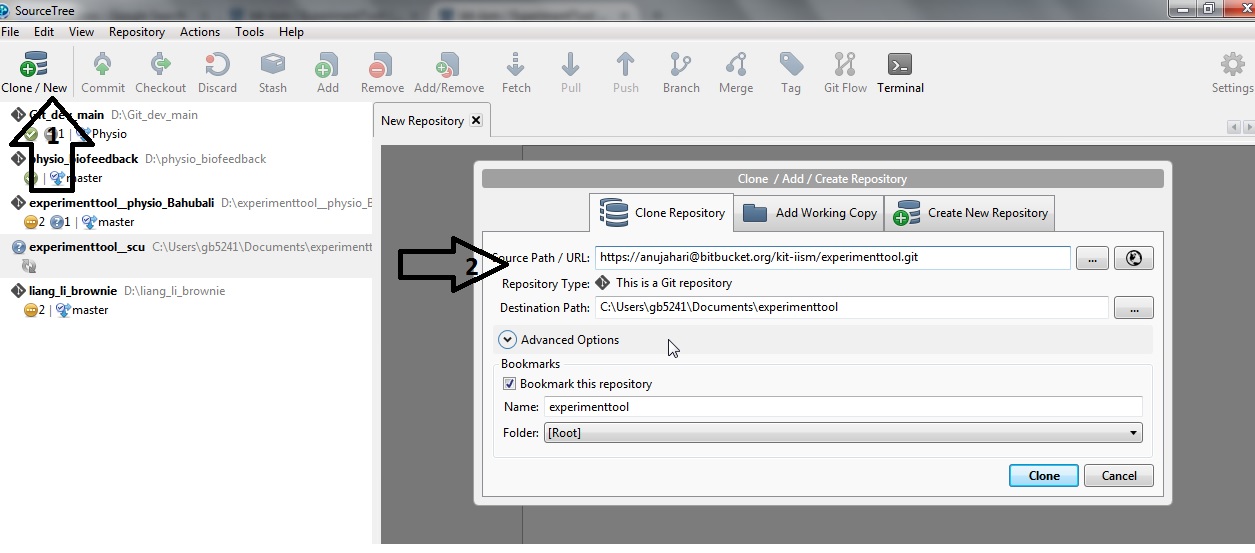
- Navigate to the fork created for your experiment, and obtain the repository URL.
-
Download source code from Bit bucket using source tree
-
On eclipse, Select File -> Import -> Existing Projects into workspace, and browse to the source code folder.
- Select all and import (Exp_Implementation, ExpServer, ExpClient, ExpSensorRec, ExpJPA, ExpCommon) in Eclipse
- And that's it, you can now test run your first experiment!
For developers:
In order to keep a consistent code style throughout the entire code, please import the code style formatter provided in the repository ("eclipe_java_codestyle_formatter.xml").
To Import the formatter start eclipse and go to: Window -> Preferences -> Java -> Code Style -> Formatter -> Import
Tutorial on Youtube: Brownie Tutorial Part 1: Setup using Eclipse and Windows
!! Code quality !!
Updated