Wiki
Clone wikiMoneydance-2019 / brIntroduction
Home>Introduction
Introduction
The Budget Report provides a full comparison of budgets verses actuals. It has a set of parameters that can be configured to give you a specific report. These parameters can be used against any 'new format' budget.
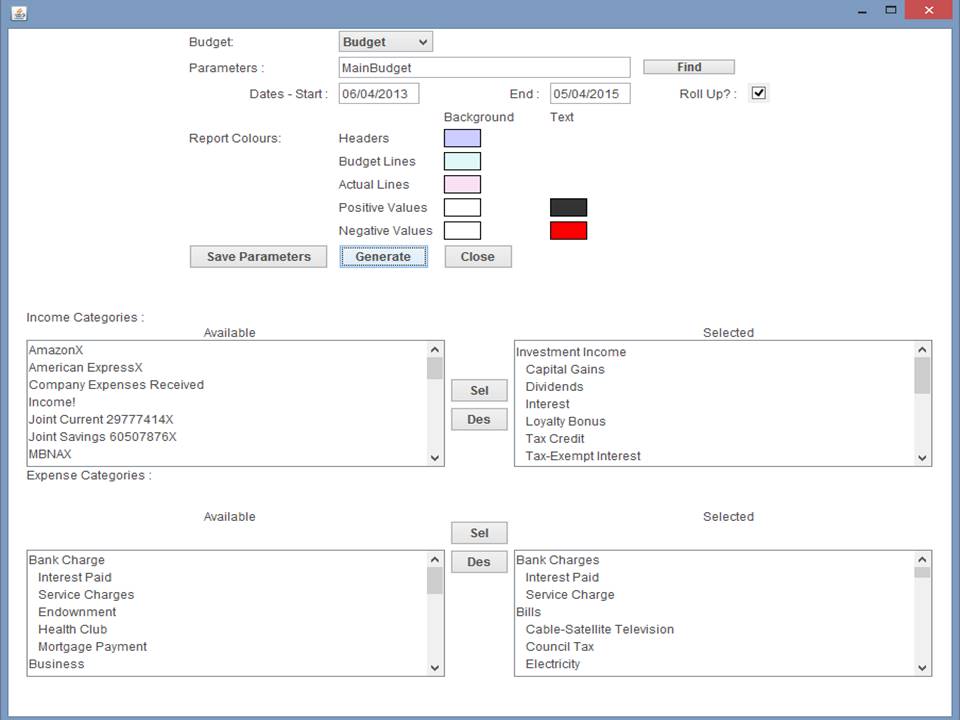
The initial screen looks like this:

To use the Budget Report you:
- Select the budget you wish to use
- Load a parameter file
- Enter the Start and End dates for the report
- Determine if you wish the actuals to be rolled up
- Select which income categories/accounts you wish to include in the reprot
- Select which expense categories/accounts you wish to include in the report
You can save the parameters to a file. This will be called file name.bprp and stored in the same directory as the Moneydance data.
The extension will remember the last budget and the last parameter file selected. This data is held in a file called 'BudgetReport.parms'.
Parameter files
You can have several different parameter files and load the one you want. Type in the name (without the extension) and click on Find.
All information on the screen is saved in the parameter file when you click on Save Parameters.
Start and End Dates
This can be any period as long as End Date is greater than Start Date. The report produced will follow the period for the selected budget. For example, if the budget has a Monthly period the report will contain one column for each month wiht the month starting on the 1st when selecting the Actuals.
Income/Expense Categories
On the left are categories available to include in the report. On the right are those that will be included. When the extension is first started up all categories are selected.
To deselect one or more categories select them in the 'Selected' box. You can select an individual category by clicking on it. To select a block of categories hold the shift key down and click on the first and last category in the block. To select more than one category that are not contiguous hold the Control key down and click on each of the categories. Once you have selected the categories click on Des next to the block of categories you are setting.
Selecting categories to be included is done in the same way by selecting the categories under 'Available' and clicking on Sel.
Colours
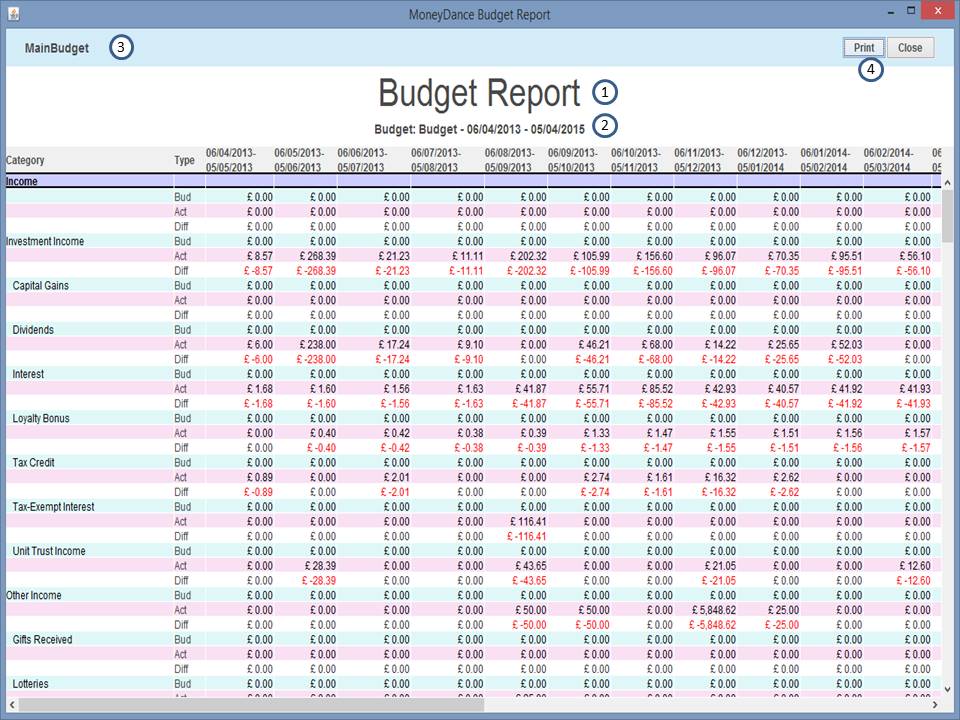
The generated report has the following lines in it:
- Header Lines for Income and Expense parts of the report
- Budget Lines containing the budgeted amounts from the selected budget
- Actual Lines containing the accumulated amounts of the transactions. If Roll Up has been selected these amounts will be the total of any transactions for that category plus any transactions of children categories
- Difference Lines, the difference between the Budget and Actual lines.
You can choose the colour of the background of each line and for the Difference Line you can choose different colours for the positive and negative amounts. You can also select the text colour for amounts and whether they are positive or negative.
To change a colour, click on the colour. A colour picker will display. Select the colour you want and click on OK.
Producing the Report
To generate the report click on Generate. The report will be shown on a separate screen like this:

Income values are shown as negative as per Moneydance. Totals are shown for Income, Expenses and Overall total.
See the details of the screen and printing in the Reporting Utility
Viewing Transactions
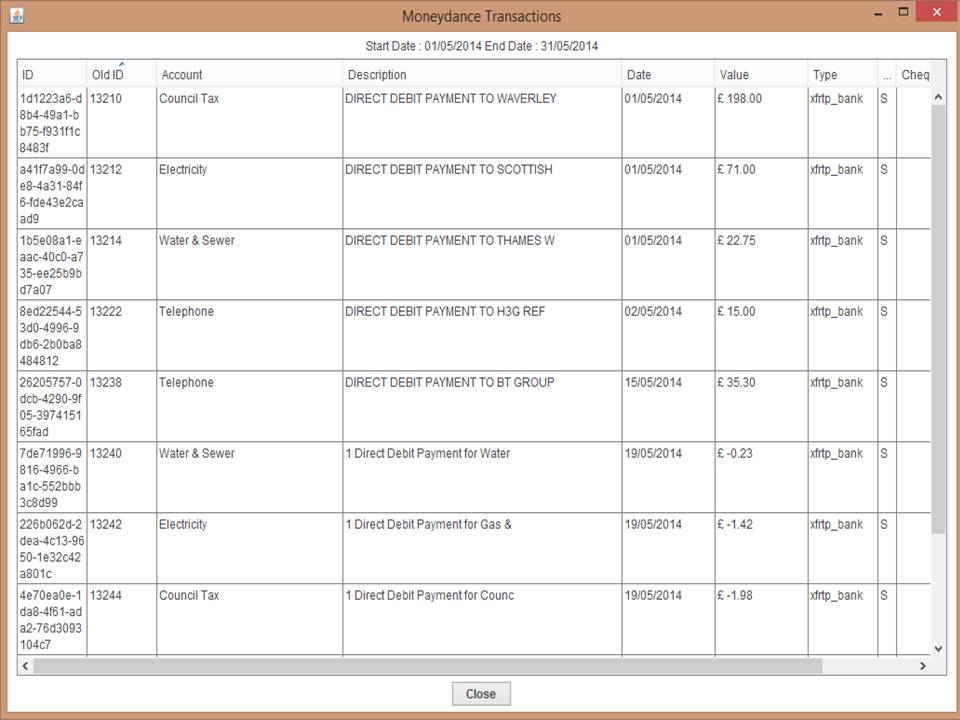
If you right click on any 'Act' amount you will be presented with two menu options.
- Display Transactions for "Category Name"
- Display both sides of Transactions for "Category Name"
If you choose the first option you will see just the side of the transaction against the selected Category. If you choose the second option you will see both sides of the transaction.
If you have chosen 'Roll Up' then when you display the transactions on parent categories you will see all transactions under that parent.
The screen looks like this:

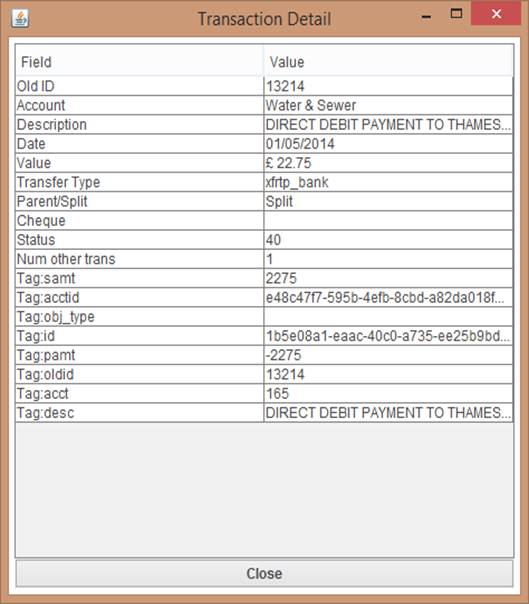
If you click on an individual transaction you will see the details of the transaction which looks like this:

Updated