Wiki
Clone wikiimport_daz / Setup / Materials / Launch Material Editor
Launch Material Editor
DAZ figures often have many materials that cover different parts of the body, like face, torso, arms, legs, etc. This makes it difficult to edit the materials in Blender, because we usually want to apply the same changes to all skin materials and it is difficult to miss something. For this reason the DAZ importer has the Mini Material Editor, which allows you to modify multiple materials simultaneously.
To start editing a selection of materials, we must first select the active material. We choose to base the editing on the Face-1 material.
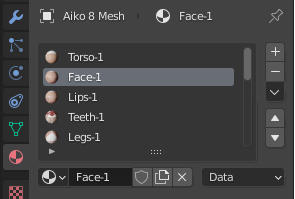
Press Launch Material Editor at the bottom of the Material section. The Material Editor appears.
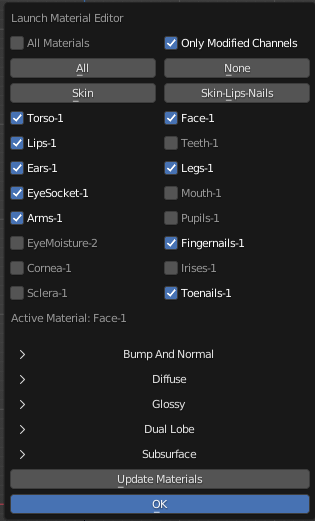
- All Materials: Affect all materials of all selected meshes.
- Only Modified Channels: Only update channels that have been modified by the material editor.
- All: Select all materials.
- None: Deselect all materials.
- Skin: Select all skin materials, i.e. materials with the same viewport color as known skin materials.
- Skin-Lips-Nails: Also select lip and nail materials.
Then there is list of the materials which are affected by the edit, followed by the active material Face-1 that we just specified. The settings of the selected materials will be updated with those of the active material. Then there is a list of editable, which correspond to node groups in the node tree. The Update Materials button at the bottom updates the materials in the viewport, without leaving the material editor.
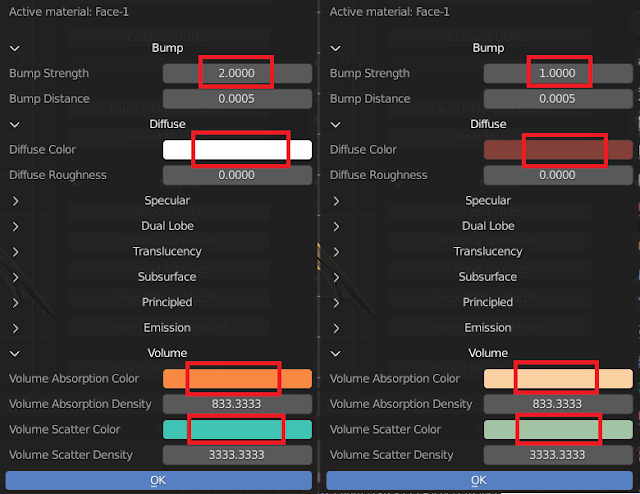
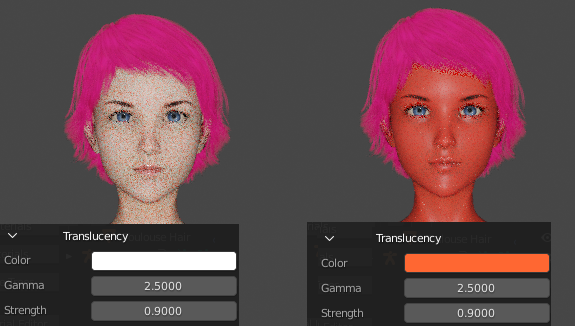
Here we have opened up some groups of settings. To the left we see the original settings when the mesh has just been imported into Blender, and to the right we have made some modifications.
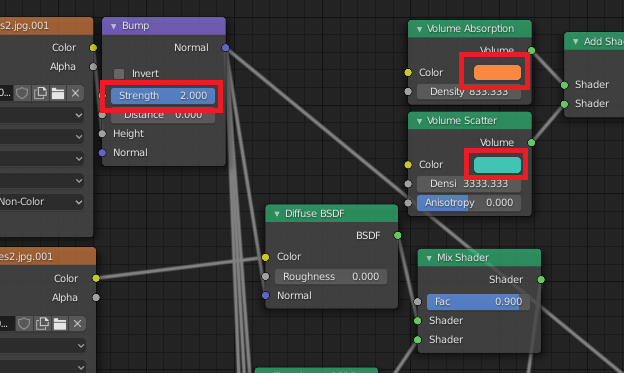
Here is the original node tree. Note how the values of the nodes correspond to the values to the left. Since the diffuse color is white, the diffuse texture is directly conneted to the diffuse node.
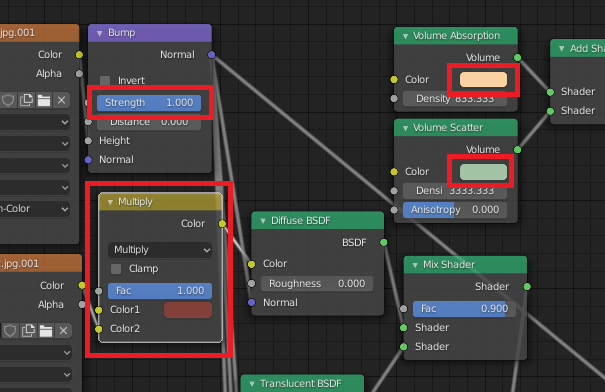
And here is the node tree with the changes applied. When a white color has been changed to something else, and there is a texture, a multiply node with the new color has been inserted. Similarly, if a texture is linked to a scalar socket with value 1.0, and the value is changed to something else, there is a new node which multiplies the texture with the appropriate value.

My own workflow is to set the viewport shading to rendered, and disable gizmos and overlays. Since the Update Materials button does not leave the material editor, we can now tweak the material settings and get immediate feedback every time we press Update Materials.
Updated