Wiki
Clone wikiWADQC / Selectors
Selectors
To start analysis of incoming datasets, WAD-QC needs to have Selectors. These define in detail:
- How to recognize data for analysis
- What Analysis Module should run
- With what ModuleConfig (i.e what runtime parameters) the Module should run.
In practice, a ModuleConfig must be coupled to an Analysis Module, so for a Selector only the ModuleConfig to be used needs to be defined explicitely. This means that there must already be some ModuleConfigs and thus some Analysis Modules present in WAD-QC, before a Selector can be defined. See Analysis Modules for more information on installing Analysis Modules.
Selectors can be added in different ways:
- Create a new Selector
- Copy an existing Selector
- Restore a Selector backup
Create a new Selector
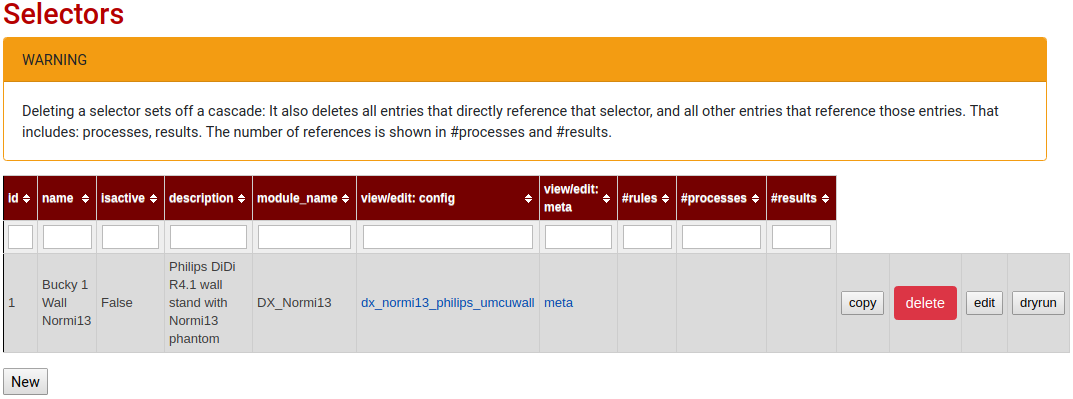
In WAD-Admin, open the Selectors overview page by choosing Selectors from the top bar on any page, or from the home page choose "selectors" from the components listed under "Configuration".
- From the Selectors page, click the "New" button, to create a new Selector.
-

On the New Selector page, choose a unique name for the Selector (i.e. "Bucky1 Wall Normi13"), add a more detailed description of the setup ("Philips DiDi R4.1 wall stand with Normi13 phantom") and pick the correct ModuleConfig ("factory: dx_normi13_philips_umcuwall"). Do not tick the "isactive" tick box yet, as there are no Selector Rules defined and without Selector Rules, any new dataset will be processed. Click "Submit" to create the new Selector.
- Now in the Selectors page, the new Selector is visible in the table of Selectors.
-

Add Selector Details
- Now press the "edit" button next to the Selector in the table to go to the Modify Selector page. In the Modify Selector Page, all the details of the present Selector are now visible in different sections.
-

In the first section, the name and ModuleConfig of the Selector can be altered.
. add selector rules
The second section shows the actual selection rules of the Selector. This will be empty for the just created Selector. Check "add new rule" and click submit to add a new rule to the Selector. These rules describe the values of dicom headers to trigger this specific Selector. It is advised to include some tags that roughly define the data (like modality) as well as some unique identifier for this machine (station name, or AE title), and a very specific identifier for the correct dataset (like series description).
. tweak runtime parameters
The third section shows the contents of the ModuleConfig as used by the Selector. It describes the actual runtime parameters of the module for this data. If data is acquired with the correct acquisition protocol, but the analysis fails, tweaking these parameters could help. For example, the Normi13 phantom might be equiped with a typ38 resolution insert, instead of the default RXT02 one. Some Module Configs can be more complicated than the simple list "parameter: value (info)" as shown here, and then it might be better to directly edit the ModuleConfig by clicking the "Edit Full Config" button on the Modify Selector Page.
. adjust constraints on results
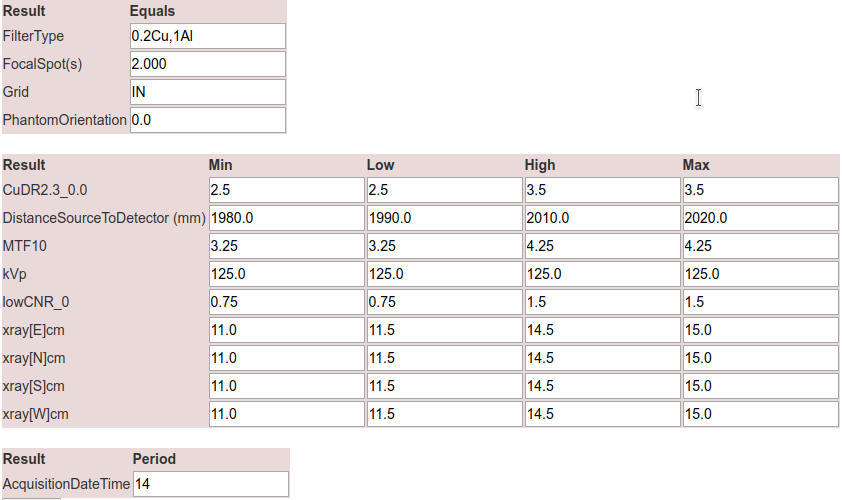
The fourth section shows the constraints part of the MetaConfig coupled to the ModuleConfig. It shows the different kinds of acceptable limits for several results produced by the Analysis Module for this specific Selector. Although the MetaConfig is only intended for usage in the reporting tool WAD-Dashboard, the constraints of the MetaConfig are shown here in the overview of the Selector to have all parameters of a Selectors grouped on one page. Instead of using this form to edit the constraints, the complete MetaConfig can be directly editted by clicking the "Edit Full Meta" button.
Testing the Selector
After setting up the Selector, the Selector Rules can be tested before activating by using the dryrun button next to the Selector in the table on the Selectors page. This will apply the selection rules of this Selector to all datasets available and report what sets would be selected, without actually running the Analysis Modules. Using this functionality is only advised if the number of available datasets is relatively small small.
Activating the Selector
If the Selector set up is finished, the Selector should be activated using the Modify Selector page. Tick the "isactive" checkbox and press "Submit".
Copy an existing Selector
From the Selectors page in WAD-Admin, click the "copy" button next to a Selector to create an inactive clone of that Selector. Next, click the "edit" button next to the just created new Selector, and change the details as needed using the information above. Afterwards, activate the Selector.
Restore a Selectors backup
WAD-Admin provides an backup and restore mechanism for Selectors. By creating a backup of Selectors, a zip file is created that can be imported in an existing WAD-QC installation. This zip file contains the Analysis Modules, the ModuleConfigs, the MetaConfig and the Selector definitions.
To restore a backup, go the home page of WAD-Admin, and select "restore selectors" under section "Configuration".
Choose the correct backup.zip file, and choose whether to restore with modules or without restoring modules. If the Analysis Modules stored in the backup are already installed in WAD-QC, you can choose to not restore the modules. In that case, make sure the names of those previously installed Analysis Modules are the same as the ones in the backup.
Updated


