Wiki
Clone wikiDocuments Add-On / GUI Uploader v2.0.0
Documents Bulk Uploader v2.0.0
Documents Bulk Uploader is a Java application that allows importing files as documents in a bulk manner. It can be also used to synchronize the content of a folder from your local computer with a corresponding folder from Documents app.
Documents Bulk Uploader can be used for day-by-day document import, but also when migrating from another document management system.
On this page:
Configuring the Documents Bulk Uploader utility
- Make sure that the version of Documents for Jira installed in your Jira instance, is compatible with this version of Documents Bulk Uploader. Click here to see the version compatibility.
- Java must be installed on the computer on which the Documents Bulk Uploader is installed.
Java can be downloaded from here: http://www.java.com/en/download/index.jsp - Download the newest Documents Bulk Uploader compatible with your Documents app from here.
- Extract the content of the ZIP archive on your computer
- Launch Documents Bulk Uploader utility by running doc-upload-gui.bat from the bin folder. The main window is displayed.
NOTE If the main window is not displayed, most probably you do not have Java installed. See the Prerequisites section.
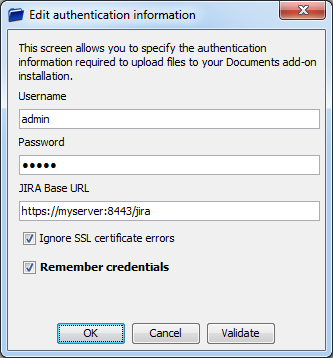
- When you run the utility for the first time, you are prompted to enter the authentication information used to connect to Jira.

- Enter the Username and Password for the Jira user that you use to upload the files. After uploading the files, the documents will appear as being created by this user.
NOTE The user must have View and Create permissions in Documents.
- Specify your Jira instance by typing its Jira Base URL
- In case of a secure (https) Jira Base URL, check Ignore SSL certificate error to suppress any errors or warnings related to the SSL certificate.
- Use the Validate button to check the info you entered. After it passes the validation, click OK.
NOTE You can edit this information later, by accessing the File> Edit authentication information menu.
The Documents Bulk Uploader utility is now configured and you can start importing or synchronizing files.
Importing files with Documents Bulk Uploader
With Documents Bulk Uploader you can upload the files located in a folder from your local drive (the "source folder") into a specified folder of a Jira project (the "destination folder"). In the source folder you can have as many sub-folders as you want; the upload process will create a folder structure in Documents as the one from the specified source folder. The files are imported as documents of type File.
NOTE The import process will always create new documents and folders in Documents no matter if they already exists. If you want to syncronize a local folder with Documents, then please use the syncronize method described in the next section.
The import method is indicated when you migrate from another document manage system and simply to bulk import the documents from a folder.
Follow these steps to bulk import files:
- Make sure that the Documents Bulk Uploader utility is properly configured (see "Configuring the Documents Bulk Uploader utility" above)
- Assuming that you already prepared the folder containing the files that you want to upload, click the Select folder... button from the toolbar.

- Select the folder that contains the files that you want to upload. In the source folder you can have as many sub-folders as you want; the upload process will upload its content in Documents by creating a similar sub-folder structure as the one from the specified source folder.

The files from the source folders are loaded and listed in a grid.

NOTE No folders are created in Documents during the upload process for the empty sub-folders of the source folder.
- The documents that will be created will have as title the name of their file. Optionally, you can change the title of the files to be imported by double clicking a row in the grid or by clicking the Edit document title button from the toolbar.

- When you are done with editing the document titles, click the Import folder... button from the toolbar.

- You are asked to enter the Key of the destination folder in which the files will be uploaded.
The Key is a number that uniquely identifies a folder or document.
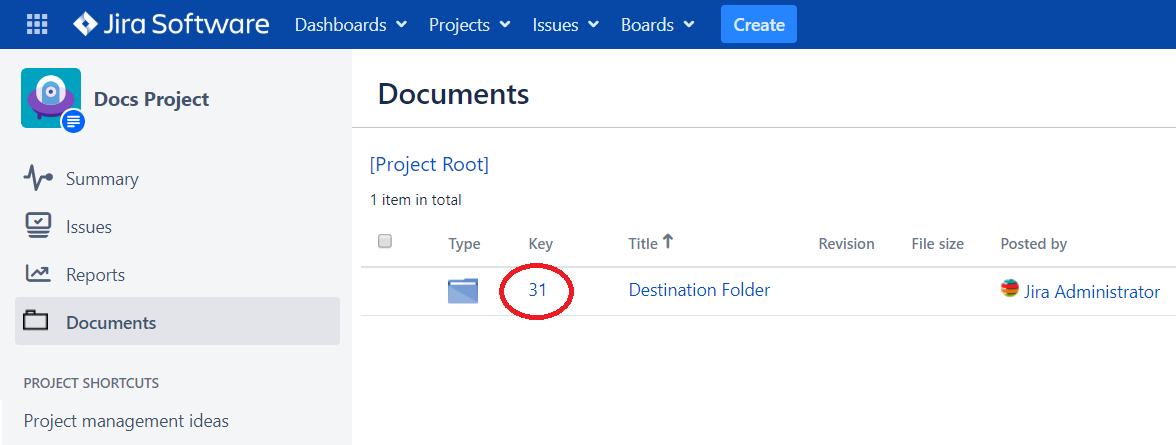
Assuming that you already have a destination folder, you can obtain its key from the Documents tab of the project.

- Once you determined the key, enter it in the edit box and then click OK.

- The specified document Key is validated. If it passes the validation, a confirmation message is displayed. Click OK to begin the upload.

- The files from the grid are uploaded one-by-one and the upload status of each file is displayed in the grid. You can pause the import by clicking the Pause button from toolbar or stop it by clicking Stop.

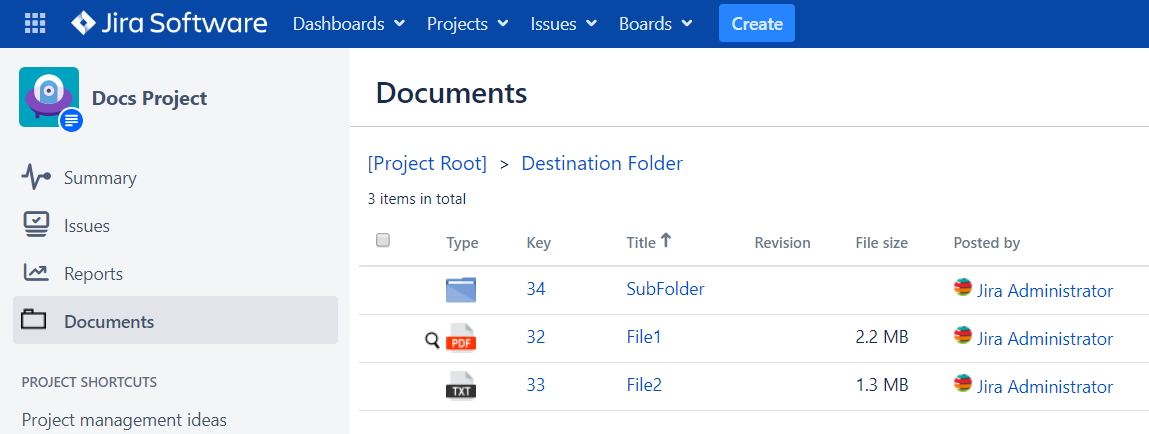
- When the upload is finished you can check the content of the destination folder on the Documents tab of the project. It contains the documents and the folders created during the import process.

You can import a new folder by repeating the above steps.
Synchronizing a local folder with a folder from Documents
With Documents Bulk Uploader you can synchronize the content of a folder located on your local computer (the "source folder") with an existing folder from Documents (the "destination folder").
How the synchronization works:
- It is always one-way: from your local "source folder" to the "destination folder" located in Documents (Jira). This means that only the changes made in the source folder are propagated to the destination folder and not vice-versa.
- If a new file was added in the local folder, the sync process creates a corresponding file in Documents (Jira)
- If an existing file from the local folder was modified, the sync process updates the corresponding file from Jira if no newer version exists already in Documents (Jira)
- If a file or sub-folder was deleted from local folder, it is not deleted from Documents (Jira)
- The sub-folders from local folder are also synchronized, but only if they are not empty (they must contain at least one file)
- If a file/folder is renamed in local folder, during sync it is seen as a new file/folder, so it is created in Documents (Jira)
In the source folder you can have as many sub-folders as you want; the sync process will create a folder structure in Documents as the one from the specified source folder. The new files are imported as documents of type File.
Follow these steps to synchronize a local folder with Documents:
- Make sure that the Documents Bulk Uploader utility is properly configured (see "Configuring the Documents Bulk Uploader utility" above)
- Assuming that you already have a folder containing the files that you want to synchronize, click the Select folder... button from the toolbar.

- Select the folder that contains the files that you want to synchronize.

The files from the source folders are loaded and listed in a grid.

NOTE No folders are created in Documents during the sync process for the empty sub-folders from the source folder.
- Click the Sync folder... button from the toolbar.

- You are asked to enter the Key of the destination folder in which the files will be uploaded.
The Key is a number that uniquely identifies a folder or document.
If you already synchronized this folder at least once, the key will be pre-filled automatically. If not, assuming that you already have a destination folder, you can obtain its key from the Documents tab of the project.

- Once you determined the key, enter it in the edit box and then click OK.

- The specified document Key is validated. If it passes the validation, a confirmation message is displayed. Click OK to begin the sync.

- The files from the grid are processed one-by-one and the sync status of each file is displayed in the grid. You can pause the sync by clicking the Pause button from toolbar or stop it by clicking Stop.

- When the sync is finished a report is displayed with the actions performed during the sync for every file.

- You can check the content of the destination folder on the Documents tab of the project. It contains the files updated or created during the sync process.

You can sync the same folder once again by repeating the above steps.
Updated