Wiki
Clone wikiPipsta / Santa Letter Generator
Difficulty Level


• No Linux or Raspberry Pi knowledge is required
• A fully assembled and set-up Pipsta and an internet connection are required
• Step-by-step instructions are provided
• There are some basic concepts and links in the tutorial for those wanting to learn about QR Codes
Time to Complete


• The tutorial covers the operation of the script in overview
• The script itself has comments to describe operation in greater detail for those wishing to dig deeper
Overview
Having received your Certificate of Niceness from the last Pipsta project, it is now time to send Santa your final Christmas list. If you have not yet completed the previous project, it can be found here. To progress without this would likely be deemed presumptious by Santa!
Santa's IT systems are cutting-edge, and he now has the provision to scan QR Code Christmas lists using his smartphone. Santa actually quite likes QR Code Christmas lists as they are very concise and he doesn't have to contend with handwriting issues.
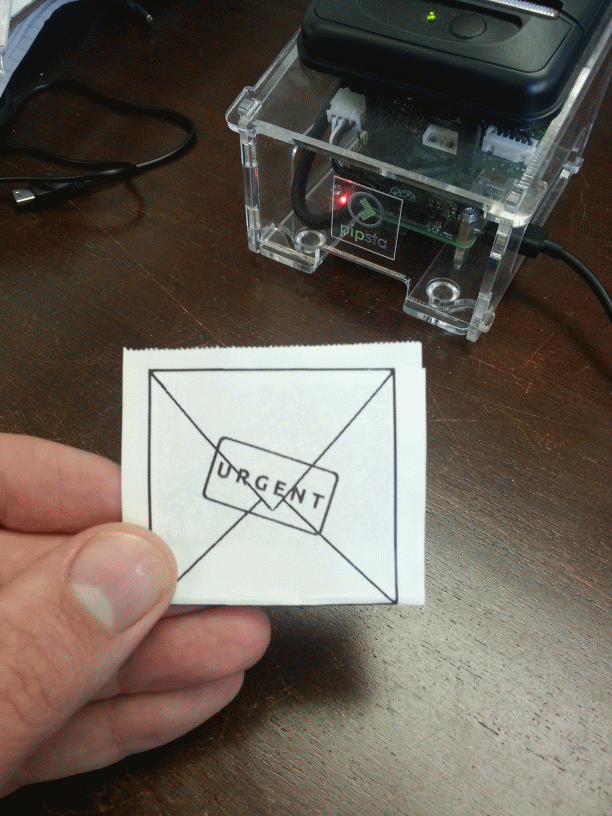
In this project, you will create a self-contained QR Code and envelope using the linerless label roll you received with your Pipsta.
Pre-requisites
This project assumes you have a fully working and configured Pipsta. There are wiki guides on how to assemble and set-up your Pipsta.
You may also like to download a QR Code scanning app for your smartphone, e.g. the ZXing barcode scanner:
You will also need your linerless label roll and a pair of scissors. If you do not have a linerless roll, standard paper rolls can be used with glue (if care is taken!)
Step-by-Step Guide
1) If you haven't done so already, create a new directory under '/home/pi/pipsta/Examples' called 'christmas',
2) Download the file '3_SantaLetter.zip' from here to the 'christmas' directory,
3) Right-click the file and select 'Extract Here'
4) You should now see: • File: santa_letter.py - the script for this project
• Directory: image_print - the Pipsta image printing module
• Directory: qr - the Pipsta QR Code printing module
• File: envelope.png - the envelope image that will wrap the QR Code
• File: zxing.txt - links to examples of Android and iOS barcode scanning apps
5) Once you have navigated to '/home/pi/pipsta/Examples/christmas/3_SantaLetter', press F4 to bring up the terminal
6) In the terminal, type:
#!python

python santa_letter.py
7) This will run the script and produce Tiny Tim's Christmas list QR Code and Envelope based on the content in letter.txt.
8) Download and use the ZXing app to scan the QR Code to see what Tiny Tim has requested. Note that the items listed by Tiny Tim may be used in upcoming Pipsta projects!
9) To produce your own list, simply edit the file 'letter.txt' with your own message and then run the script again.
10) Note that QR Codes can contain a large amount of data. As the amount of data (the 'payload') goes up, the QR Code 'version' will also increase. You may notice for higher versions with large payloads that this introduces additional, regularly-spaced alignment patterns (squares with dots in the middle) around the image.
Generally, the higher the version of QR Code, the more payload data it can contain. Note that the amount of error correction can (in some applications) also be increased and that --if higher error correction is selected-- this comes at the cost of the maximum payload size.
11) To turn the label you have printed into a letter suitable to send to Santa:
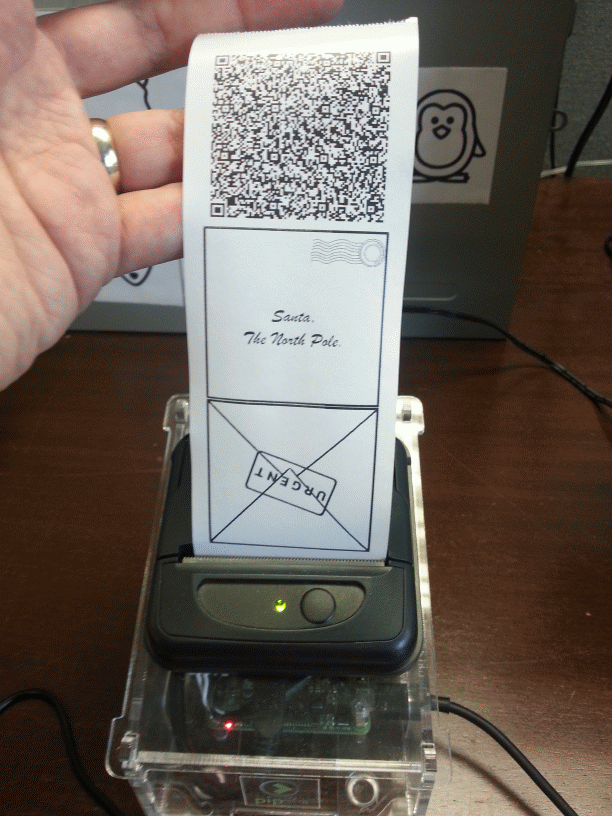
-
Tear the label off
-
Using scissors, cut to the top corner of the front of the envelope. DON'T CUT FURTHER THAN THIS!
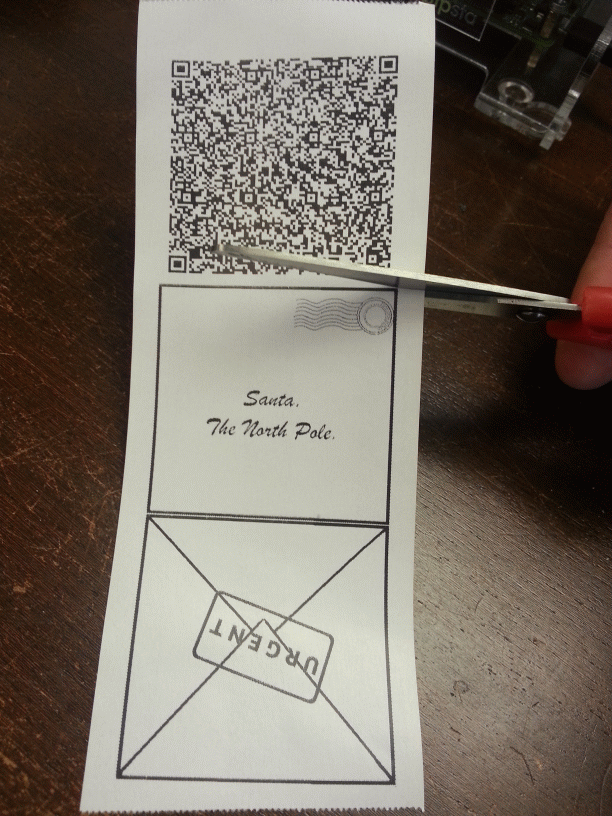
- Do the same on the other side:
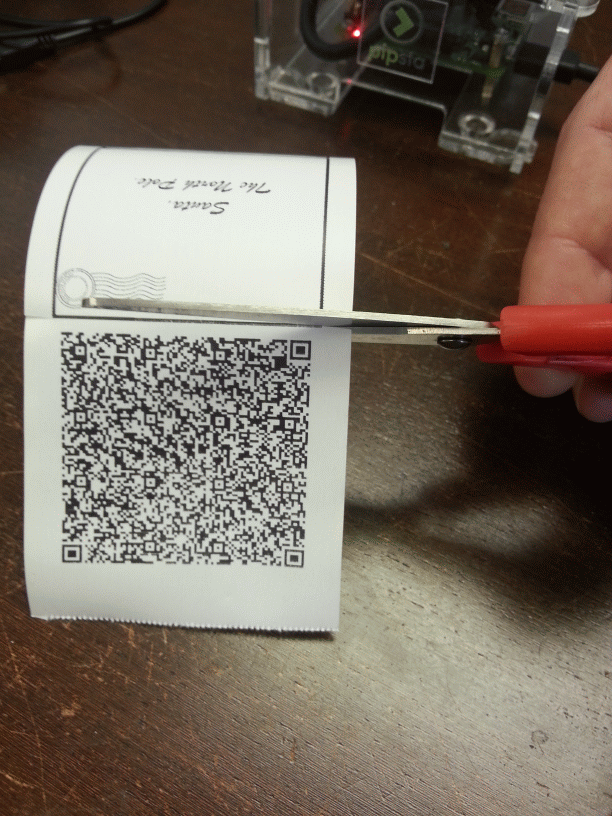
- Now fold along the side of the QR Code, leaving a little bit of white label showing at the side:

- Fold the other side in:

- Now fold the QR Code down behind the front of the envelope, ensuring the fold is square along the top of the envelope front:

- Now fold the back of the envelope over the QR Code to seal it:
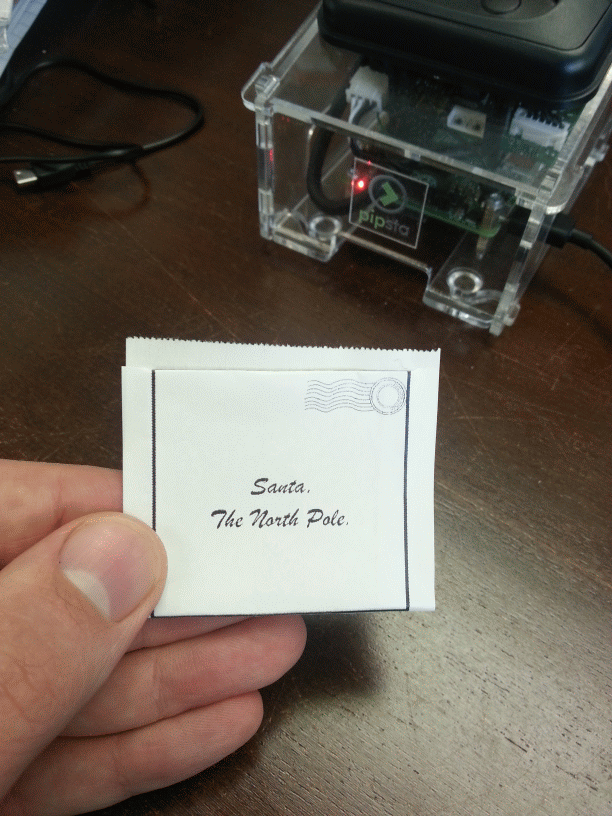
- Now trim off the excess paper at the top and your letter is ready to send!
Notes on Linerless Label Media
Linerless label is a continuous peel and restick media that can produce labels of any length. It can be stuck to surfaces or can be folded upon itself to enclose QR Codes, NFC tags etc.
Linerless label media needs no shiny backing paper as its front face is silicone coated, so the glue on the back face of the media will not stick to the front face. This allows for thicker media with no waste.
In this application, the edges of the label media along the length of the QR Code are cut and folded back, exposing the glue to more glue when folded and permitting the 'envelope' to be sealed. Whilst this gives good adhesion, the glue can still be prised-apart by Santa and his elves.
Notes on QR Codes
-
If your list was shorter than Tiny Tim's, you may find that your code is smaller and comprised of bigger blocks. This indicates that your payload data was encoded as a lower 'version' number.
-
QR Codes should formally have a 'quiet zone' (i.e. a white border) that is at least 4 'modules' in size, where a module is the size of the smallest feature in the QR Code. Depending on the size of the QR Code generated and on the precision of cuts and folds, this may or may not have been met. This quiet zone helps the QR Code scanner know with certainty where the edges of the QR Code are.
-
The wikipedia article on QR Codes is a good place to start
-
Those wishing to get a full understanding of how QR Codes are produced should look to the excellent step-by-step treatment provided at thonky.com
If you are struggling to read your QR code:
1) Try to ensure the QR Code is as flat as possible,
2) Try to eliminate areas of shadow and reflections,
3) Try holding the QR Code against a sheet of white paper to improve the 'quiet zone'
4) Try a QR Code with a smaller payload of data (i.e. make your letter to Santa less wordy!)
How It Works
1) The script checks the system time to see if the last post date before Christmas (21st December) has been exceeded. If so, the script will terminate.
2) At the heart of this script, there are two modules invoked:
-
qr
-
image_print
3) The qr module is passed the filename of the file whose contents should be encoded into the QR Code
4) The image_print module is passed the filename of the image file to be printed
5) See the advanced QR Code tutorial for more information. This tutorial is also a good grounding on how images in general are printed, and covers conversion from their native bitmap format to the single dot line commands that are sent over USB to the Pipsta printer.
[END]
Updated