Wiki
Clone wikiorg.openmarkov / First_download
Downloading OpenMarkov's repositories
At this point, you are supposed to have a working IDE and Git in your computer; if not, go back and install them.
You have to download every repository you want to browse plus these two: org.openmarkov, which is like the front door of OpenMarkov; and org.openmarkov.full, which acts as the corridors to the other Maven repositories.
You can download all repositories with this script.
If you don't want to download all the repositories, simply delete them from the previous script. You have a list to help you choose.
The script will clone from the development branch. Once over, import your local copy into your IDE. We explain how to do it for IntelliJ and Eclipse.
1a. Importing OpenMarkov into IntelliJ
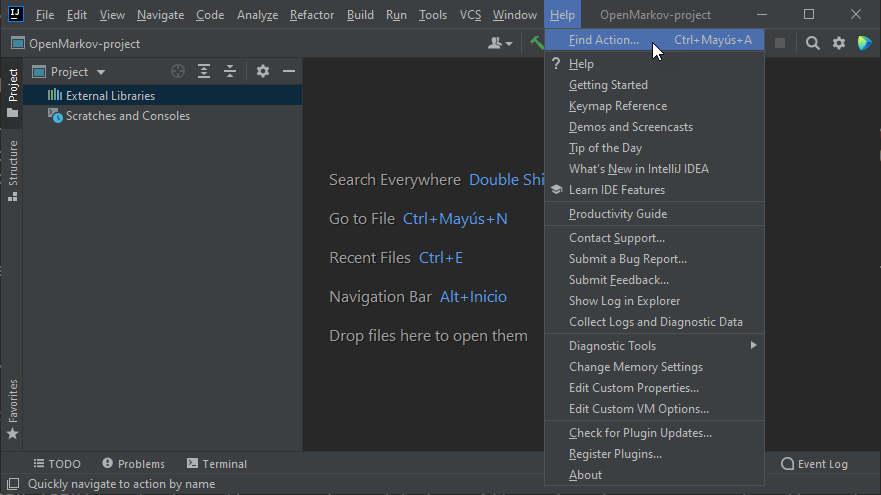
Open IntelliJ, select "New project", and create a new empty project. Once the project is created it is necessary to activate the recursive search when importing Maven projects. You can do it by selecting "Help > Find Action", entering "Toggle Search" in the search field, and ensuring the switch is set to "ON".


Now, we are ready to import the Maven projects as modules of our project. Open the project structure ("File > Project Structure"). Select the plus icon under the modules view, select the option "Import Module" and the folder in which you downloaded the OpenMarkov projects.

As we activate the recursive search of Maven projects when importing, we only need to select the folder in which we downloaded all the Maven projects. Select "Import module from external model" and Maven (as external model), and click Finish.
Now you should see every repository you downloaded as modules of the project.
Setting the path for the JDK
The next step is to configure the Project SDK. In the "Project Structure" window, select the "Project" menu on the left and select the Java Development Kit (JDK, also known as SDK), you want to use (or download a new JDK).

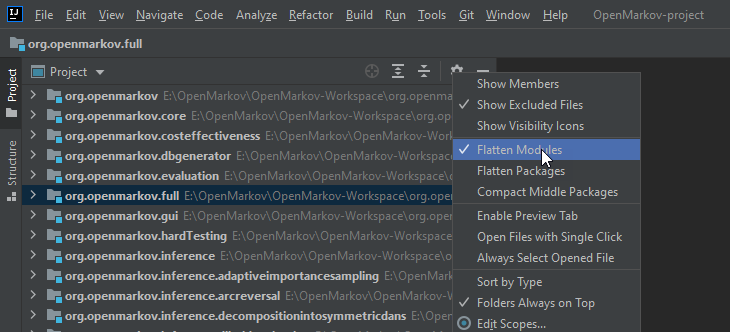
Once the project configuration is done, press "OK" button on the Project Structure dialog. Once IntellIJ imported all modules, you can navigate for the OpenMarkov's structure by selecting the "Flattern Modules" option (by clicking the gear icon on the project panel)

Troubleshoot
If IntelliJ is unable to locate your JDK (the version you already installed) you are can search for its location manually. It will likely be in one of these folders:
-
Windows:
Program Files/Java -
Linux:
/usr/lib/jvm/java-1.8.0-openjdk-amd64
If there are any projects with problems in their pom.xml files, try to reload all Maven projects (in the Maven tab at the right side of the IDE click the "Reload all Maven Projects" button).
1b. Importing OpenMarkov into Eclipse
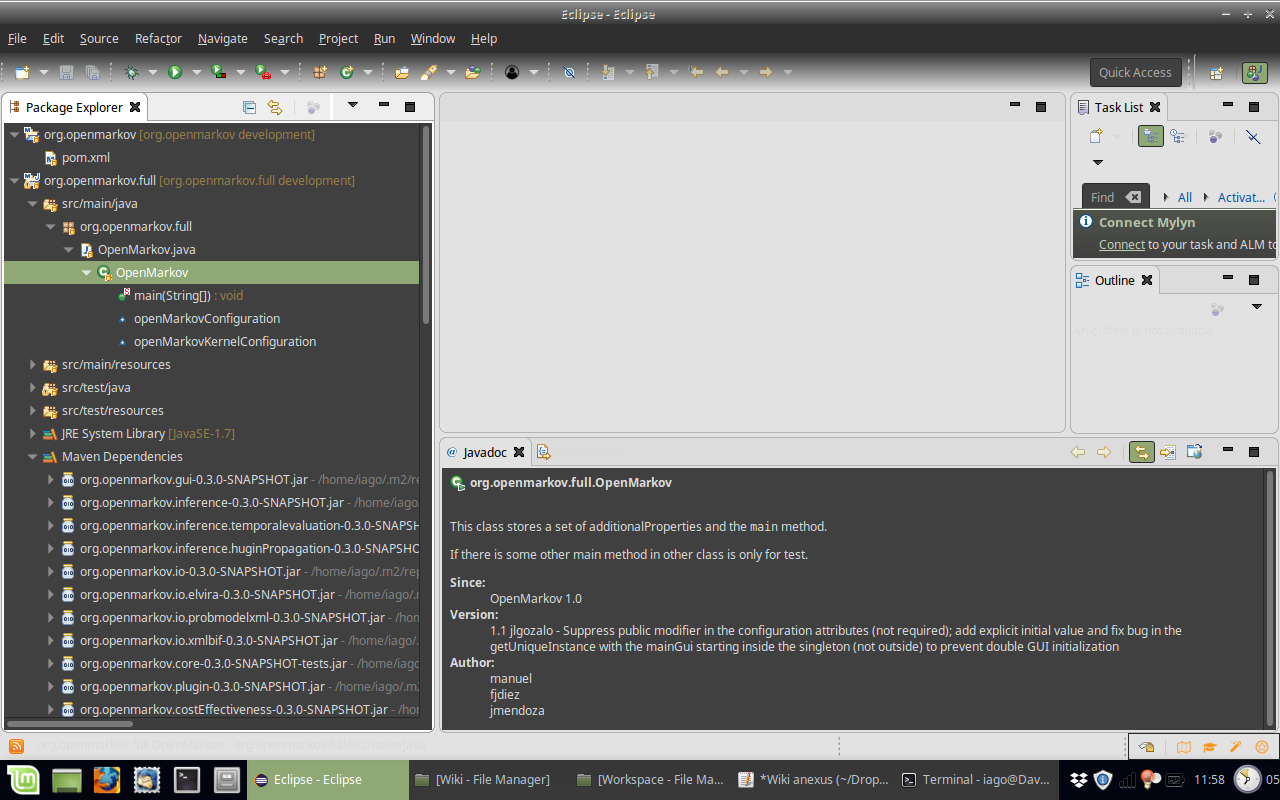
Open Eclipse and import the project (File > Import > Maven > Existing Maven Projects). Then select the /OpenMarkovMainFolder folder and click "Finish". You will see something like this:

As a final test, right click the OpenMarkov.java file and run it (Run > As Java Application).
Adding a new module to OpenMarkov
If the CISIAD added a new module (subproject) to OpenMarkov or you didn't download some of them and you want them now. Here is how to add a new module to a project (OpenMarkov in particular) in Eclipse and IntelliJ. By module, I refer only to CISIAD-approved modules, the ones in the cases stated before: - new OpenMarkov subprojects added by the CISIAD team or - subprojects of OpenMarkov that you didn't download in the first time. These subprojects are already integrated with Maven while a custom/external subproject will need Maven integration and that will not be covered here.
Download with Git
The first step is going to the OpenMarkov working directory and open there a terminal/Git Bash. Then clone the wished repositories using the git command:
git clone -b development http://bitbucket.org/cisiad/org.openmarkov.<modulename>
IntelliJ IDEA
To add a new module open File -> Project structure and navigate in the lateral menu to Modules. Now look for a + symbol in the top-left corner and click it. Choose "Import module". From here the steps the same as those of the first download. Those are:
1a. [Few modules] For every module: choose the folder that contains the module. Next. Choose "Maven" as external model. Next. Then accept the default options until you click Finish.
1b. [A lot of modules] In this case it is better to choose the folder that contains all subprojects (which is the OpenMarkov working directory). Next. Choose Maven as external model. Next. And in the final screen, select only the subprojects that you wish to import (navigation through this list is easier using arrows and Spacebar to check/unckeck projects). Click Finish.
The subprojects will be added and automatically ordered in the package tree (you might need to click on them to actually see that).
Eclipse
Eclipse doesn't treat different projects from modules so the importing process is the same as in the first download, which is:
- Select File -> Import
- Choose Existing Maven Projects
- Select as root directory the OpenMarkov working directory
- Eclipse will recognize which subprojects are new and check only those, so clicking Finish get the things done.
-
If it is the first time you open IntelliJ, it will ask you about installing plugins. You don't need to mark anyone as the default configuration is enough to run OpenMarkov.
-
If Windows blocks you for any reason (for example, because it is unable to access the folder
/OpenMarkovMainFolder) run IntelliJ as administrator. -
If you closed this message don't worry, it will reappear eventually.
Updated