Wiki
Clone wikisftpgateway-public / Azure Basic Usage
Basic Usage
Table of Contents
- Launch a VM
- Initial Configuration
- Basic Usage
Overview
This article will walk you through the process of provisioning an SFTP user, and connecting as that user.
You will perform the following steps:
- Create an SFTP user
- Log in using FileZilla
- Upload a file
- Viewing the file in Azure Blob Storage
1. Create an SFTP user
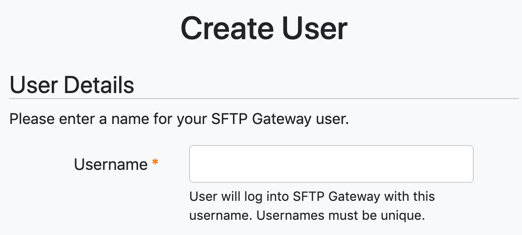
Click on the Create user button in the top right corner.
You will be taken to the Create User form.

Enter a Username.
Keep the defaults, and scroll to the bottom.
Click Save.
Your browser will download a private key, named username.key.
2. Log in using FileZilla
Use FileZilla to connect to the server via SFTP.
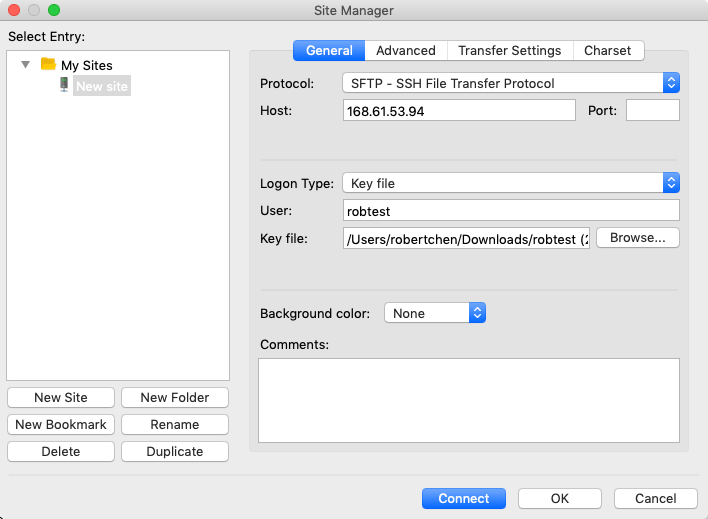
Launch FileZilla, and go to File > Site Manager. Fill out the following fields:
- Host: Enter the VM's Public IP address
- Protocol: Select SFTP - SSH File Transfer Protocol
- Logon Type: Select Key file
- User: Enter the username of the SFTP user
- Key file: Browse to the downloaded private key. The file extension is .key, so select file filter for All Files.

Click Connect
You will see a warning for an Unknown host key. Check the box next to Always trust this host, add this key to the cache and click OK.
3. Upload a file
Drag and drop a file into the uploads directory.
Note: the file will get transferred to Azure Blob Storage and should disappear after you hit Refresh.
4. View the file in Azure Blob Storage
Once you are done transferring the file, go to the Azure portal.
Go to Storage accounts, and click on your storage account.
Under the Blob service section, click Blobs.
Select the Container, which should be based on the VM's Computer Name.
Within the container, navigate to the path: username/uploads/.
There, you should find the file you uploaded.
Updated
