Wiki
Clone wikiqatrackplus / v / 0.2.8 / admin / test_lists
Configuring Test Lists
To edit existing test lists or create new test lists click on the Test Lists in the QA section on the main admin page.
Create a new test list by clicking the Add Test List link on the Test Lists admin page. The fields for defining a new test list are described below.
Name
A descriptive name that will be displayed in listings of test-lists.
Slug
A slug is a URL friendly short label for a test list. It should consist of only letters, numbers, underscores and hyphens.
Description
Optional
A concise description of what this test list is for.
Sublists
Optional
Test lists can be composed of both individual tests as well as including the tests from another test list. To include all the tests from another test list simply move the test list who's test you want want to include from the Available sublists to the Chosen sublists.
Test List memberships
In order to add a test to your test list, click the magnifying glass beside the first text box under the Test header.
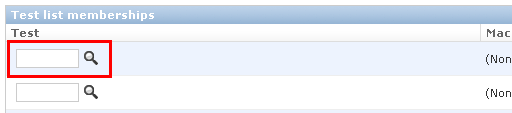
This will bring up a dialogue box that you can use to search for the test you want to add (or create a new one).
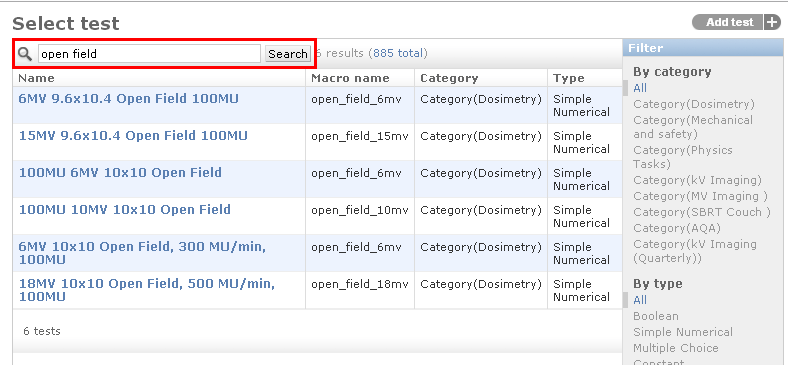
Once you've found the test you want to add, clicking on its name will close the dialogue box and add the test to your test list.

If you now click the Save and continue editing button at the bottom of the page, you will see the name of your test next to its id number.

Continue to add tests in this fashion (you can add many tests without saving in between) until you have added all the required tests.
When you are finished click *Save and continue editing and confirm that all your tests are present. See the section below for instructions on how to reorder the tests if required.
Reordering Tests within a test list
Tests can easily be reordered by dragging and dropping a tests row into a new position in the list. After you have finished reordering click Save and continue editing and ensure all your tests are now in the correct order.
Updated