Wiki
Clone wikiTheS4Studio / Using Sims 4 Studio to Add a New Accessory
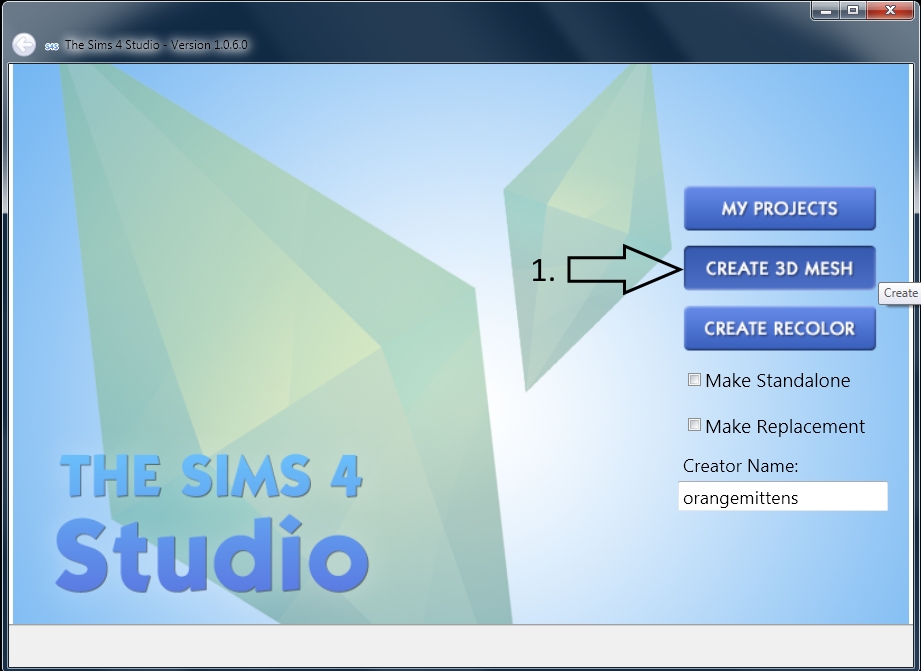
A. Open Sims 4 Studio enter a creator name if you have not yet done so. 1. Select Create 3D Mesh.
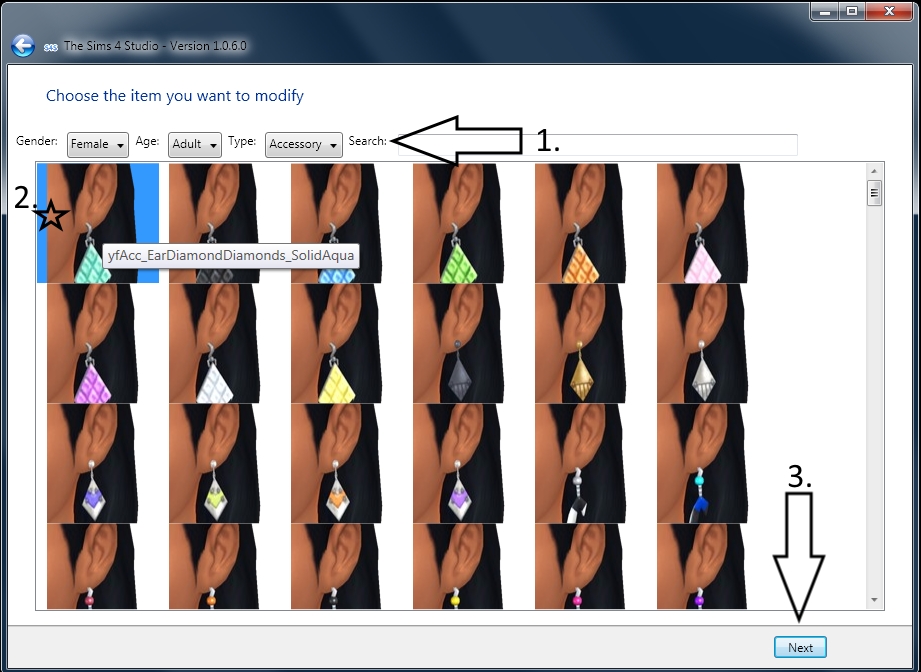
B. 1. Use the filter drop downs or the Search box to find the item you wish to modify. 2. Click the thumbnail of the item once you locate it. 3. Click the Next button to open the Save As box. 4. Enter your package name in the File name line and click the Save button.
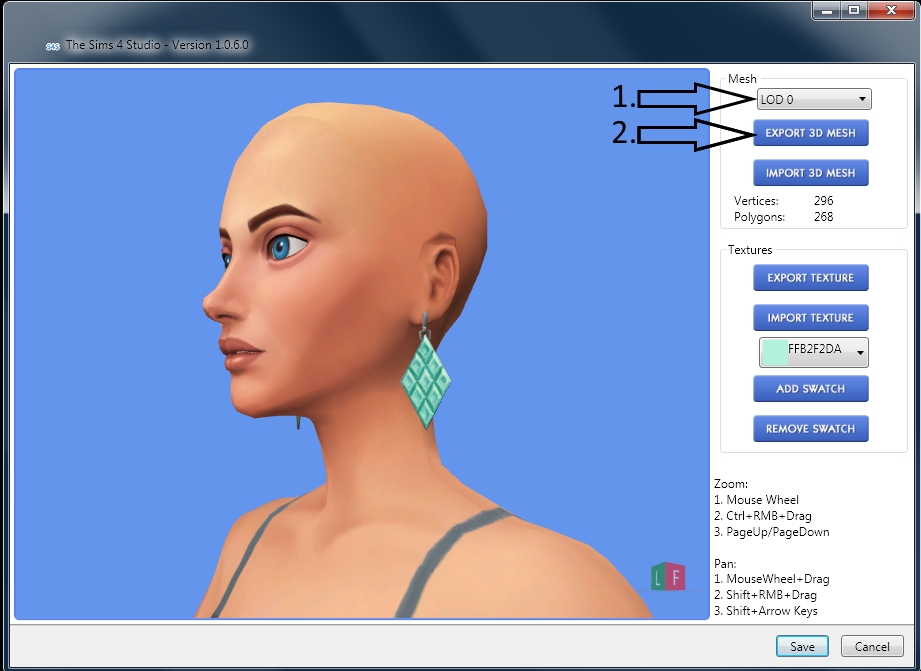
C. 1. When the model viewer page loads you will notice LOD 0 in the box directly below the word Mesh. This is your high quality LOD and it is the one you see in game when zoomed close to the Sim. 2. Directly below that is the Export 3D Mesh button. Click on that. 3. Enter the name of your item in the File name line and click the Save Button. 4. Once your item is saved the project folder you saved it into will pop up. Click on the .blend you just saved. Do NOT click the .package or a .blend1.
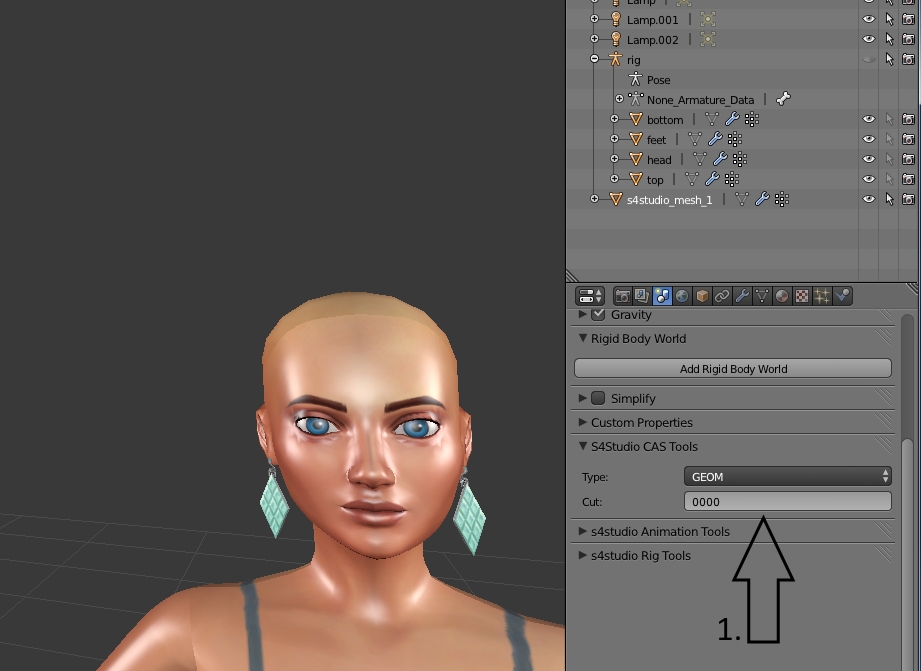
D. 1. When Blender opens make a note of the Type and Cut of the EA item. Your item will have to have the same Type and Cut so make sure you know what to put there later in the tutorial.
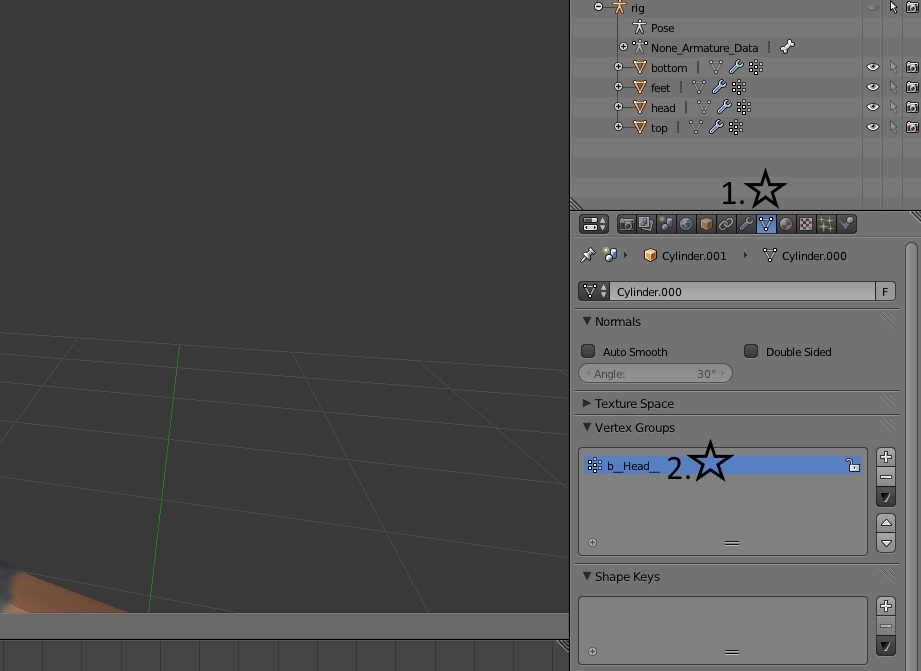
E. 1. Next click the inverted triangle 2. Make a note of the joint that is in the Vertex Groups box. Your item will have to have the same exact joint name when you do the joint assignment step further in the tutorial.
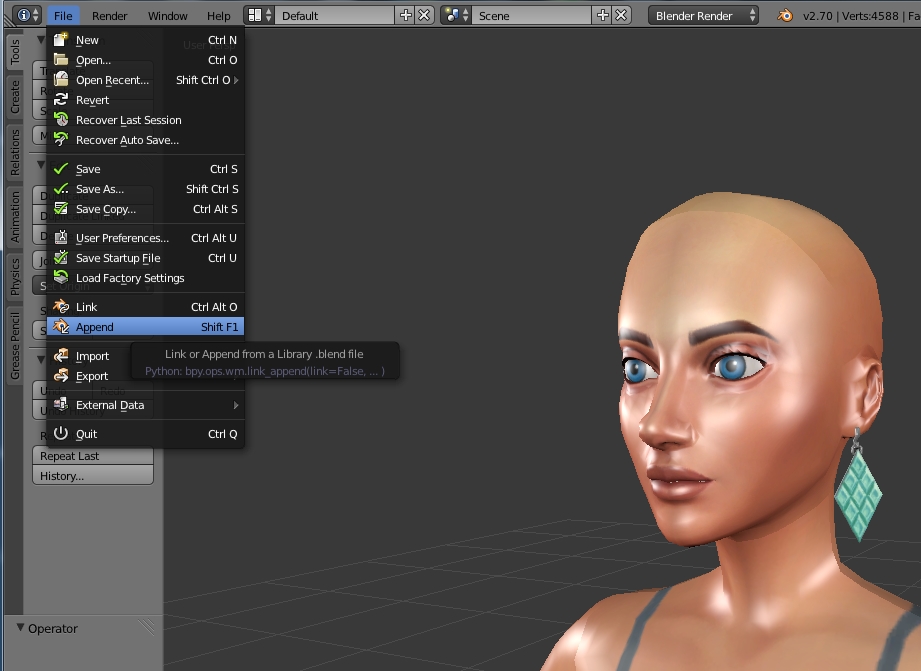
F. 1. Next you will need to swap your mesh for the EA mesh. I made my earrings before hand and simply added them to
this .blend using Append. To do that click File and choose Append.
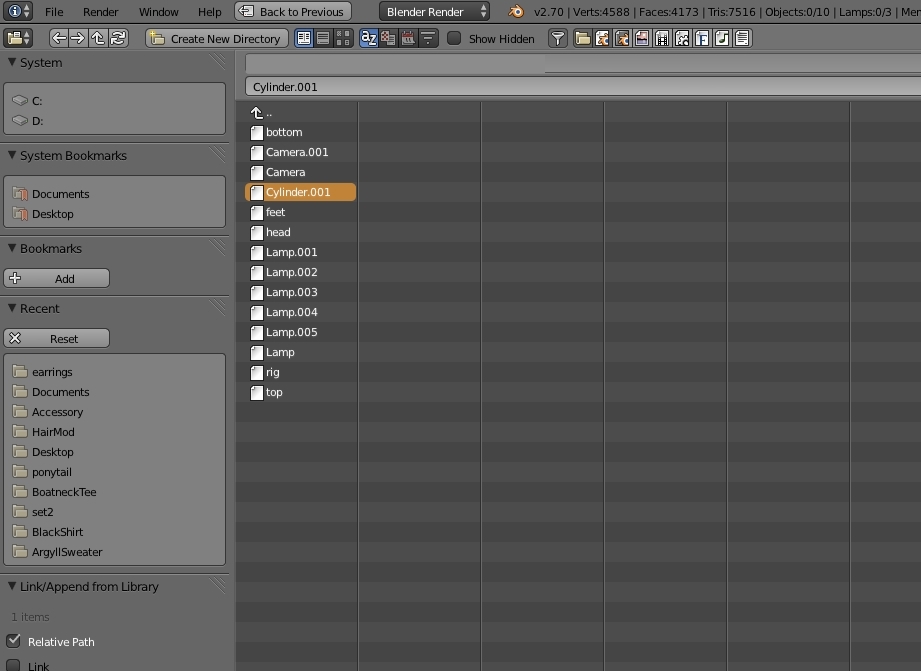
2. Select the .blend you have the object saved in and click the word Object. Then select only the group that represents
your item. I saved mine as Cylinder.001. Once it is selected click the Append button in the upper right corner of the
screen.
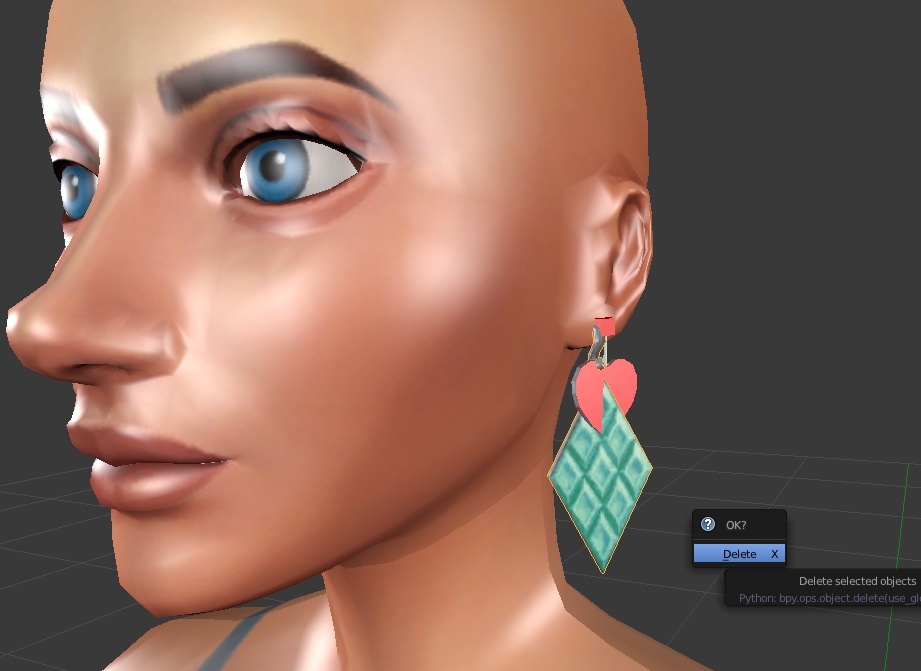
G. Once you have your item in place how you want it. Right click the EA item to select it. This should be done in Object Mode and it will cause an orange outline to appear around the EA item. Then Click the x key on your keyboard and then click the word delete in the popup.
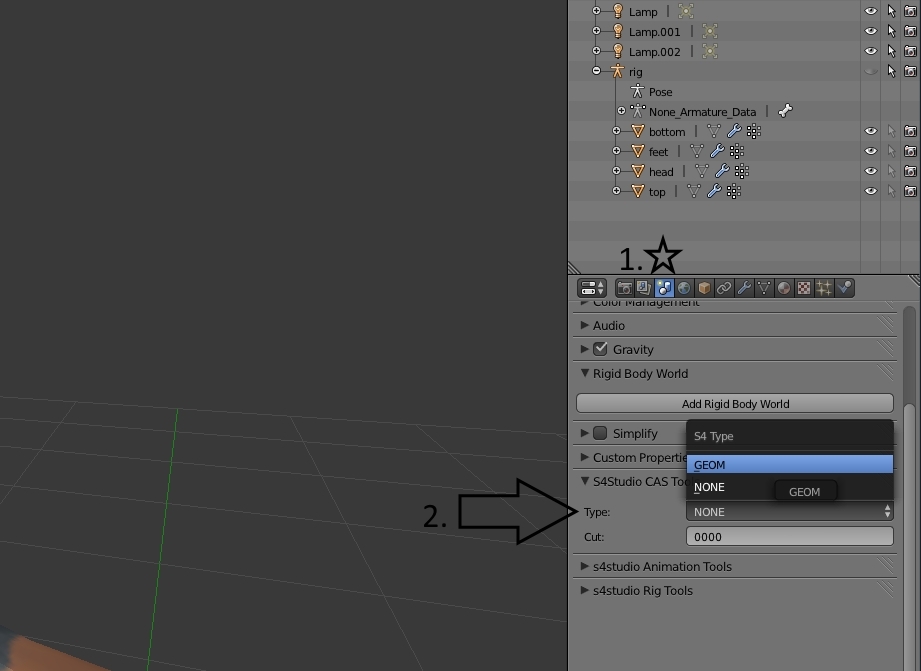
H. 1. click the little button that is two buttons over from the small camera on the right side of your screen.
2. Scroll down to the S4 Studio CAS Tools menu. Select the Type from the dropdown and enter the Cut in the box
below. These are the Type and Cut you made note of in step D.
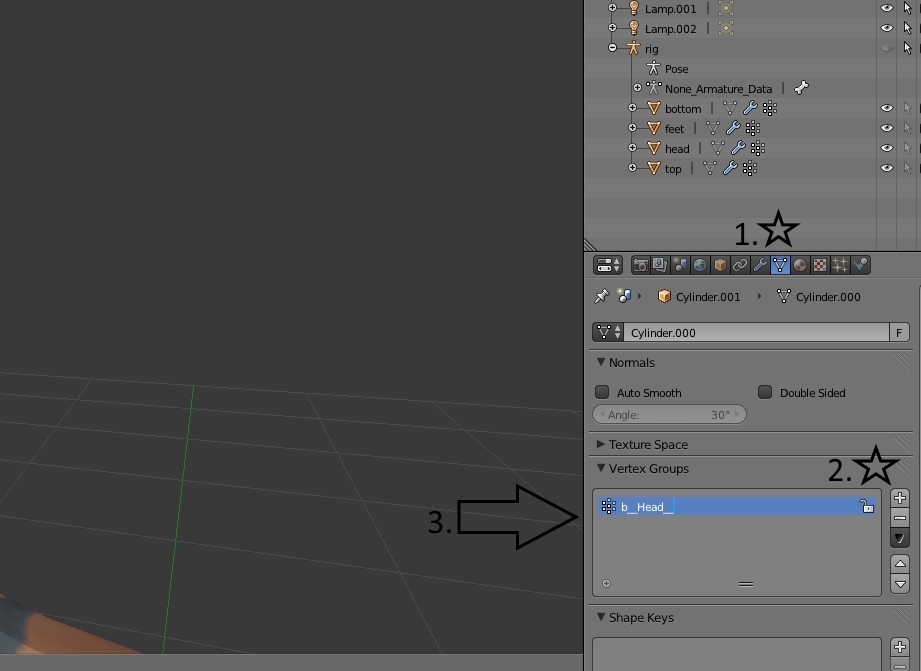
I. 1. Now click the inverted triangle again. 2. Click the plus sign adjacent to the Vertex Groups box. 3. Enter the joint name you noted in Step E. It must be exactly the same so be sure it has the proper number of underscores and the right name.
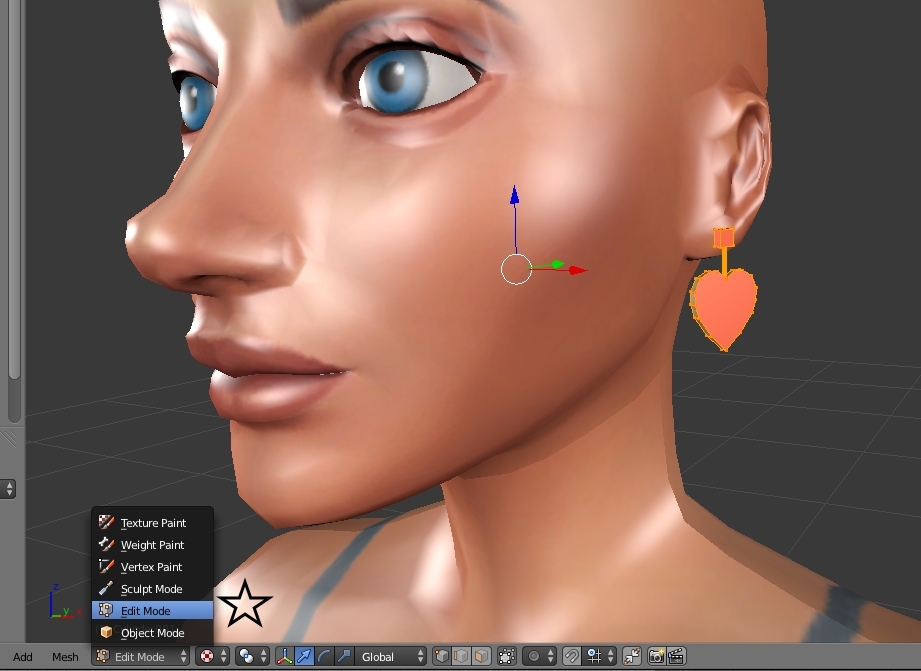
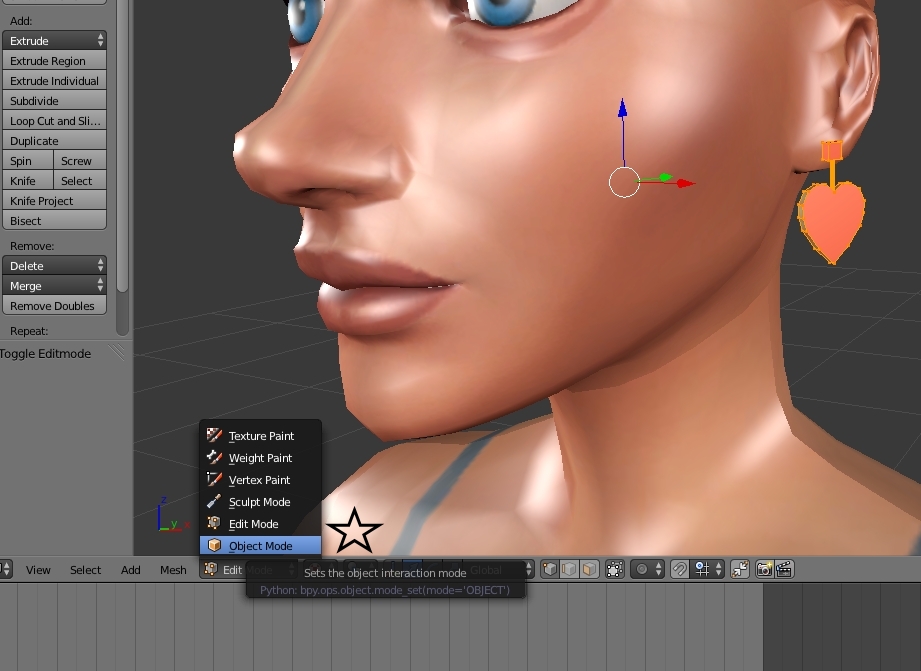
J. 1. Now click the menu below the viewport and select Edit Mode. 2. Once in edit mode click the A key on your keyboard to select your whole mesh. It will turn orange when it is selected.
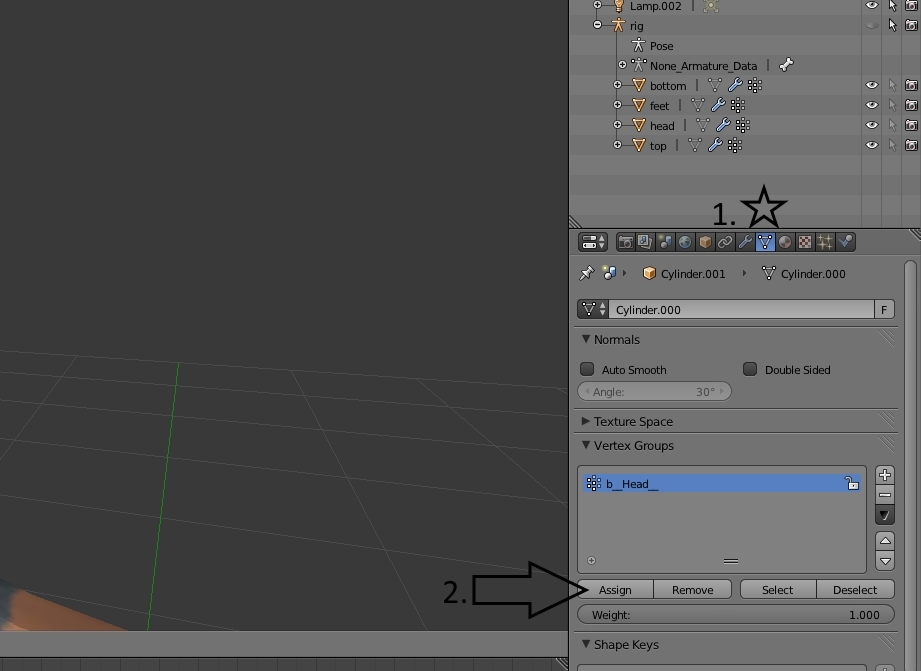
K. 1. Now make sure the little triangle button is selected. 2. Click the Assign button to assign your selected item to this joint.
L. Now return to Object Mode.
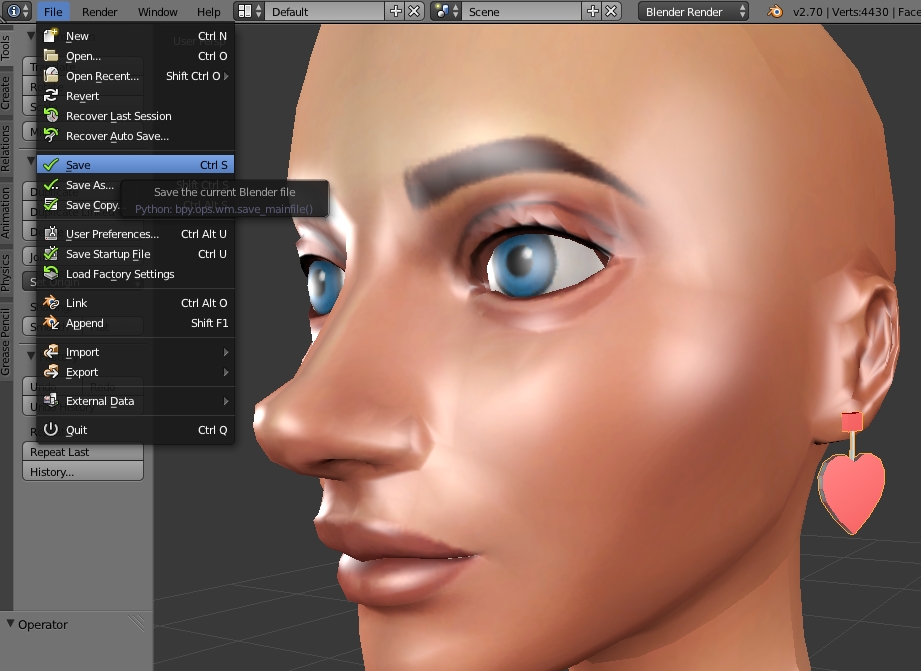
M. Click File and Select Save.
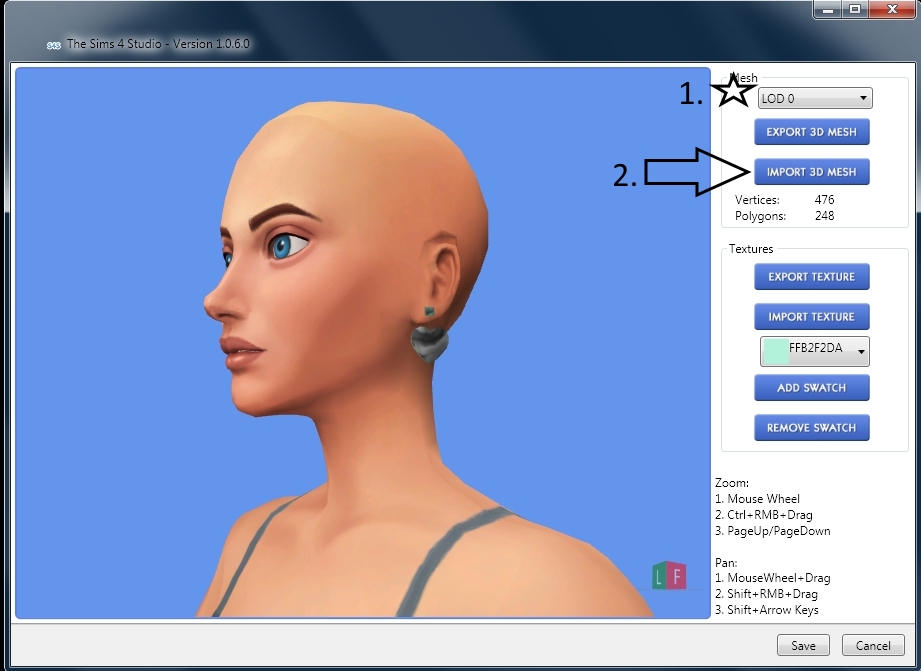
N. 1. Return to Sims 4 Studio. Make sure LOD 0 is selected. 2. Click Import Mesh. Select the .blend you just saved in step M.
O. 1. Now select LOD 1. from the drop down and export it as you exported LOD O.
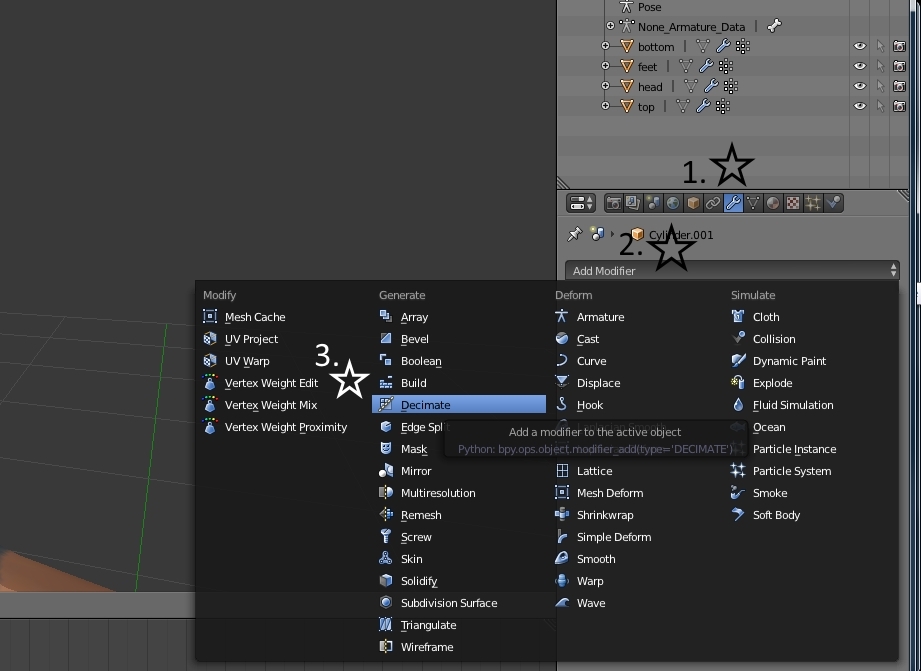
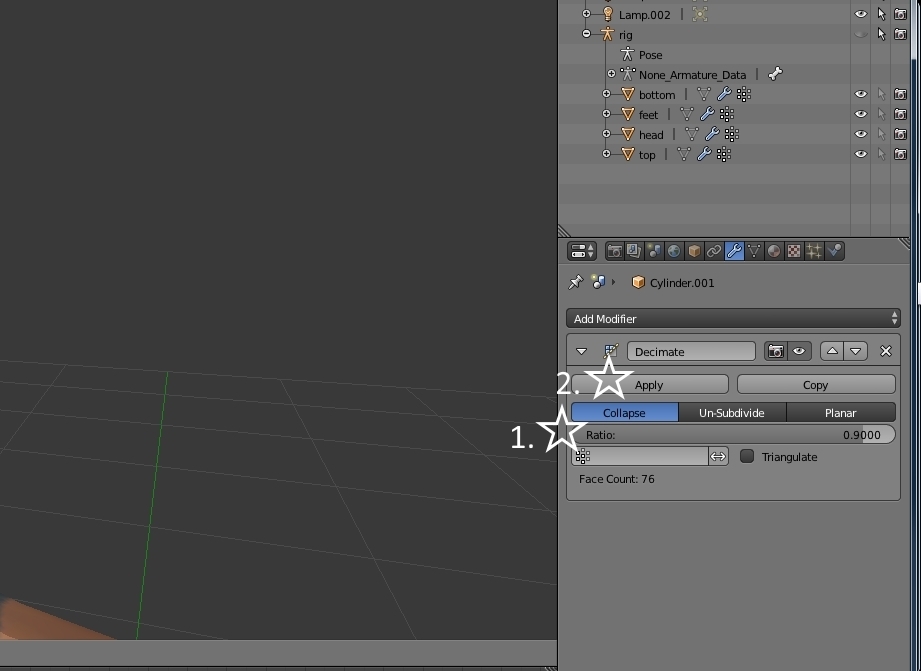
P. Open LOD 0 (not LOD 1) in Blender. Then: 1. Click the small wrench button. 2. Choose Add Modifier. 3. Choose Decimate.
Q. 1. Enter the percentage of vertices you would like to have for your lower quality LOD in the ratio line. 2. Click Apply.
R. Now Click file and choose Save As. Save this over the LOD 1 .blend. Import it to overwrite EA's LOD 1 in Sims 4 Studio.
S. Repeat steps O-R for each of the LODs in the .package. It is important to note that LOD 0 and, possibly, LOD 1 are the only ones people will be able to clearly see in the game. The others are only visible when the player is zoomed out far from the Sim wearing your accessory. Since accessories are generally small items no one will see those very well at all. This means that you can reduce the poly here significantly and it won't really matter. No one will notice.
T. Now add your texture as is shown in other tutorials. Add any extra swatches you want.
Save the .package and test it in the game.
Updated