Wiki
Clone wikiukds.tools.textAnonHelper / INSTALL
Installation
Step 1. Show Developer Ribbon
The Developer Ribbon is not shown by default. This step covers the instructions on how to make it visible.
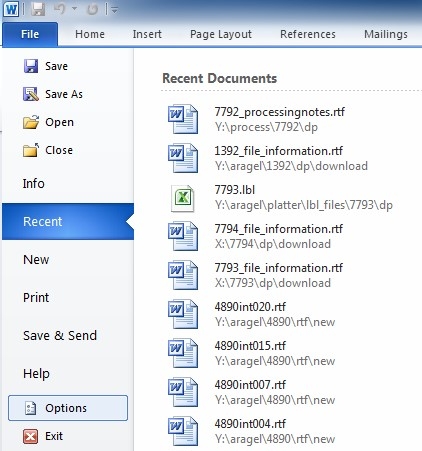
Figure 1: Select Options
When Microsoft Word editor is opened, click on File-> Options to open a Word Options window (Figure 1). On the Options window click on Customize Ribbon (Figure 2). Make sure Developer Ribbon is ticked (Figure 2). When all done, click OK to save changes. There should be a new Developer Ribbon at the top of the MS Word window.
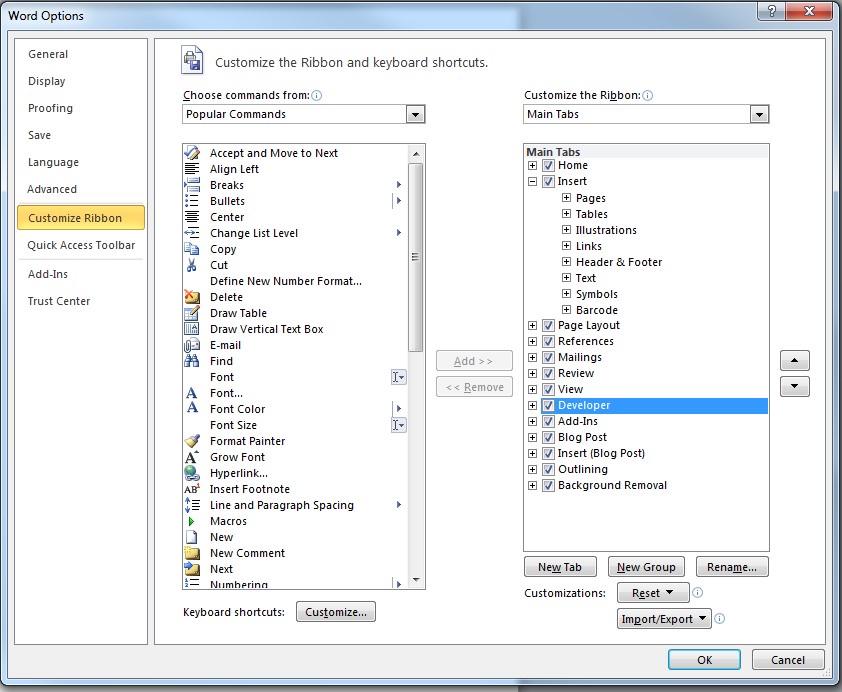
Figure 2: Customise the Ribbon
Step 2. Install the macros
From the Developer ribbon choose Visual Basic (Figure 3).
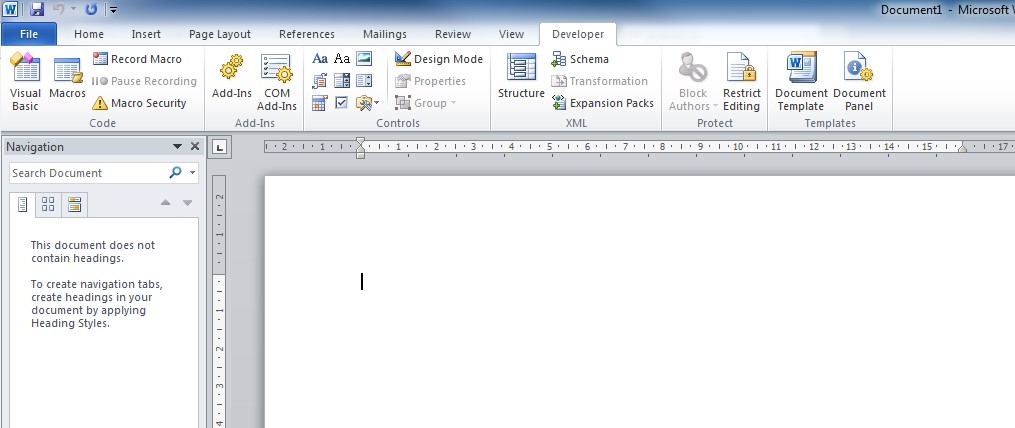
Figure 3: Select Visual Basic
Make sure you are editing the 'Normal' file (check the tree on the left of Figure 4). Double click on ThisDocument. It will bring up the text editor window.

Figure 4: Select ThisDocument in Visual Basic editor
Copy the contents of the AnonymisationHelperMacros.txt file into that macro text editor. You should now see a view similar to Figure 5.
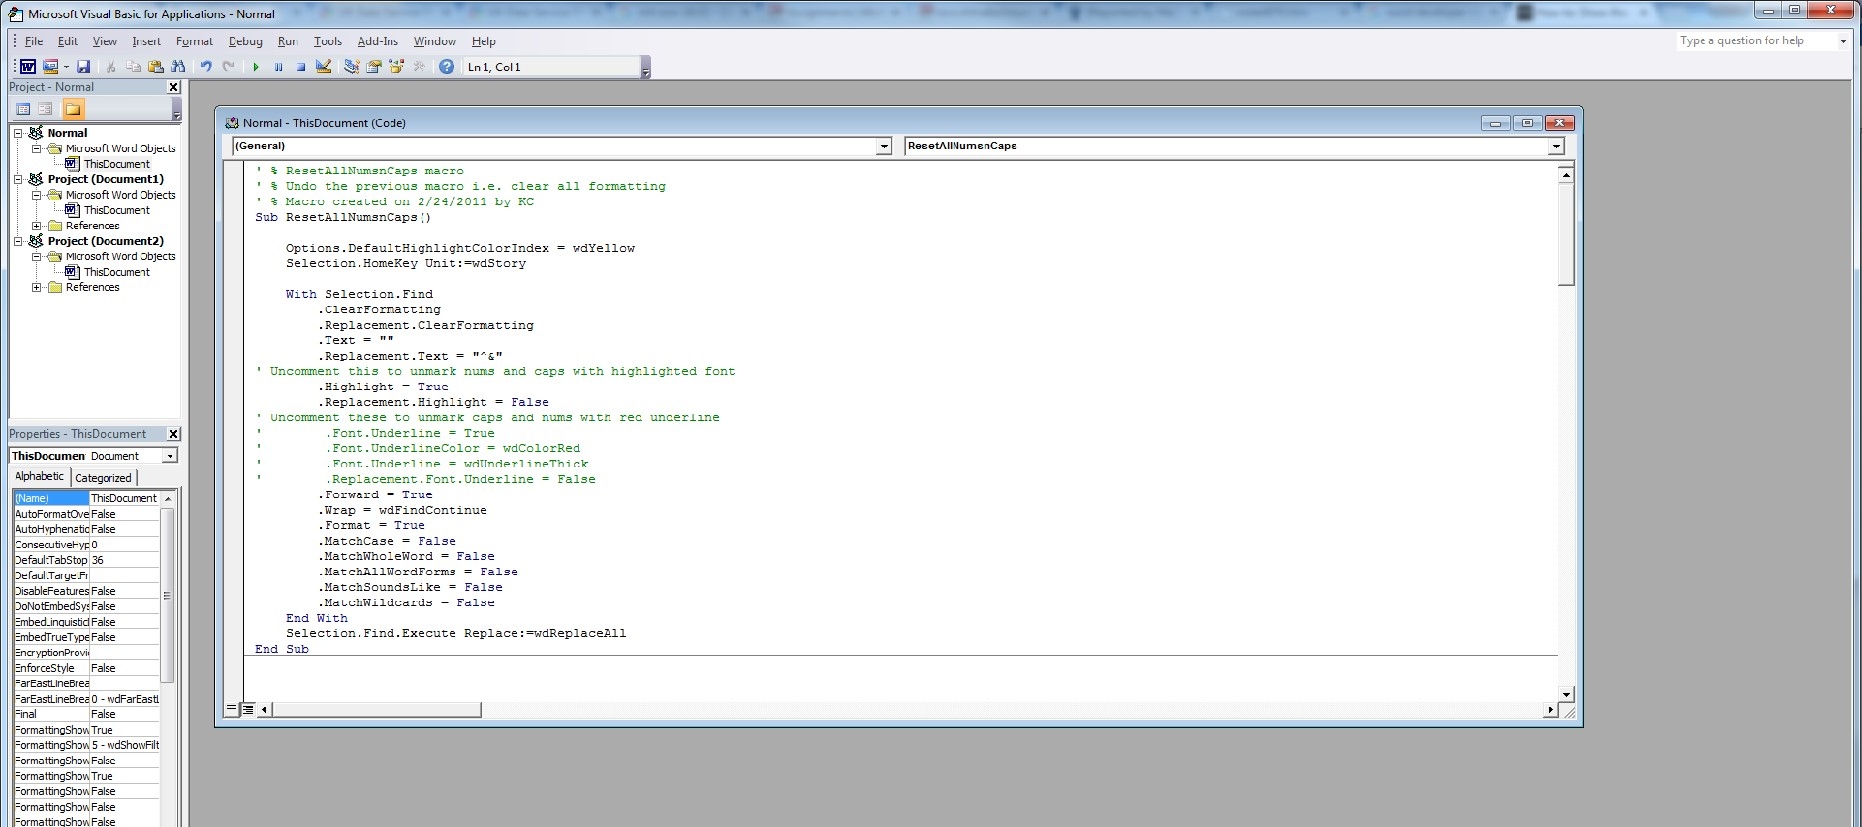
Figure 5: View macro editor pane
Click Ctrl+S to save the file and close Microsoft Visual Basic for Applications window. Users of Word 2013 may get an alert saying 'The following cannot be saved in a macro-free document', in which case, see the Troubleshooting section, below.
Step 3. Install the text anonymization helper tab
Go to File -> Options -> Customise Ribbon (as in Step 1). Under Import/Export (right bottom of the screen) select 'Import customisation file'. (Figure 6).
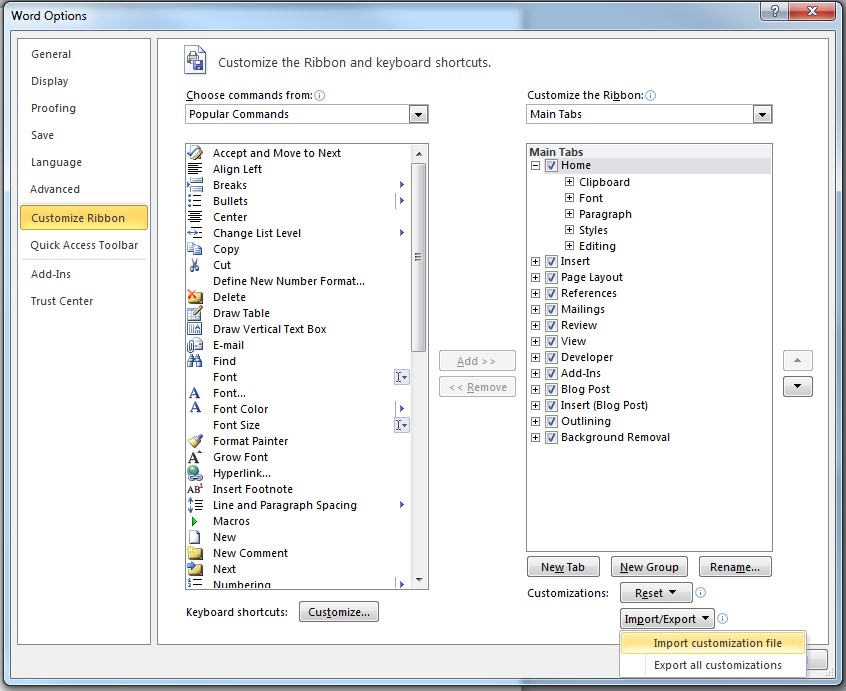
Figure 6: Import Ribbon customisation file
Find the AnonymisationHelperTab.xml file in your file directory. If you navigate to the right directory but it appears to be empty, type the name of the file (AnonymisationHelperTab.xml) and click Open (Figure 7). A new Tab should appear in your list of tabs. Click OK/Back to see the ribbon in your Word environment.
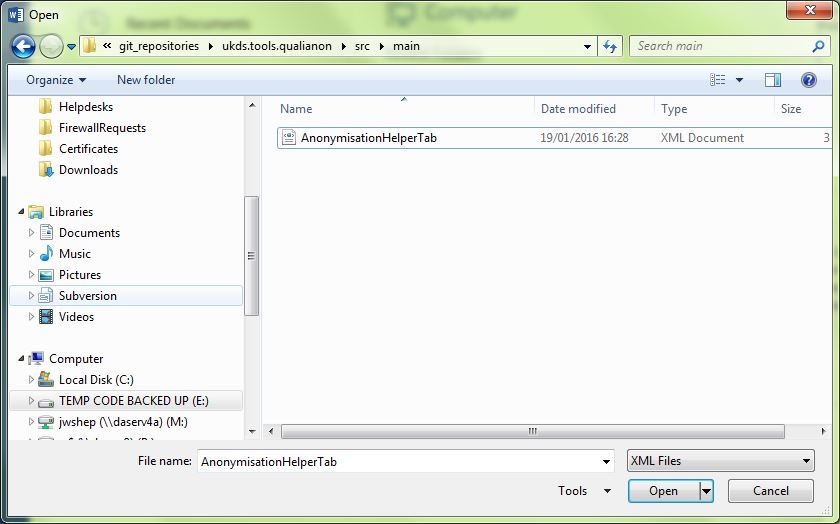
Figure 7: Find and load Ribbon customisation file
You can change the position of the ribbon (e.g. have it as your last ribbon) by choosing 'Anonymisation Helper (custom)' with a single left mouse click and then use arrow buttons on the side to change the position up and down. You can go back to this step later and change the position/turn off the ribbon if needed (Using File -> Options -> Customize Ribbon). When completed, click OK. (See Figure 8).
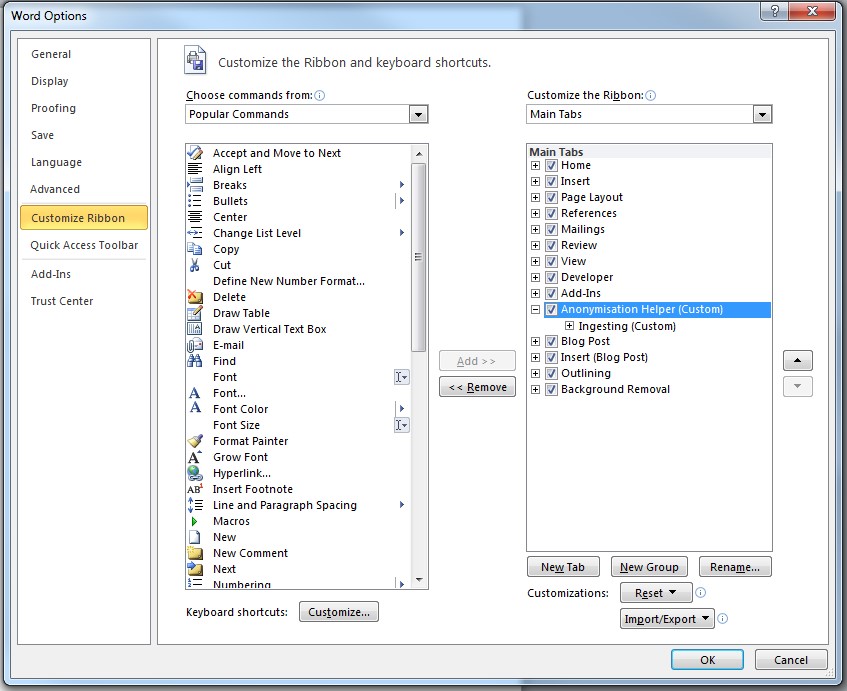
Figure 8: Ribbon customisation
Updated