Wiki
Clone wikiXMALab / Marker Tracking: Point Tracking
Automatic Point Tracking
Once you have initialized a set of points (see "Marker Tracking: Create or Import Points (Markers)" in the Table of Contents) for a trial, XMALab can mostly track these points automatically. You can perform automatic tracking with one point at a time, a subset of points, or all of the points in the trial simultaneously.
XMALab defaults to tracking black spherical X-ray markers. If your videos are using a different kind of marker, see "Marker Tracking: Marker Settings" in the Table of Contents before tracking.
To track a single point:
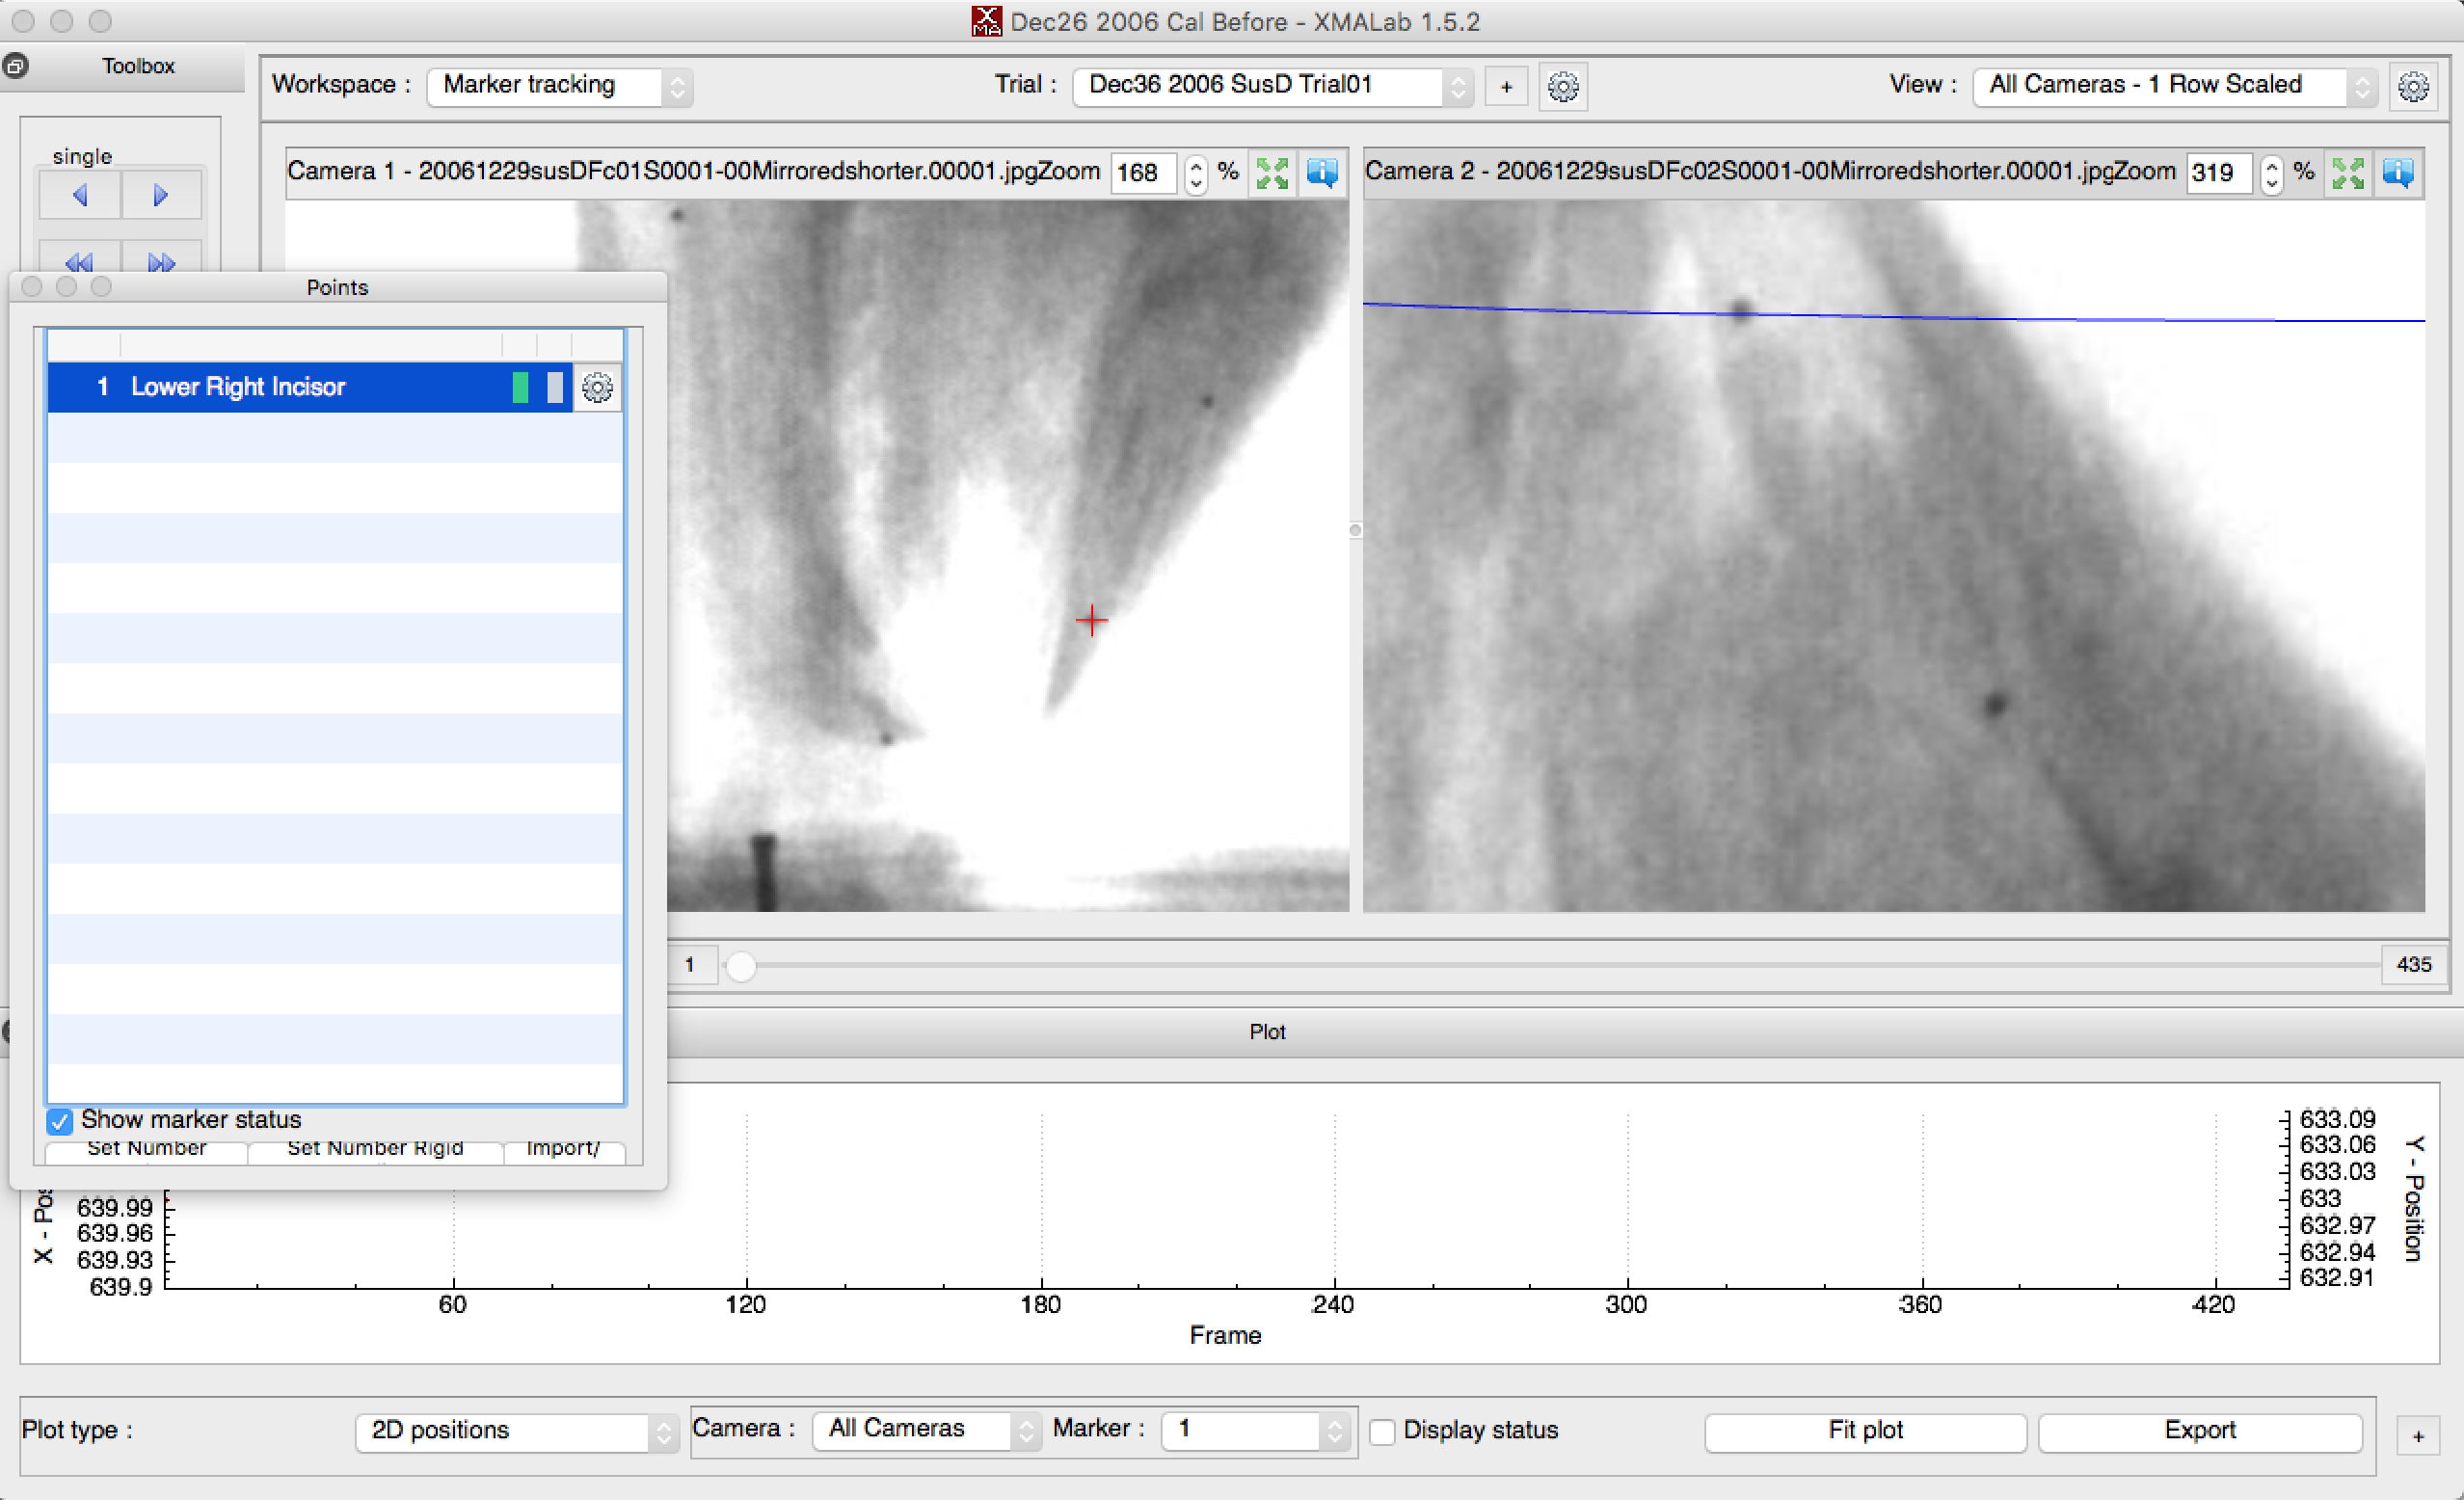
1) In the Points window or a camera view, click on the point you want to track.
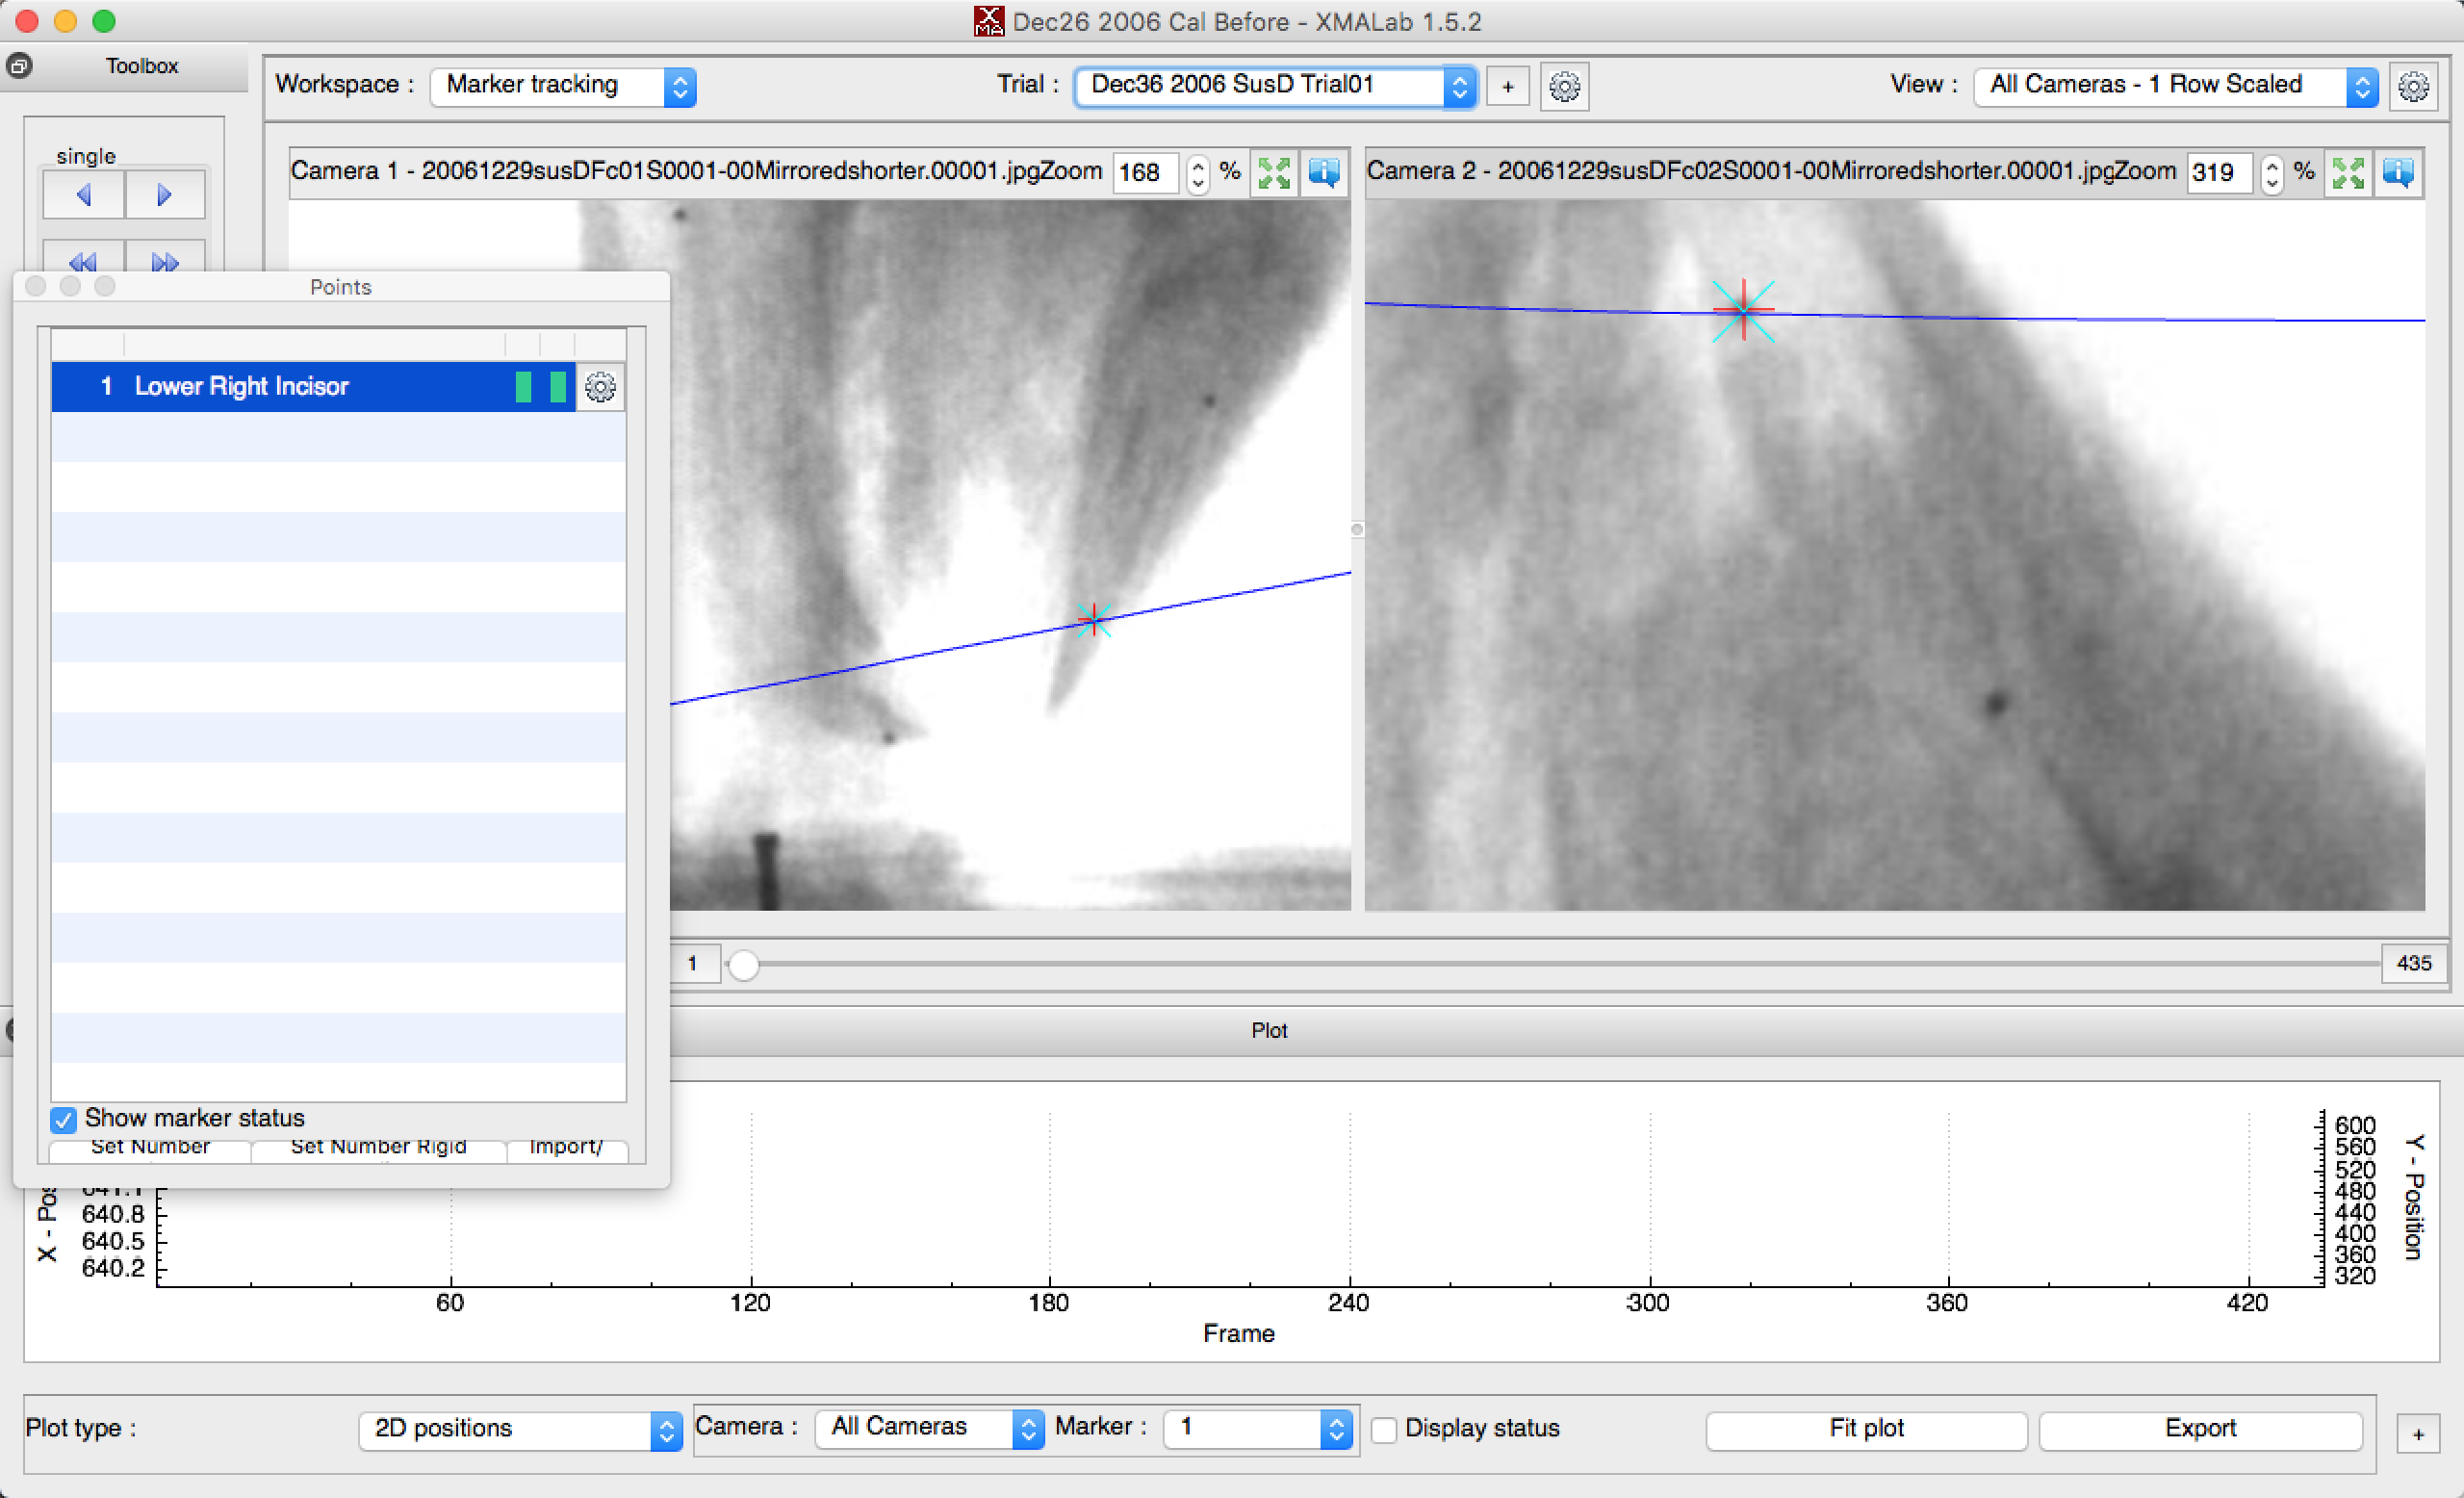
2) A blue epipolar (3D projection) line will appear in the opposite camera view:

This line should go through the same point in the other camera view. Left-click on this point so that the point is identified in both camera views:

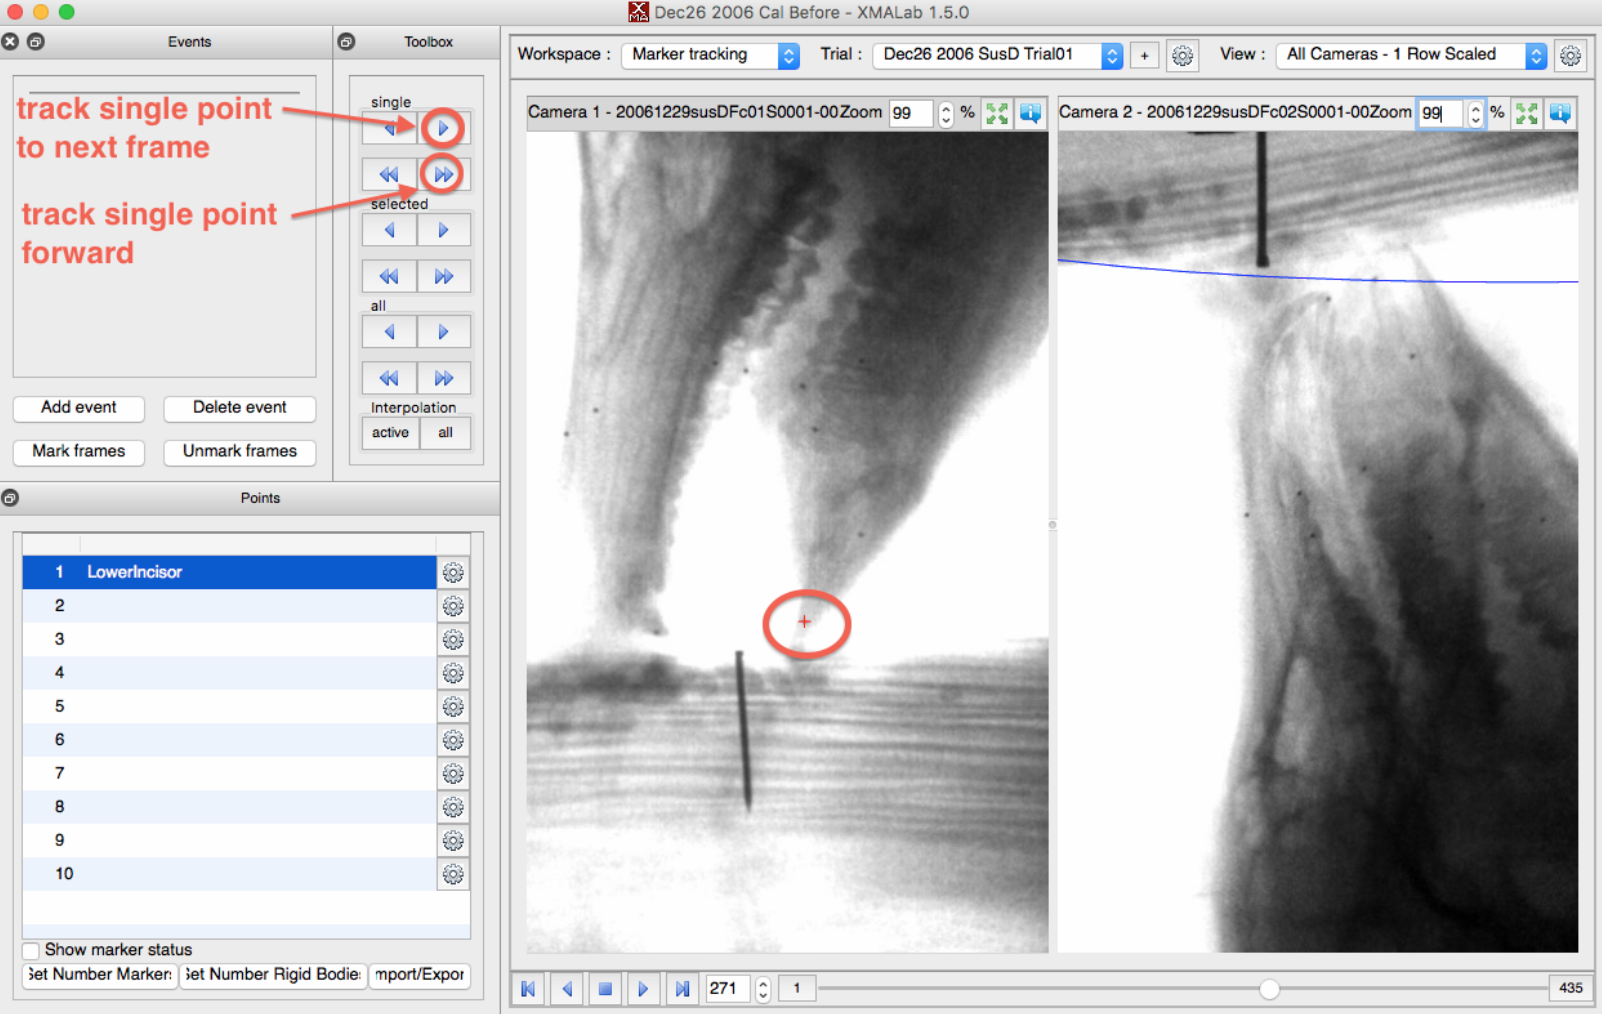
3) In the point-tracking toolbox, click on one of the forward arrows under the 'single' section to track this point forward a few frames. Hit esc to stop tracking.

To track multiple sets of points:
1) For each point of interest, manually identify the point in both camera views for at least one frame as described above.
2) Select all the points you want to track in the Points window (hold down Shift and left-click on the points of interest).
3) In the point-tracking toolbox, click on one of the forward arrows under 'selected' to track all selected points.
Tracking all points is similar. Use the arrows under the 'all' section of the point-tracking toolbox; all points are tracked regardless of whether they are selected.
Note that you don't need to have the point identified in both camera views for automatic tracking; if you only have a point selected in one camera, it will only be tracked for that camera. However, in addition to being unable to determine the 3D position of the point, tracking only in a single camera means that XMALab cannot calculate reprojection errors for that point.
Manual Point Tracking
Automatic tracking will stop if the reprojection error for a point gets too high. This usually happens when the marker is not easily detected automatically, such as when two markers overlap, the marker is in a dark part of the image, or the marker is obscured by a dense part of the study organism. In some cases, you can fix this by changing the detection settings (see "Advanced: Tuning Marker Detection Settings" in the Table of Contents). More often, you will have to manually track the point across the frames for which automatic tracking failed.
Manual tracking can be done in the main camera view or the Detailed View window (View -> Detailed View), which gives you a better view of the tracked point and allows you to reassign the location of an automatically tracked point in one or both cameras.
Keyboard Shortcuts
The following keyboard shortcuts are useful for automatic and manual point tracking:
1and2track backward and forward one frame at a time5and6track backward and forward by several frames at a time (specify in XMALab -> Preferences -> General)QandWor arrow keys advance a frame without tracking3moves to the last frame of the current tracked segmentShift+3moves to the first frame of the current tracked segmentEscstops trackingShift+ left-click a point in the image to select it in the Points window- Scroll to zoom in camera views
For a full list of available keyboard shortcuts in XMALab, go to View -> Help.
Troubleshooting
Ideally, XMALab will be able to track all of your points automatically throughout the whole video with low re-projection errors. Realistically, automatic tracking may:
- lose points for parts of the video,
- be unable to track from frame to frame using the default settings,
- or result in high errors for parts of the video where a point is dark or partly obscured.
In some cases, this can be fixed by manually re-identifying or moving points in a frame, which will get automatic tracking back on track. Often, fixing tracking issues requires either changing the detection settings for automatic tracking, or manually tracking a point for part of the video. Even if XMALab successfully tracks a point throughout the whole video, you should still check the reprojection errors and marker-to-marker distances to make sure it tracked the same point the whole time!
- To change automatic tracking settings, see "Marker Tracking: Marker Settings" in the Table of Contents
- For quality control of automatically tracked points, see "Marker Tracking: Correct Tracking Errors" and "Quality Control: Working with the Plotwindow" in the Table of Contents
Updated