Wiki
Clone wikiXMALab / Standard (light) Camera Calibration with a Checkerboard
-
Record a series of at least 10 sets of images with different orientations and positions of the checkerboard. Save them as image series or a movie file (.avi, .cine)
-
Select Light Cameras and Checkerboard
-
Load in your set of images or movies (shift-select to select a set of images and load them all at once)
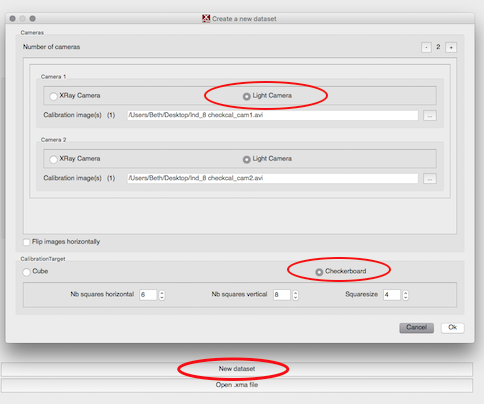
- The Nb (number) of squares horizontal or vertical is the number of black/white intersections (so n-1 number of squares)
- The Square size is in centimeters, e.g. for square size 5 mm enter 0.5, and for square size 4.2 cm enter 4.2. All XMALab data will be output in cm and will have to be converted to mm, if desired.
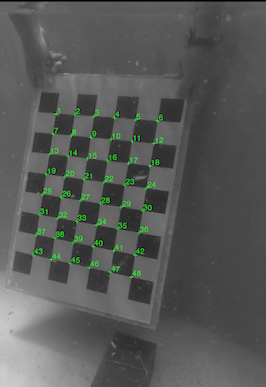
- First click on the upper left interior intersection
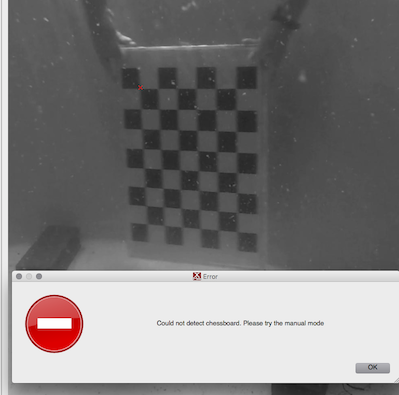
- If the intersections of the squares are not detected automatically, an option to click the 4 interior corners will come up. Start upper left and go Clockwise
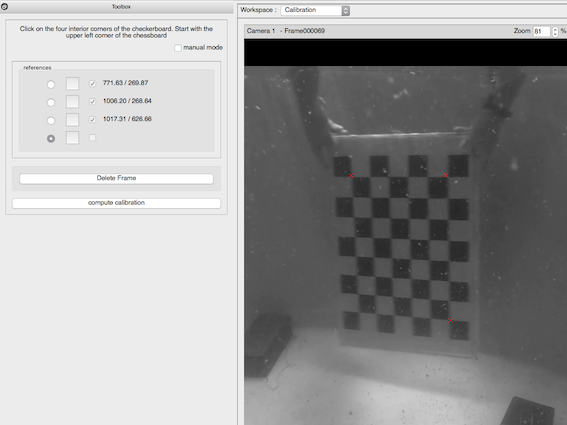
-
Once you have at least two images with points detected for a camera, the calibration computes automatically. You do not have to press the Compute Calibration button (as of July 2018, that button can cause crashes).
-
Once you have at least two images per camera marked, you can modify the calibration. Open the “info window” (press the blue icon with i for info). Double click points to exclude them. In the example below, number 43 was excluded because the intersection was unclear. Use Command or Control+click to add or move a point. Then click recompute calibration.
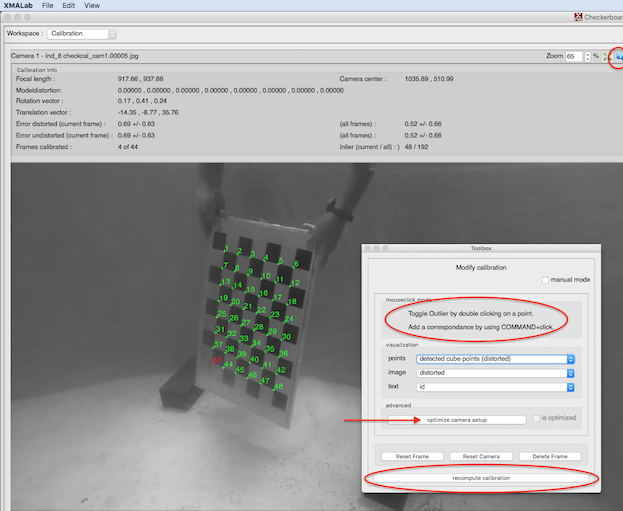
- Once at least 10 images per camera are marked (more, better), click optimize camera setup. Use at least 100,000 iterations but it is even recommended to use much more. This is required as 1 frame of the checkerboard calibration does not have as much information as a 3D calibration object and errors have a stronger impact on the final setup. The optimizations add up so you can run 10,000 iterations multiple times and stop if the results are sufficient and do not change anymore.
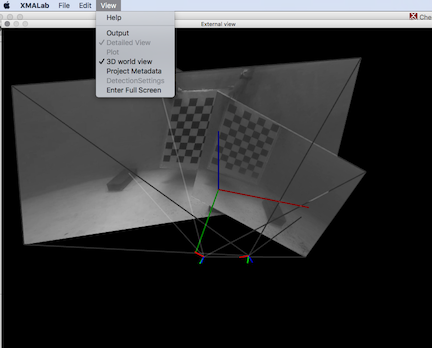
*Check the 3D World Views to make sure the camera positions make sense.
Hints, Recommendations and additional info
Good data for the checkerboard calibration is very important. In general the data should be well sampled and the checkerboard should be well visible and big enough in the image space to be accurately detected. Here are some additional tips on how to record the images.
-
The images should not only be recorded for the workspace, but it should also be made sure that several checkerboards are covering the whole image of each camera. This will have to determine the internal parameters of the camera accurately. The checkerboard does not have to be visible in the other cameras.
-
The checkerboard orientation should change in regard to the camera by tilting it in different directions and by moving it to different positions. Consider the checkerboard a 2dimensional ruler with which the different dimensions of the 3D workspace should be measured. A good example for calibration images of a single camera can be found with the Camera Calibration Toolbox for Matlab
-
Several checkerboard images should be visible in multiple cameras. It is enough if all cameras are connected. E.g. image 1 is visible in camera 1 and 2, image 2 is visible in camera 2 and 3. This makes it easier for setups in which cameras are filming from opposing directions and where it is not possible to record a checkerboard images for all cameras.
-
It is highly recommended to check all the corners in detail to make sure the corners are correct.
-
The detection of the checkers via the manual of the 4 corner points sometimes does not work correctly as the checkerboard is too small or the image quality too bad. In this case an automatic refinement for the corner points can be disabled in the Settings dialog (Disable corner refinement during manual checkerboard placement) and the placement of the checker corners is solely based on the 4 selected points and not on the image. It is highly recommended to check and manually move the corners for correct calibration.
-
The size of the checkerboard is crucial for good calibration. If the corners are too small it is not possible to detect the corners accurately. In this case it is better to have bigger checkers and to record more images.
-
For light cameras there is an option to enable a lens distortion model. It is recommended to first calibrate without the model and only enable it once all checkerboards have been detected. If enabled it should also be checked if the undistorted images appear correct.
Updated