Wiki
Clone wikiART / Quickstart
![]()
ART Quick Start
(contributed by Barry Thomas)
Quick Start
When you first open ART, you see the File Browser screen:
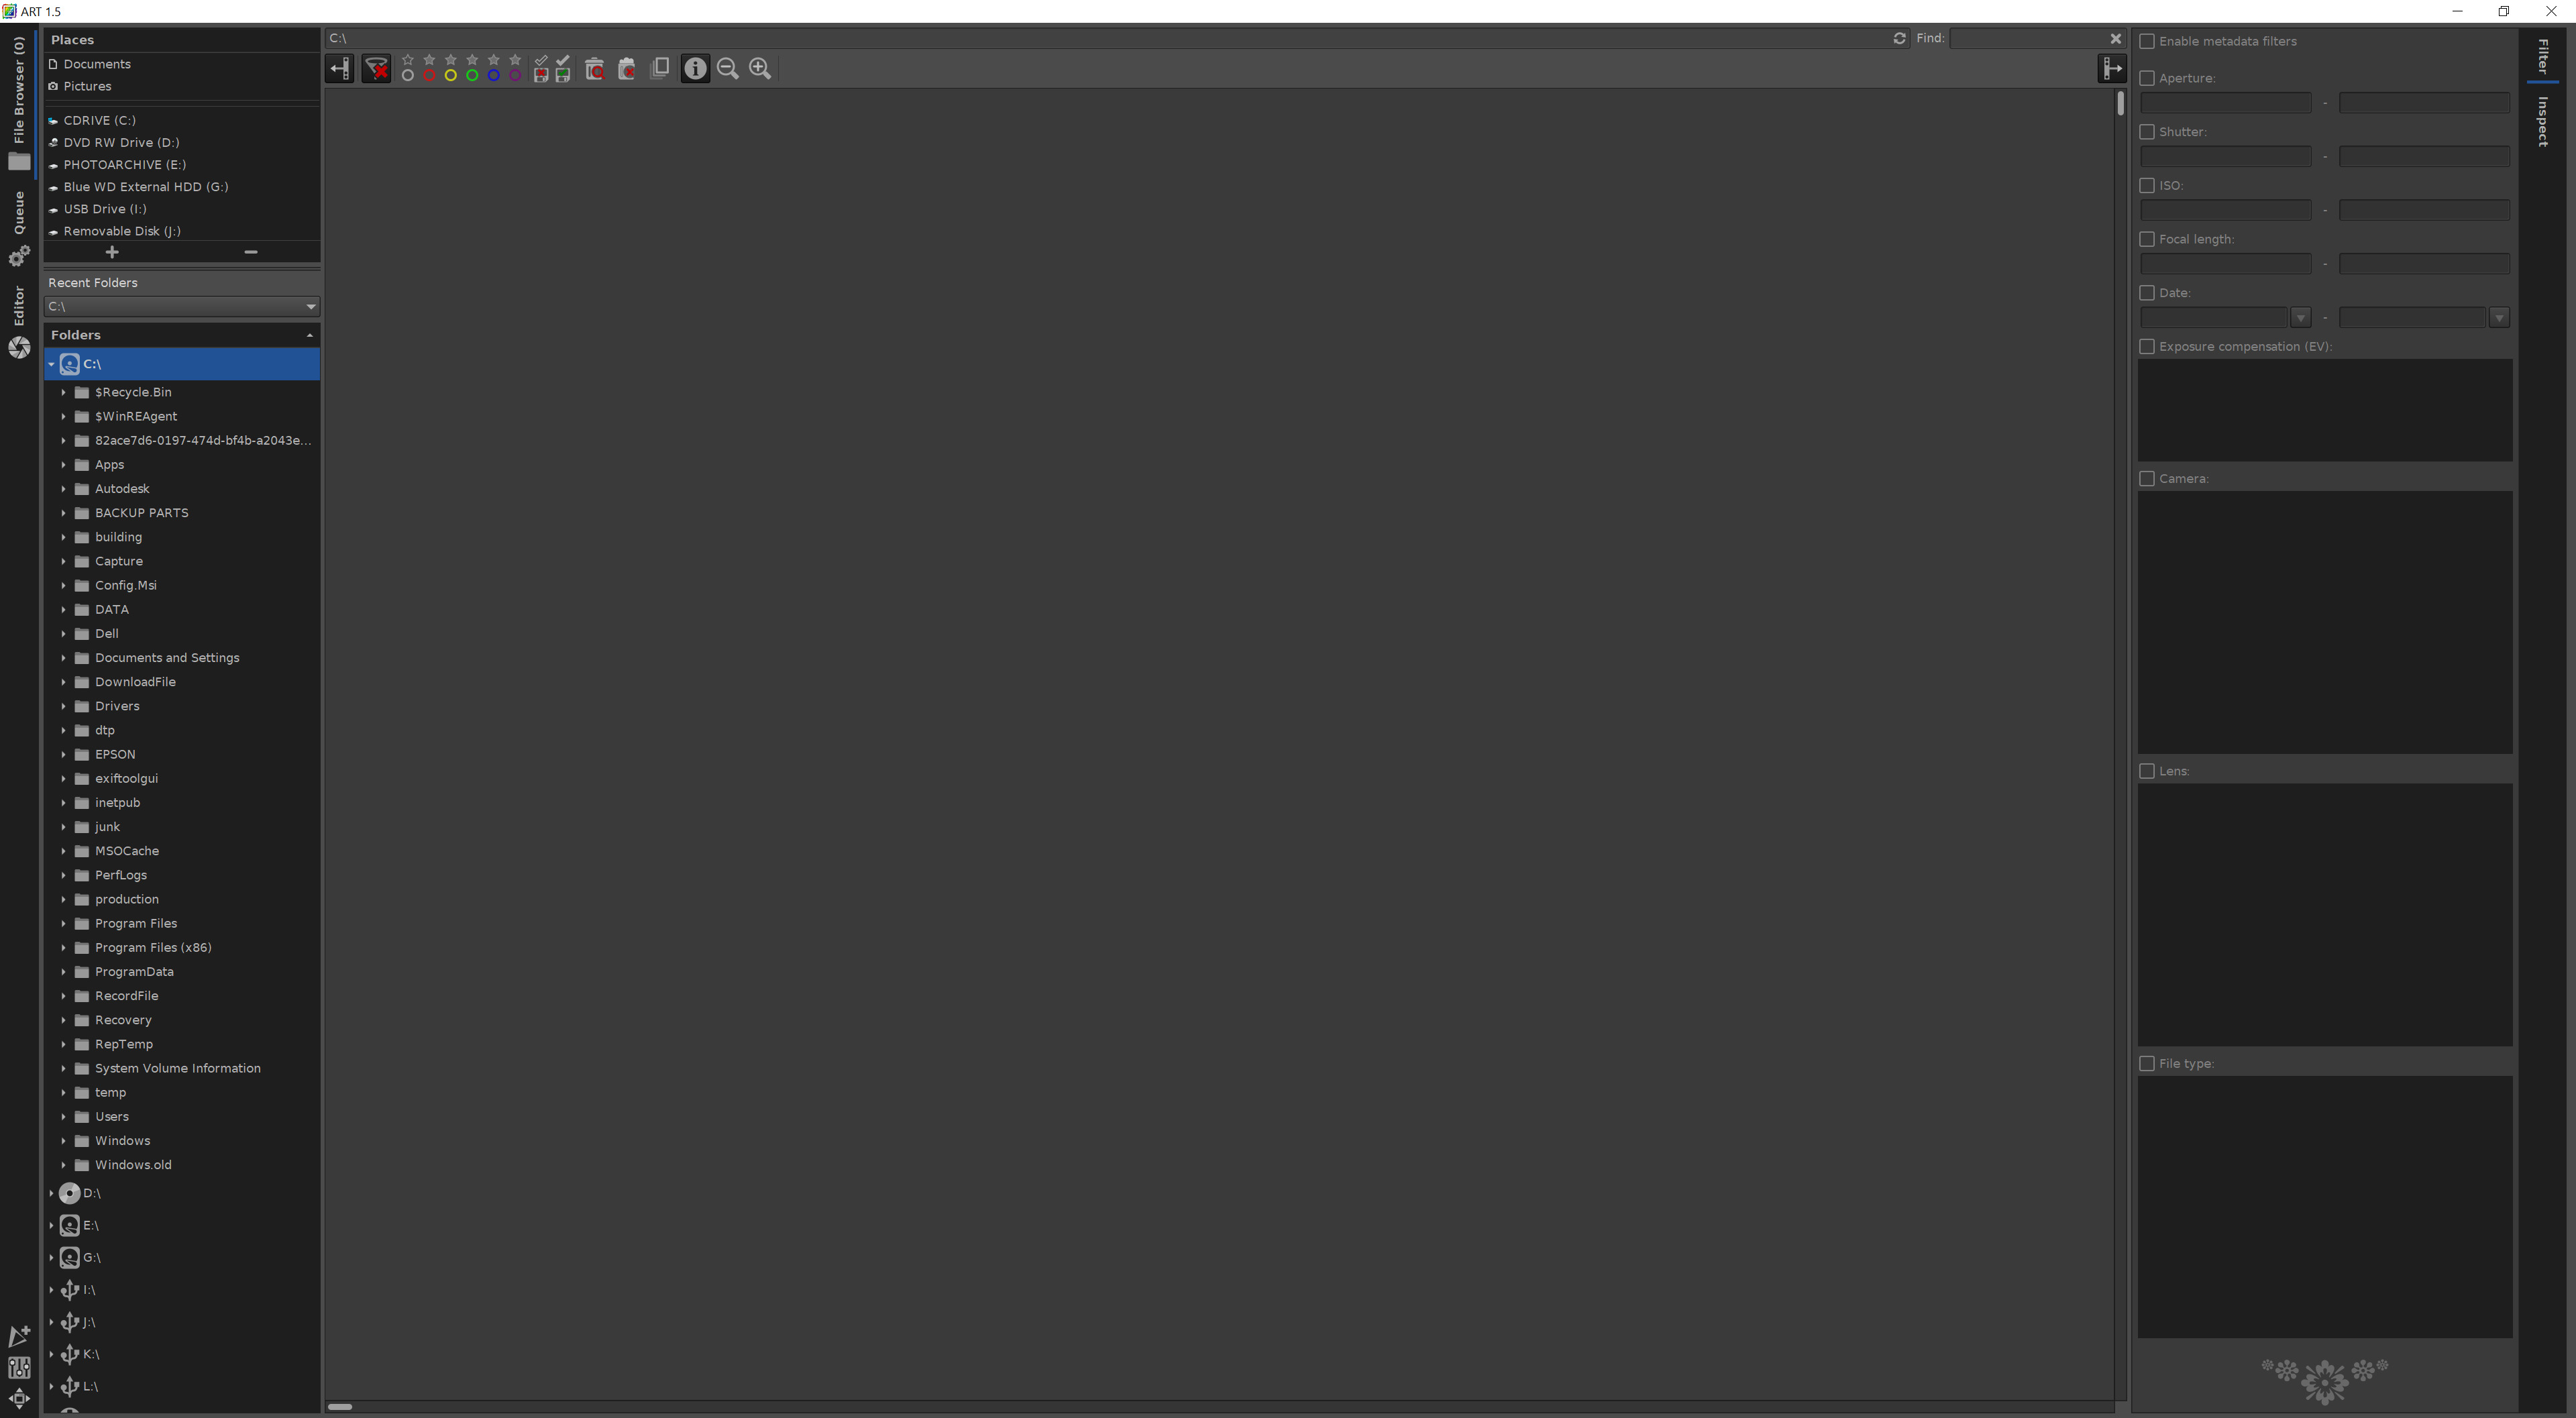
The display is divided into three main areas:
- The left pane, to navigate to your images
- The middle pane, to view thumbnails of images in the current folder
- The right pane, to filter the thumbnails by various settings - file types, dates and so on.
Find some files
In the left pane, the top area shows drives, the lower area shows folders on the current drive.
Navigate to a folder containing some of your RAW images:
ART displays all common image types – RAW, JPEG and others. The thumbnails are sorted in file name order.
By default each thumbnail is captioned with the file name, date, f-stop, ISO and lens focal length.
Filter your images
The right hand pane has two modes – Filter and Inspect. These are selected using the two vertical tabs at the top right of the screen.
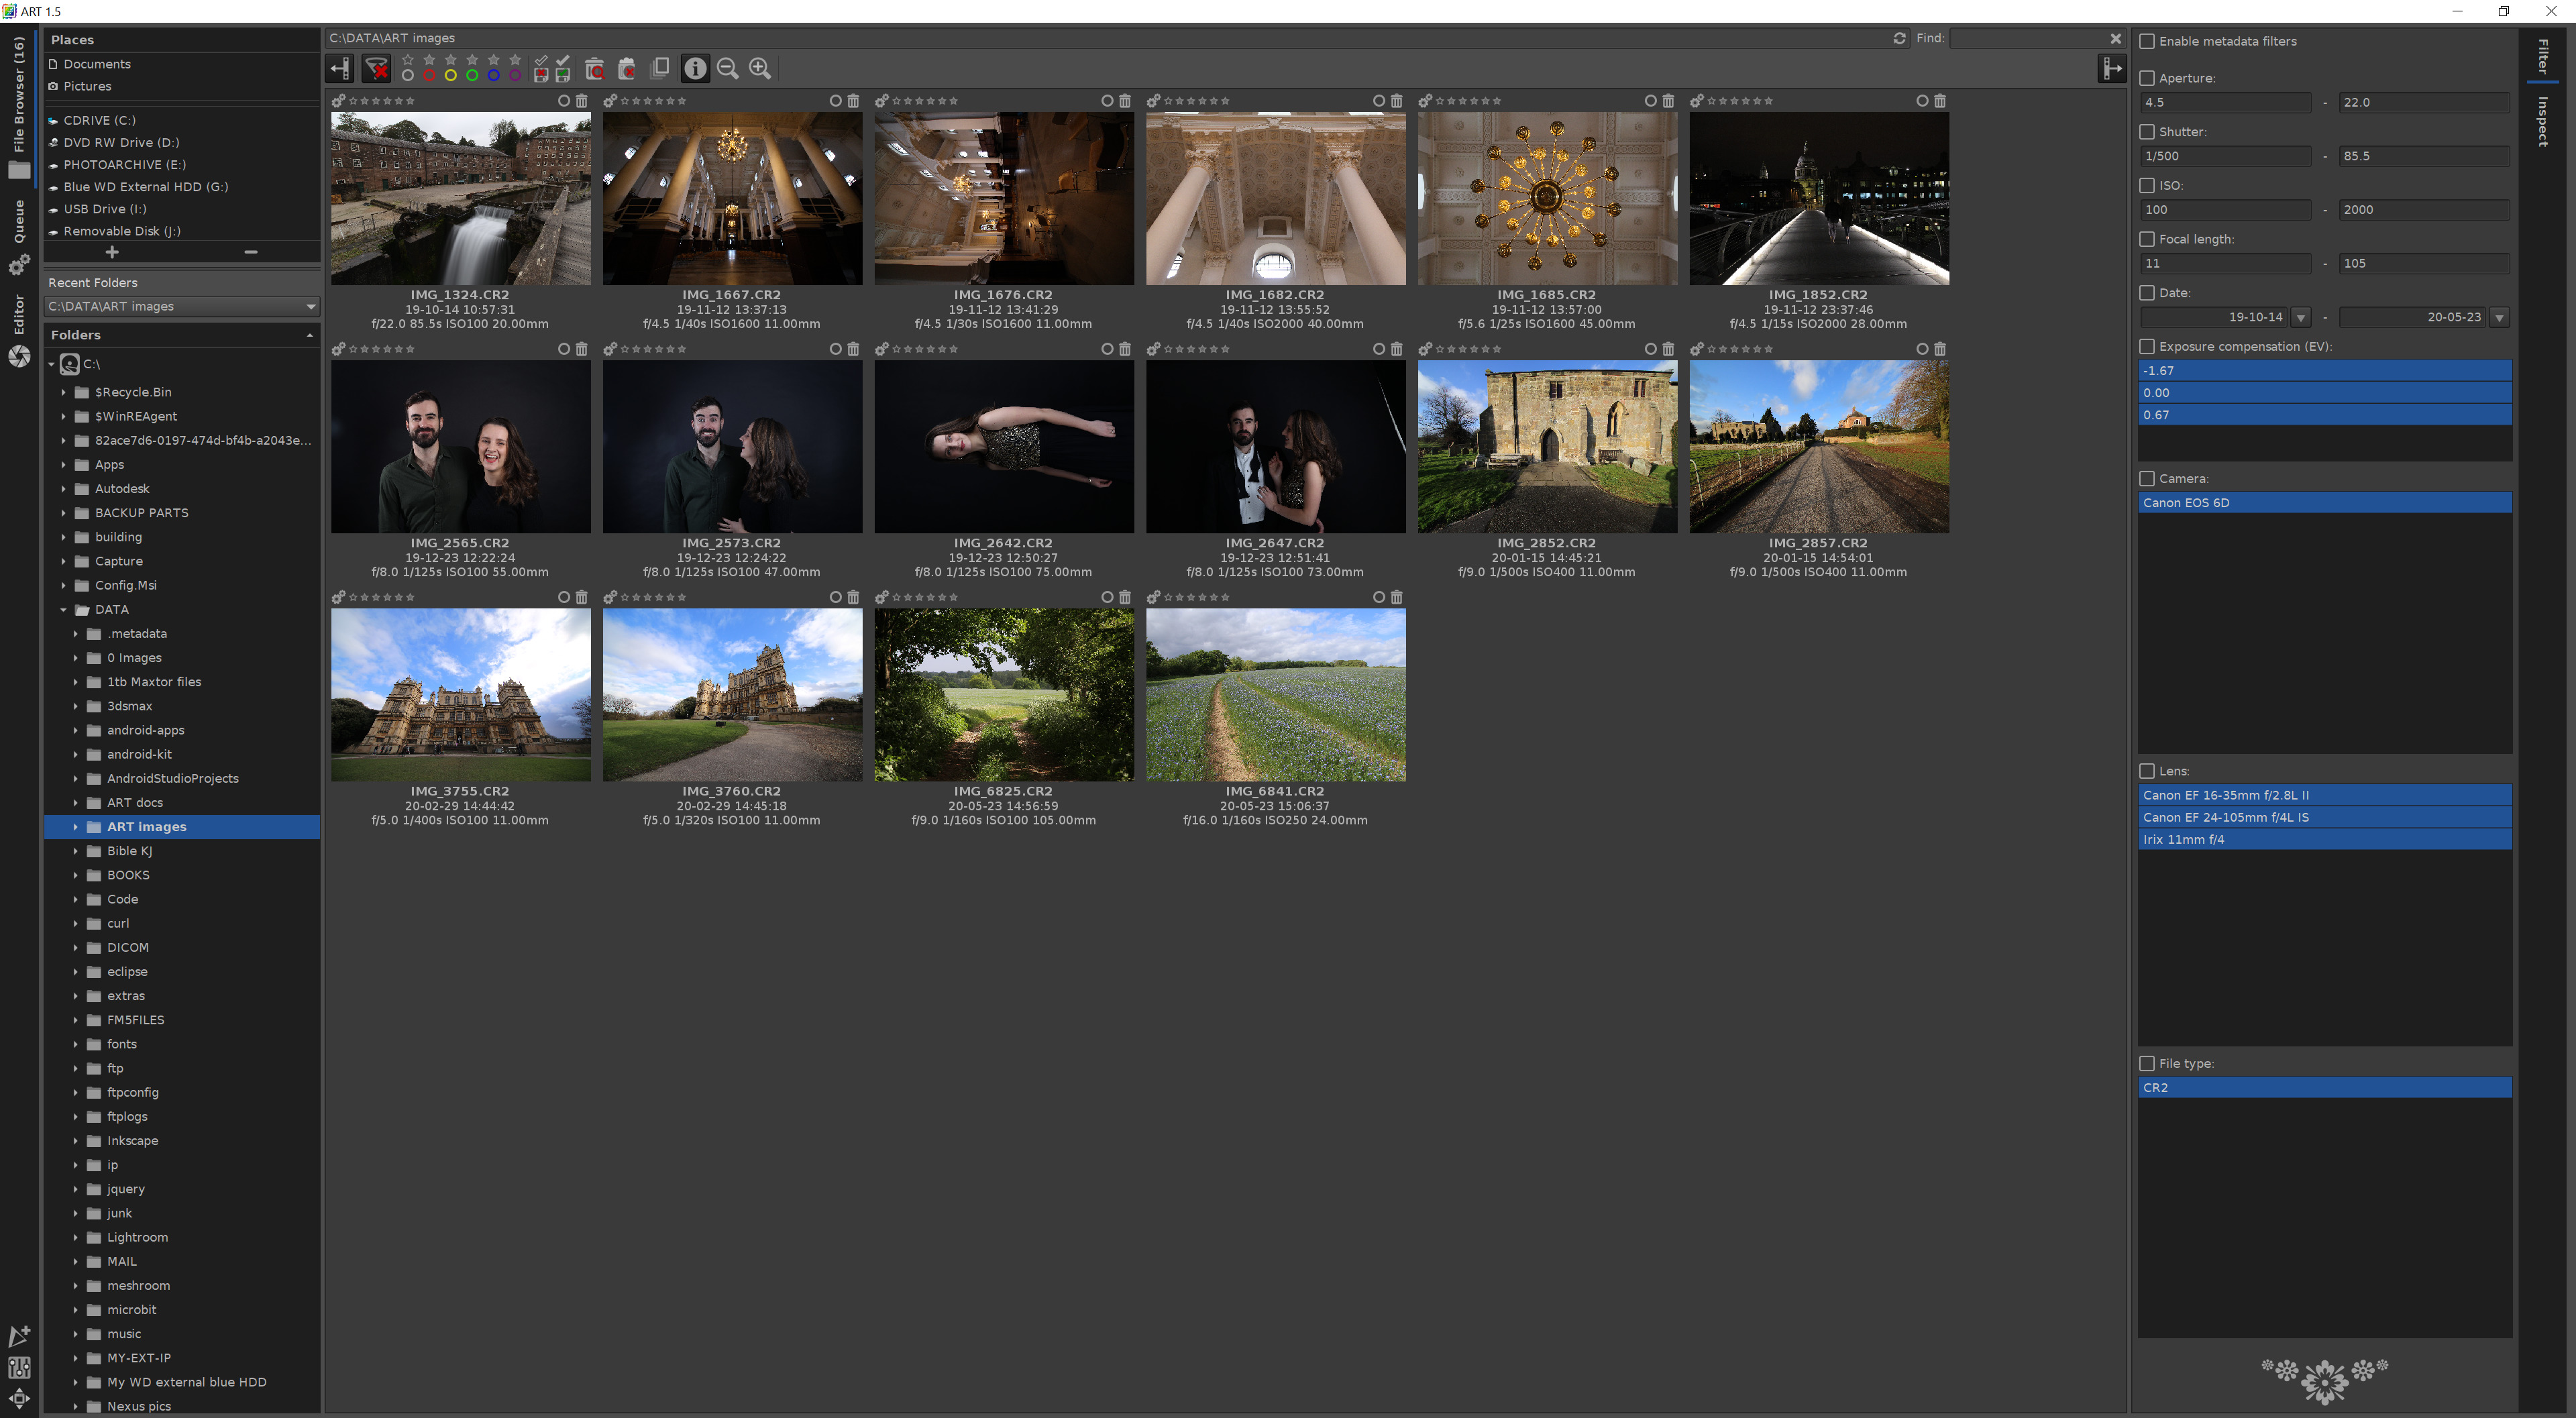
First try out the filter. My images were taken with three different lenses, a 16-35mm, a 24-105mm and an 11mm. I want to just see the images from the 11mm wide angle:
- At the top of the Filter pane, check the Enable metadata filters box
- Half way down the []{#anchor}Filter pane, check the Lens box. At first all lenses are highlighted. You can use click, control click and shift click to select one or more lenses. I'll just click on Irix 11mm f/4 and just those image thumbnails will be shown in the the middle pane:

With your images, try selecting and deselecting the options in the filter panes to show and unshow images with particular camera settings.
To reset the view so all image thumbnails are shown, uncheck the Enable metadata filters box at the top of the filter pane.
Inspect your images
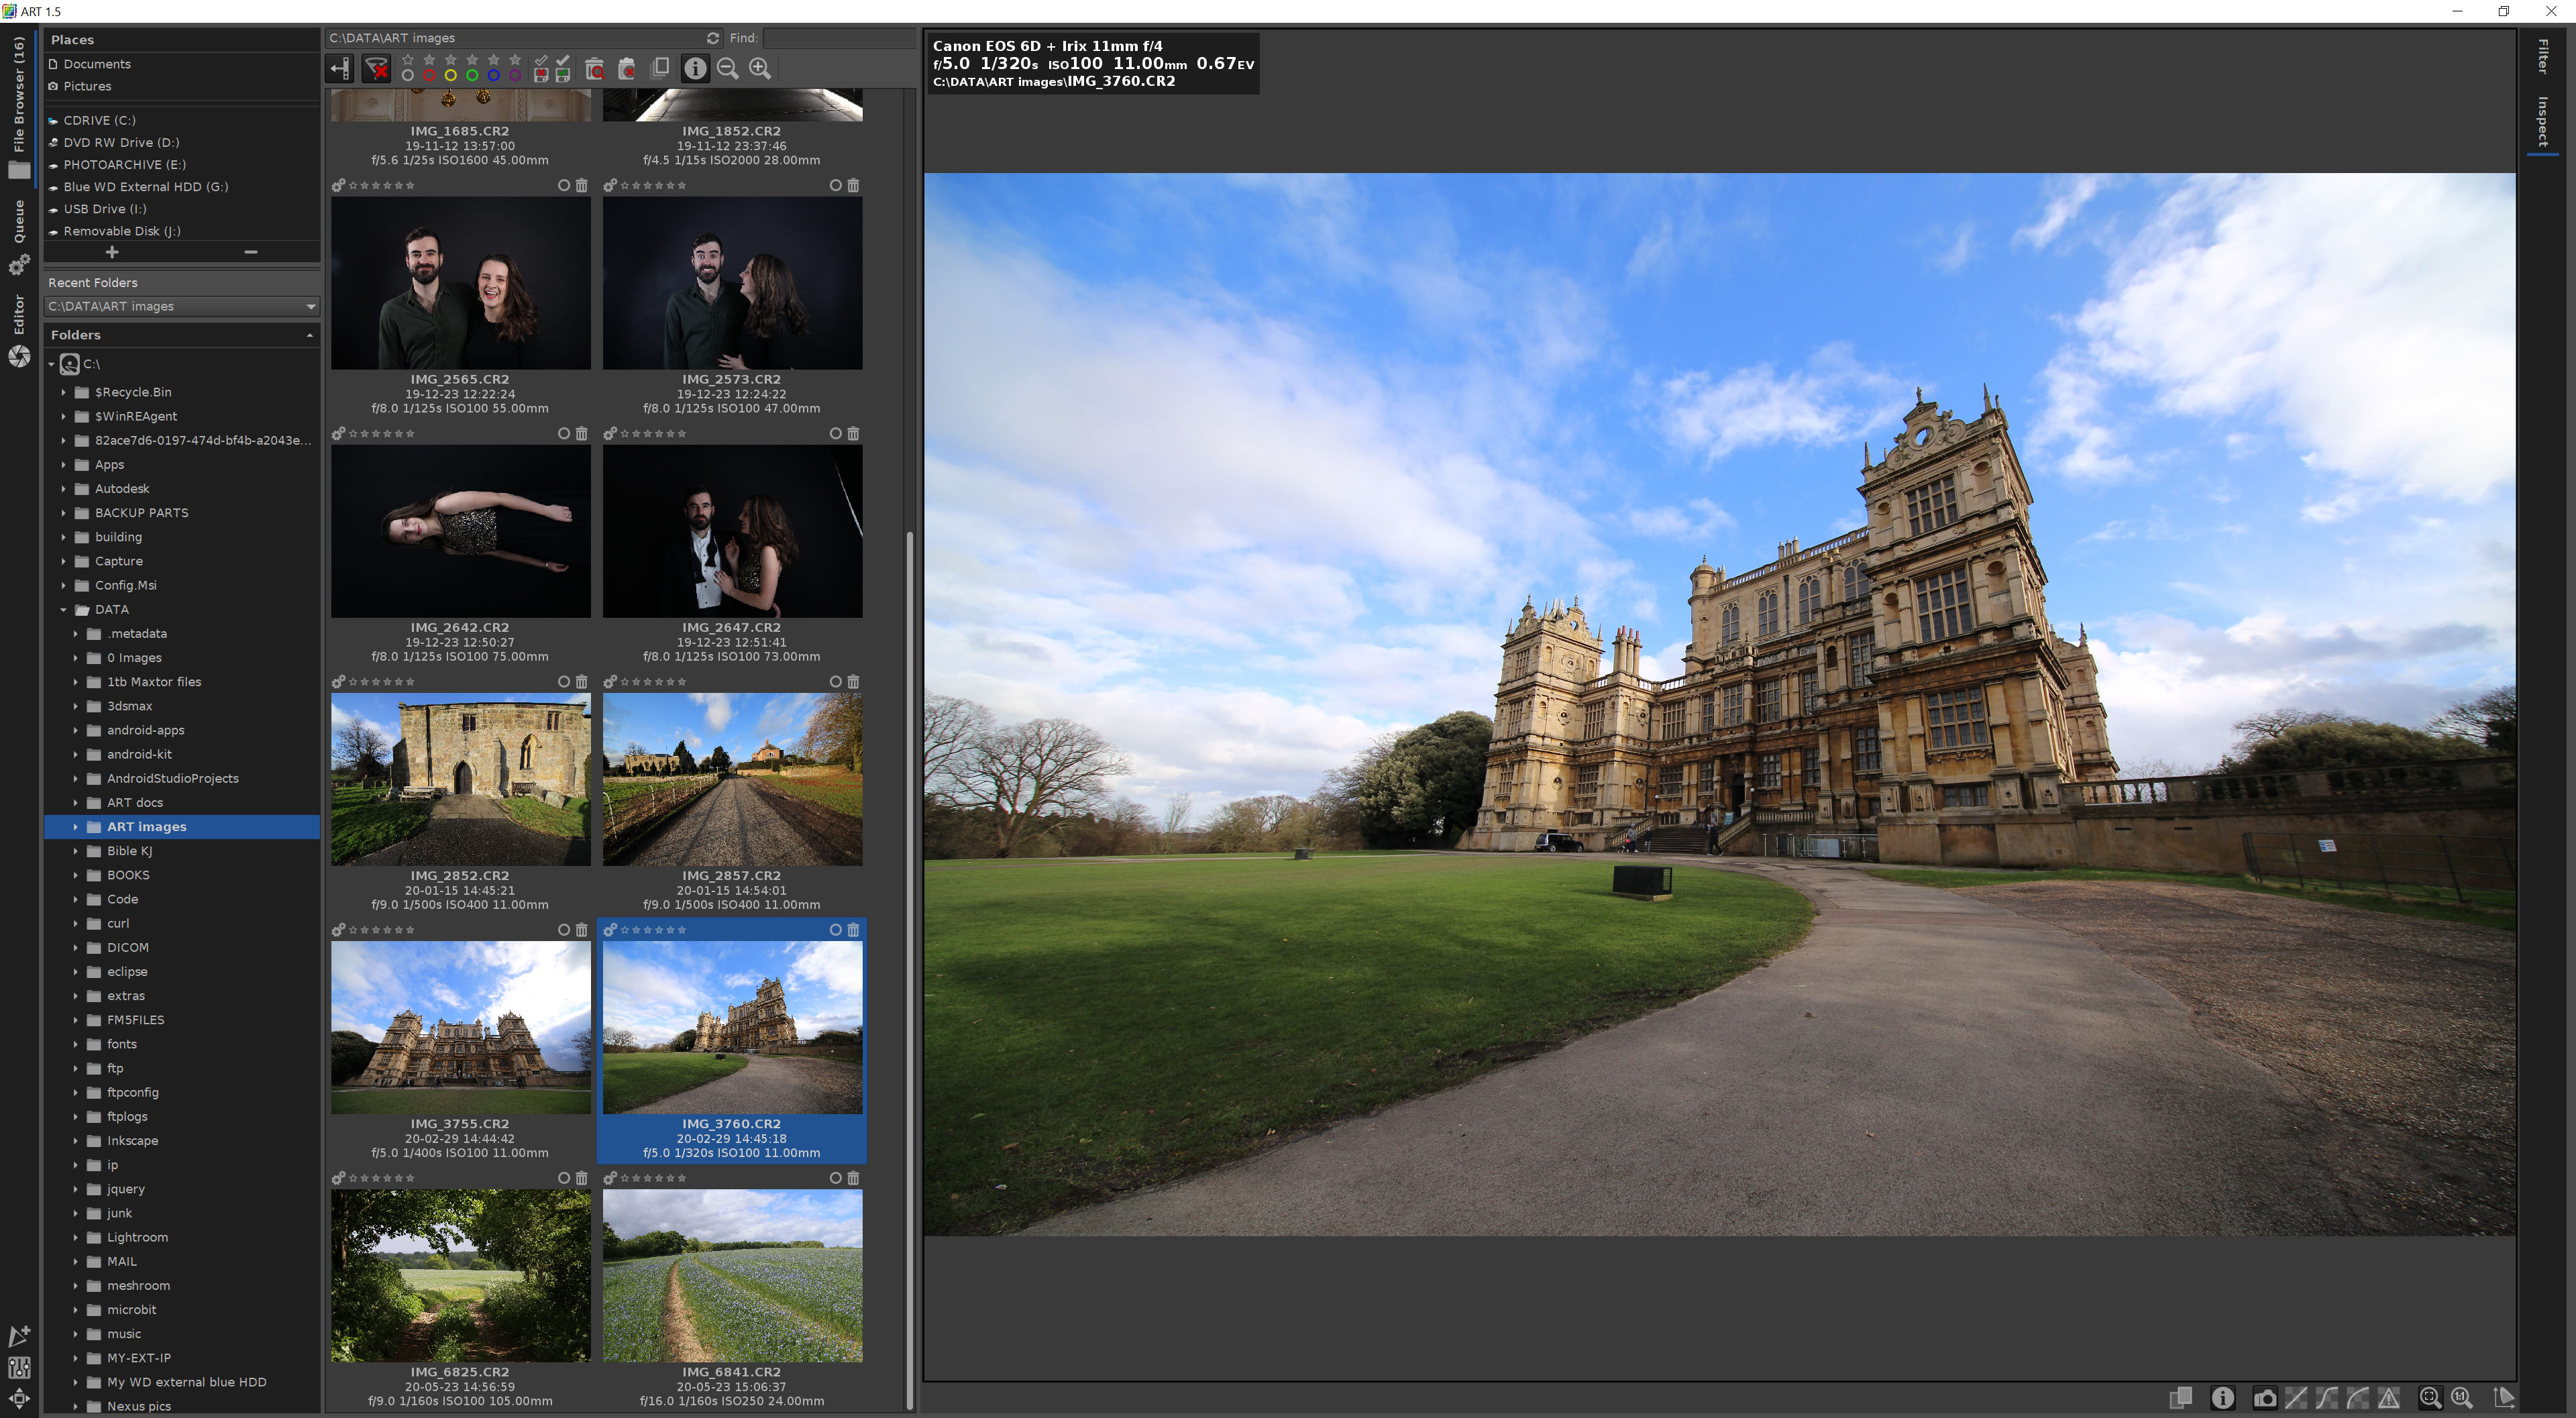
The right hand pane has a second mode – Inspect. Select this by clicking the Inspect tab at the top right of the screen:

The middle and right pane are replaced with a scrollable pane of thumbnails and a quick image viewer. Click on any thumbnail to see a preview of the image:
At the bottom right of the Inspect pane there are some buttons which let you choose how the quick preview is displayed:

These controls include:
- View the RAW file's embedded JPEG
- View a fast RAW rendering with linear tone curve
- View a fast RAW rendering with a film-like tone curve
- View a fast RAW rendering with a shadow-boosting tone curve
- View a monochrome version of the image showing clipped pixels highlighted in colour
- Fit the current image to the screen
- View the image in 1:1 pixel size.
Open an image
Double-click on a thumbnail image from either Filter pane or the Inspect pane, to see the Editor screen:

This RAW image (of Wollaton Hall in Nottinghamshire, UK, by Barry Thomas) is public domain and is available to download here so you can match these descriptions with the steps you take on your own computer.
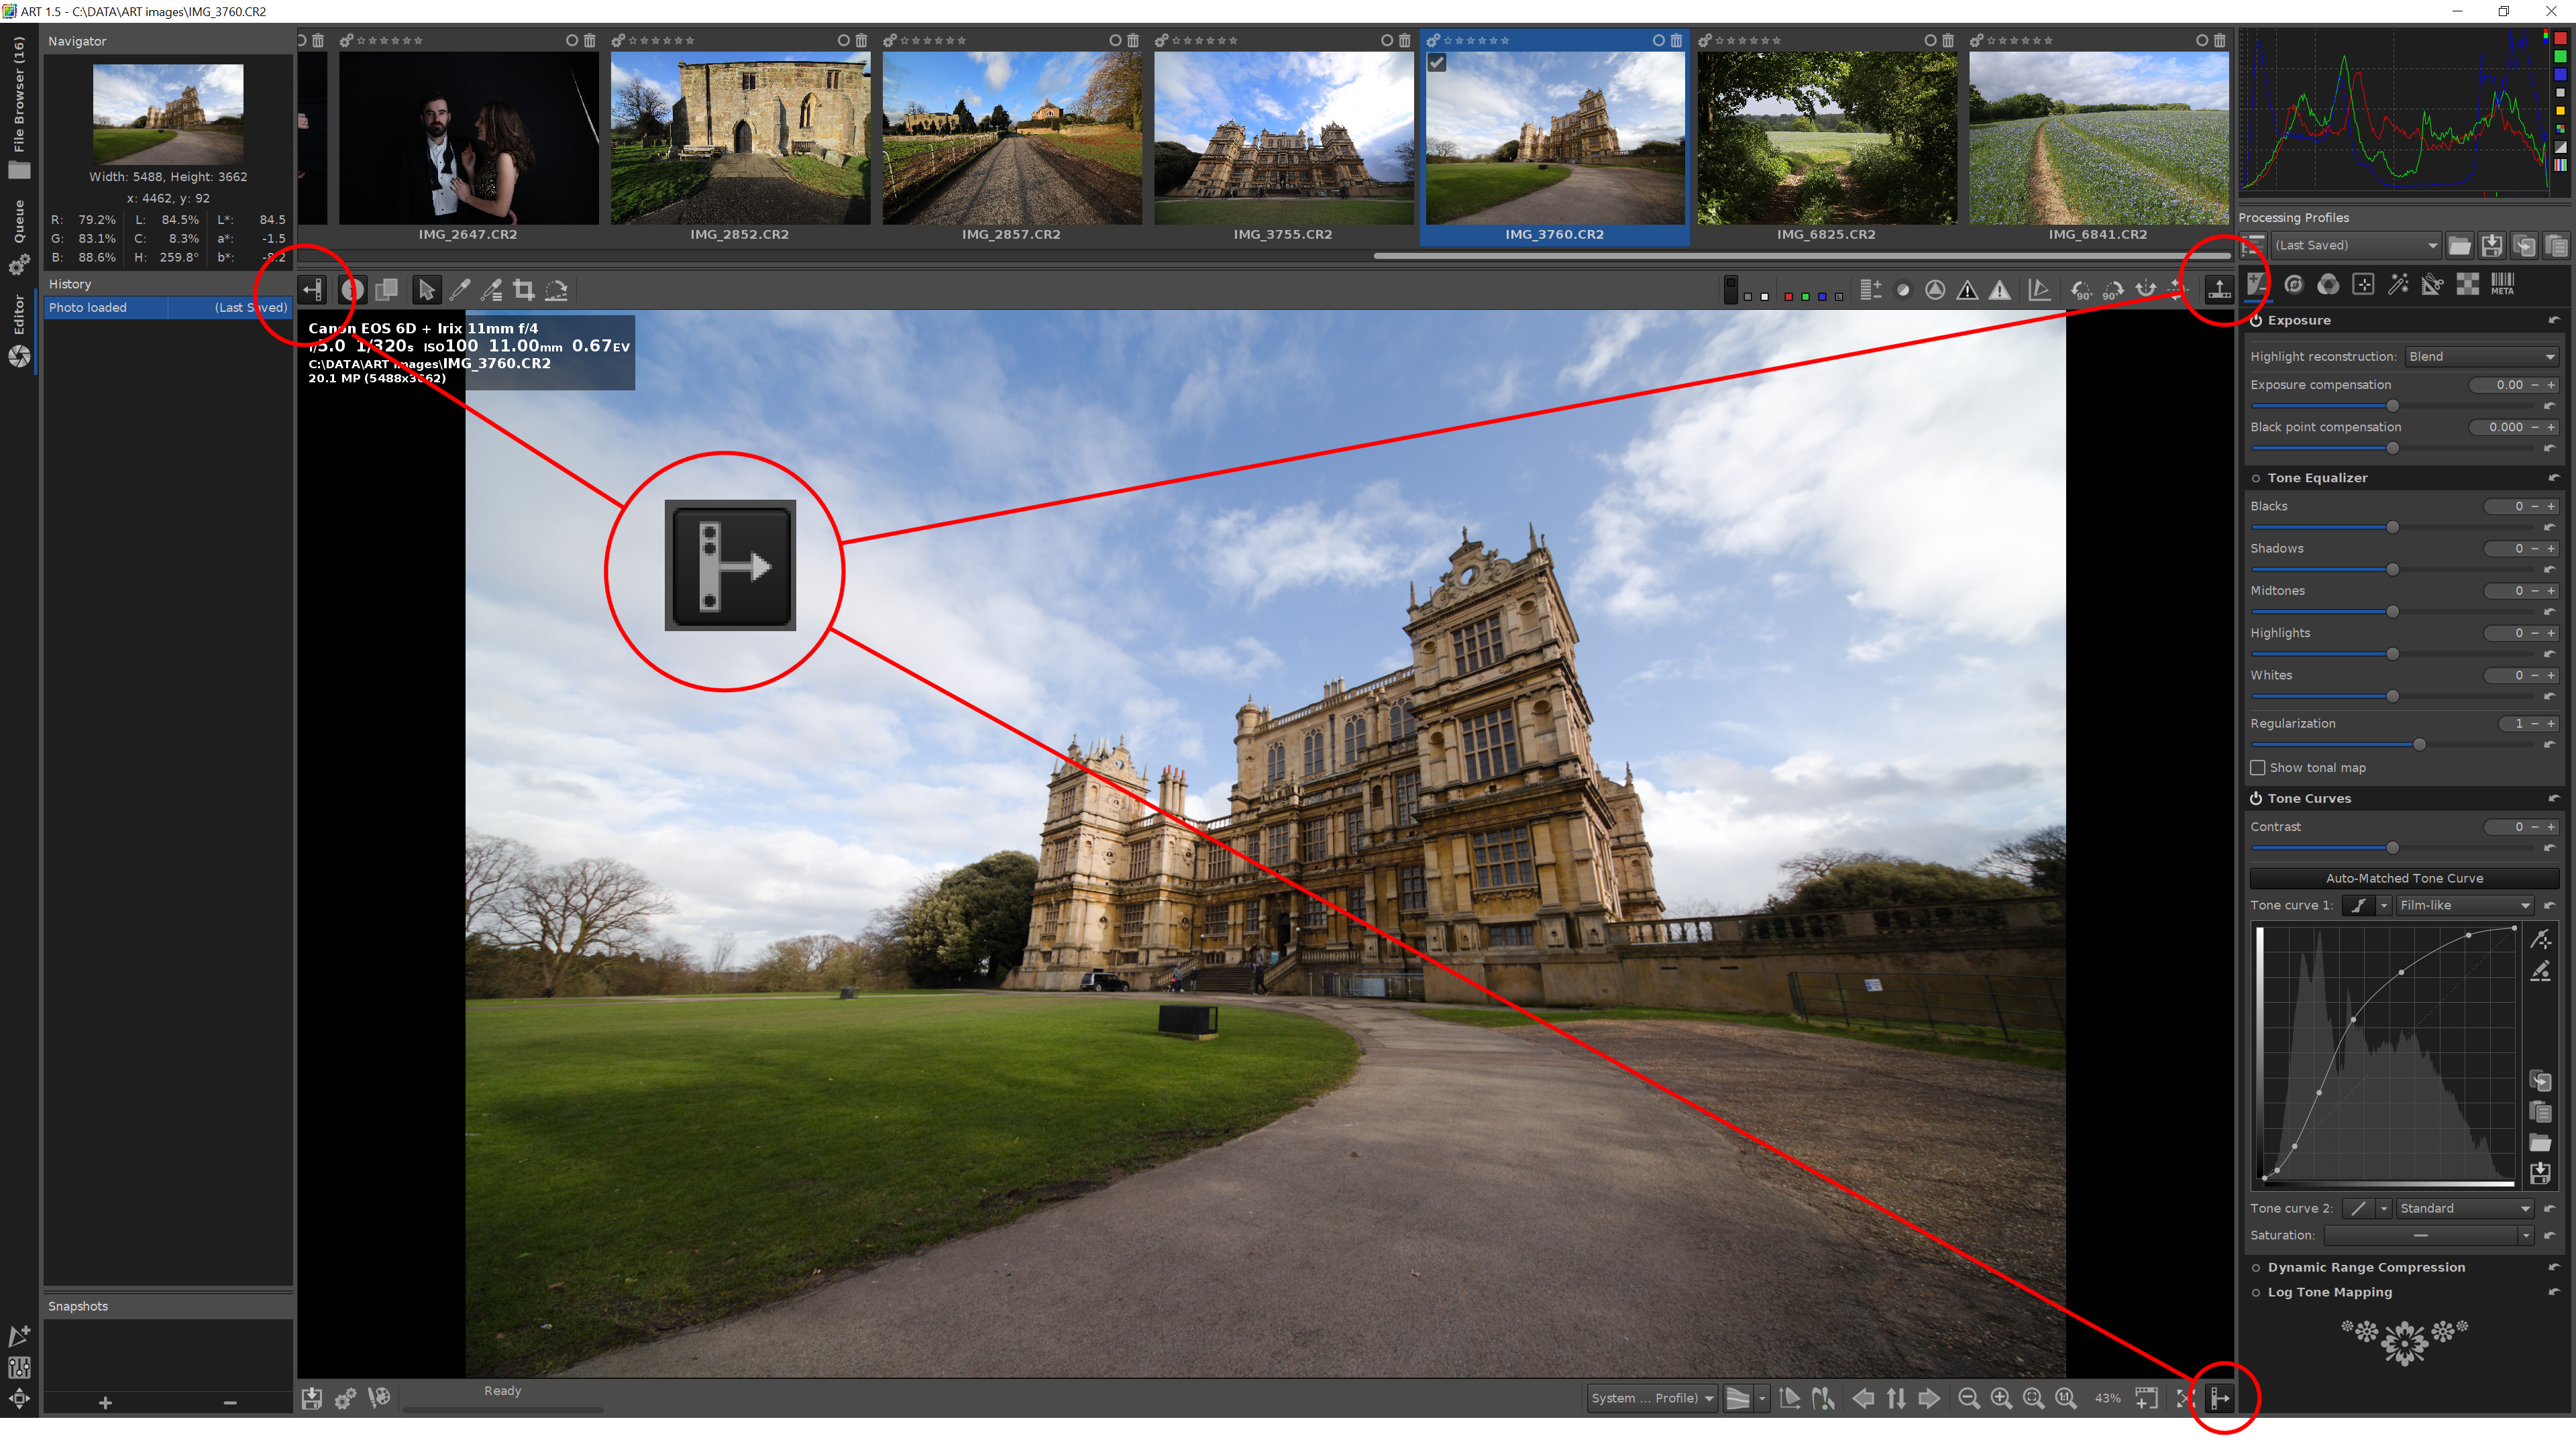
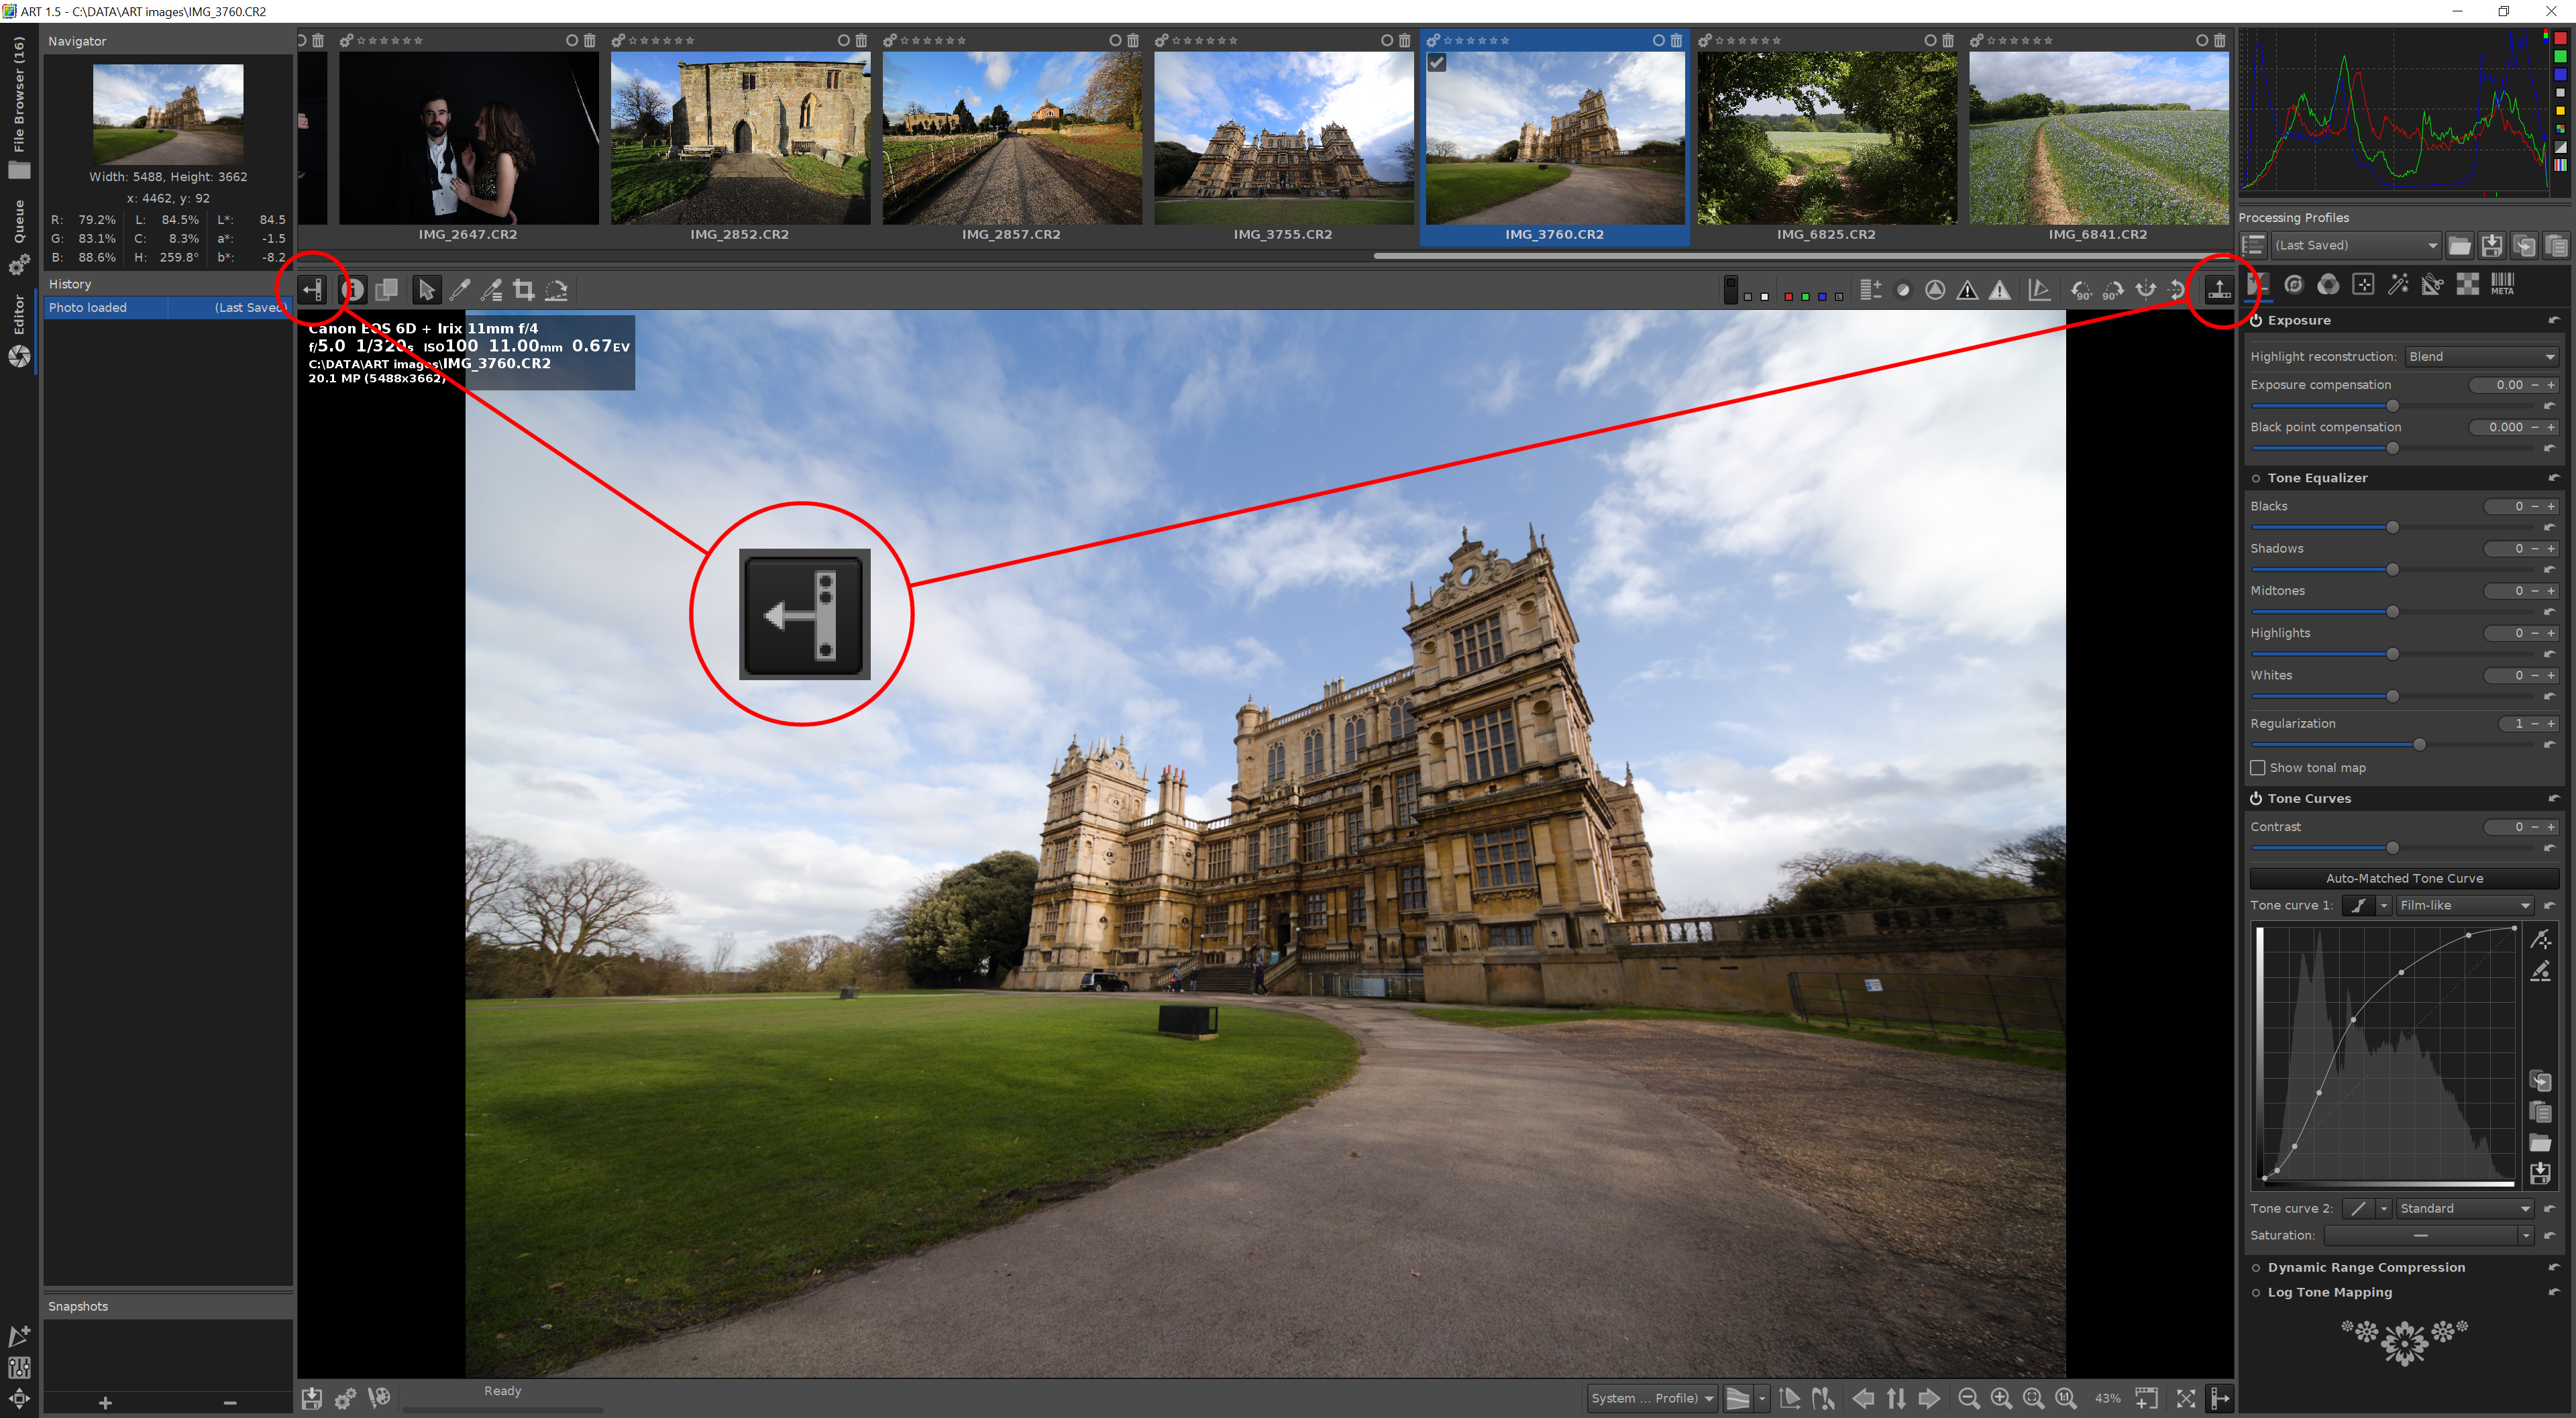
The Editor screen offers a range of new tools and controls, but they are grouped into three main panes, the Navigator and History at the left, the ‘Film-strip' across the top and the Processing Tools on the right.
These three panes can be closed and opened, to leave more room for the main image. There are three buttons which do this:
 Click each of these buttons – the panels collapse out
of sight, leaving just the image currently loaded in the editor. Now
click each one again to reopen the three panels.
Click each of these buttons – the panels collapse out
of sight, leaving just the image currently loaded in the editor. Now
click each one again to reopen the three panels.
The arrow on each button shows the direction of the panel will move when the button is clicked.
The Navigator and History panel
Navigator
The top of this panel shows a thumbnail of the current image with basic RGB, LCH and lab colour figures. When you have zoomed into the image in the main editing panel, a red line is overlaid on the thumbnail showing the extent of the image currently in view in the main panel. This red overlay can be moved by clicking and dragging, to move the image around the main panel.
History
In each editing session, every processing change you make is listed here, so if you want to go back to a specific point in the sequence of steps, just click on one of the items in the list. You will see this in action later when we make a number of changes to an image.
Snapshots
At the bottom of the left hand panel is the Snapshots pane. When you reach a point in processing that you would like to keep for later you can save a snapshot. You can make as many as you like and they are all stored alongside the RAW image for later. You will see this in action later when we make a long sequence of processing changes on one file.
The Film-strip panel
Above the main image pane is a row of thumbnails of the images in the current folder. You can browse left and right using the arrow keys or the horizontal scollbar. The current image is highlighted in the ‘film strip'.
The Processing Tools panel
Before we look at some simple processing steps, let's just make a bit more screen room for the image itself.
Click the panel buttons at top left and top right to close the Navigator / History panel and the Film-strip:
The screen now looks like this, showing the image and the processing tools panel:
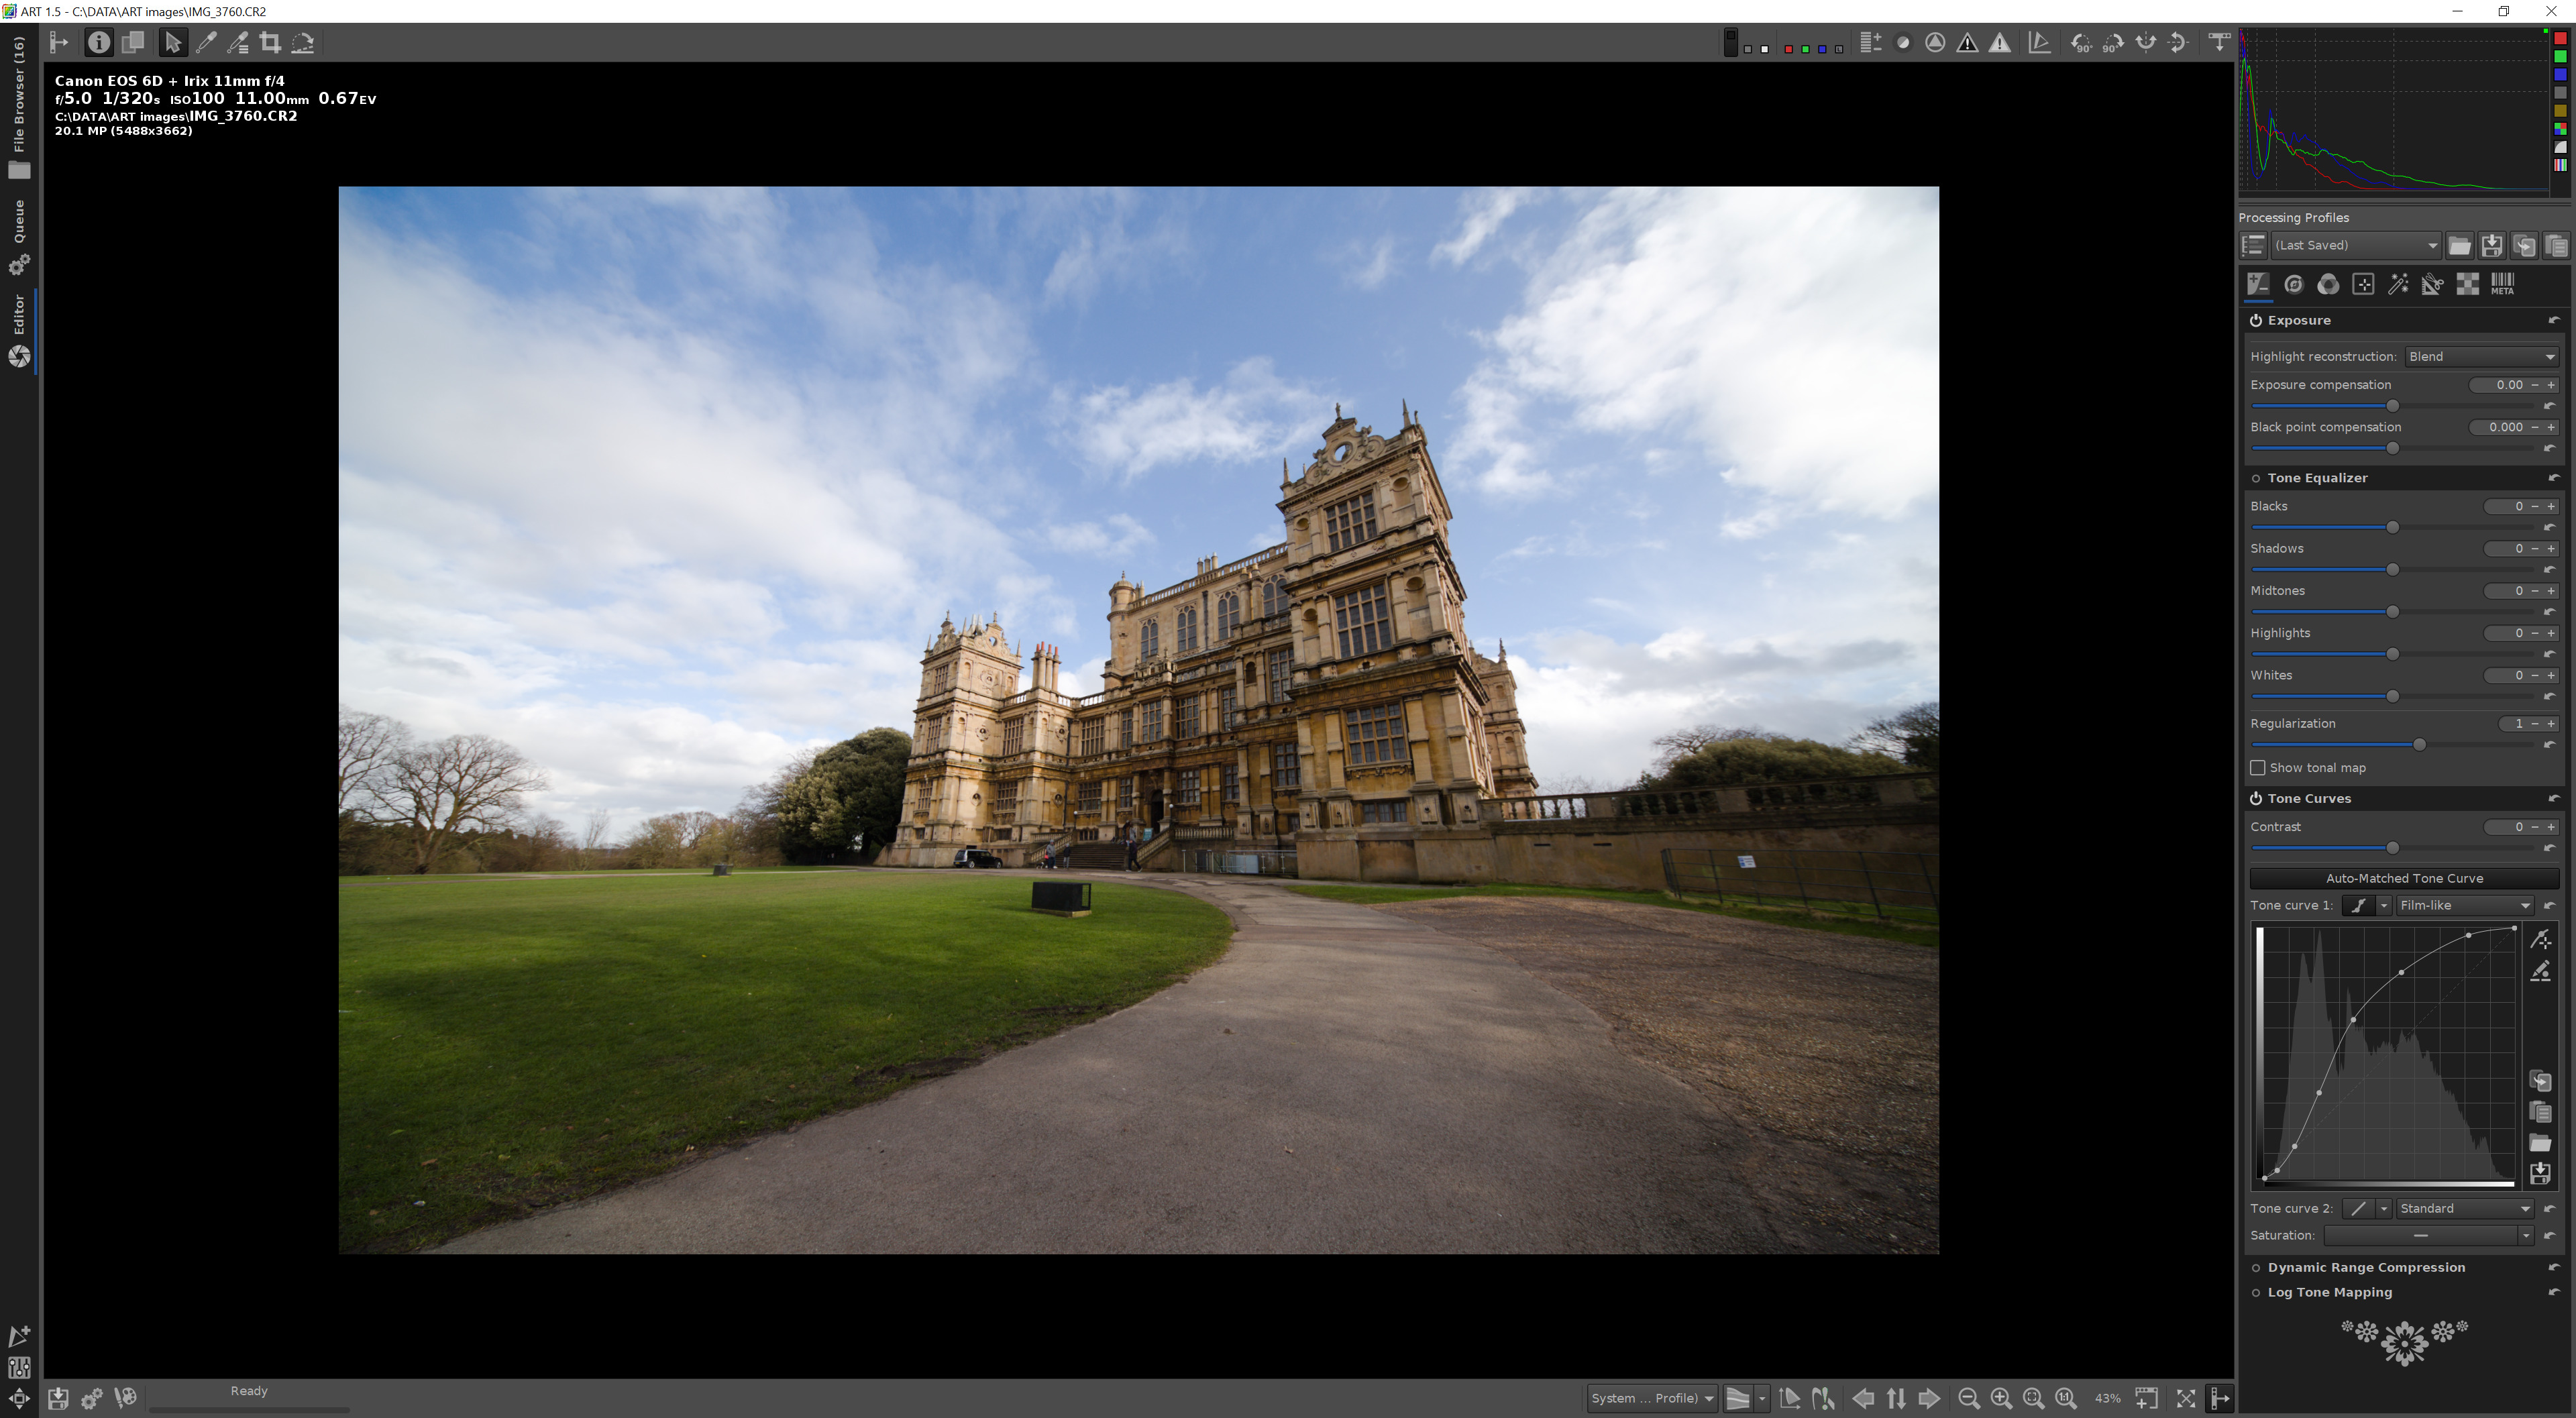
I haven't zoomed the image in or out, so it is just at it's default size, which filled the image pane when the other panels were visible.
At the bottom right there are some controls to help you zoom to the right level:

From left to right they are zoom in, zoom out, fit to screen and 1:1 pixel view.
You can also change the zoom level by scrolling your mouse wheel.
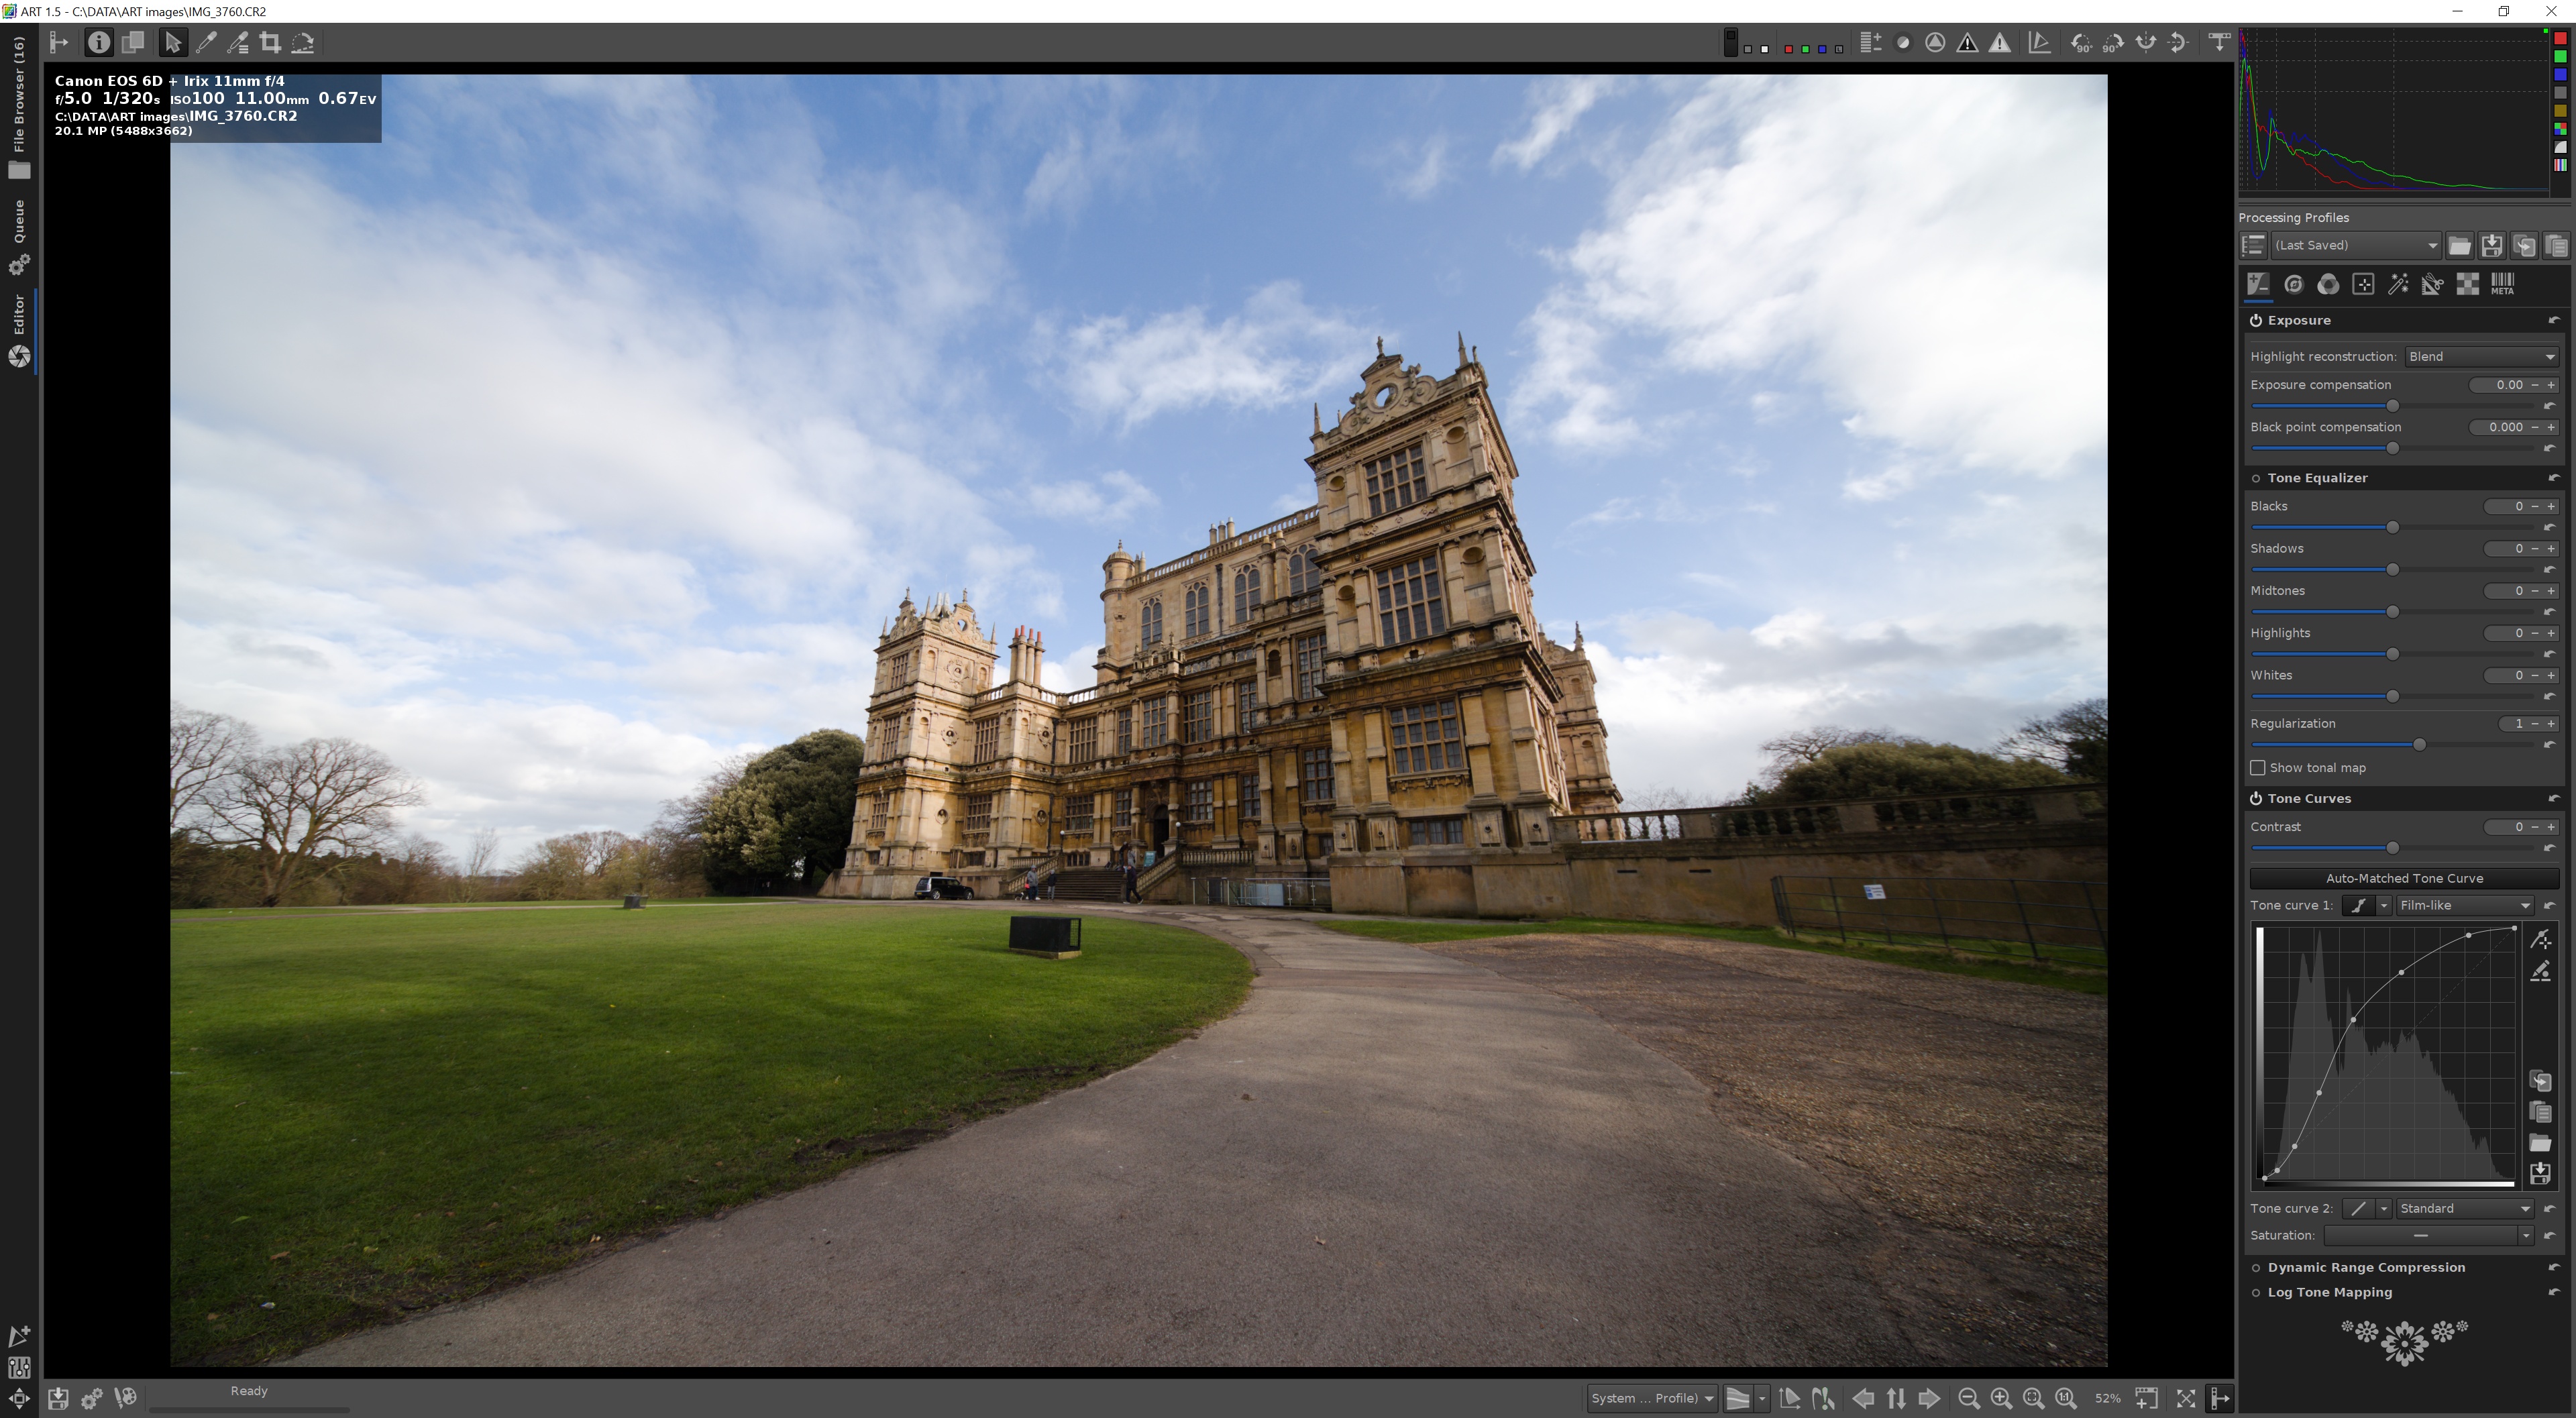
Click the fit to screen button to fill the image pane with the image (Tip: the keyboard shortcut for this button is [f]):
Some simple processing steps
Here are some simple edits to help you get started using the controls in the processing tools pane on the right.
At the top right there are eight buttons for the various main tool groups. Initially the first one is highlighted with a blue underline, this is the Exposure group:

Each tool group is divided into sub-groups, in Exposure they are:
- Exposure
- Tone Equalizer
- Tone Curves
- Dynamic Range Compression
- Log Tone Mapping
All of the tool groups and sub-groups are descibed elsewhere in the documentation, but for now we will look at the Tone Equalizer group:
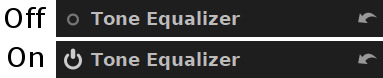
Next to the name of each tool sub-group there is an On/Off switch to enable the tools:
The arrow button at the right allows you to reset all controls in this sub-group to their default values.
Each of the control sub-groups can be collapsed, so the controls look less busy. Just click on the name of the subgroup to collapse or reopen that panel of tools.
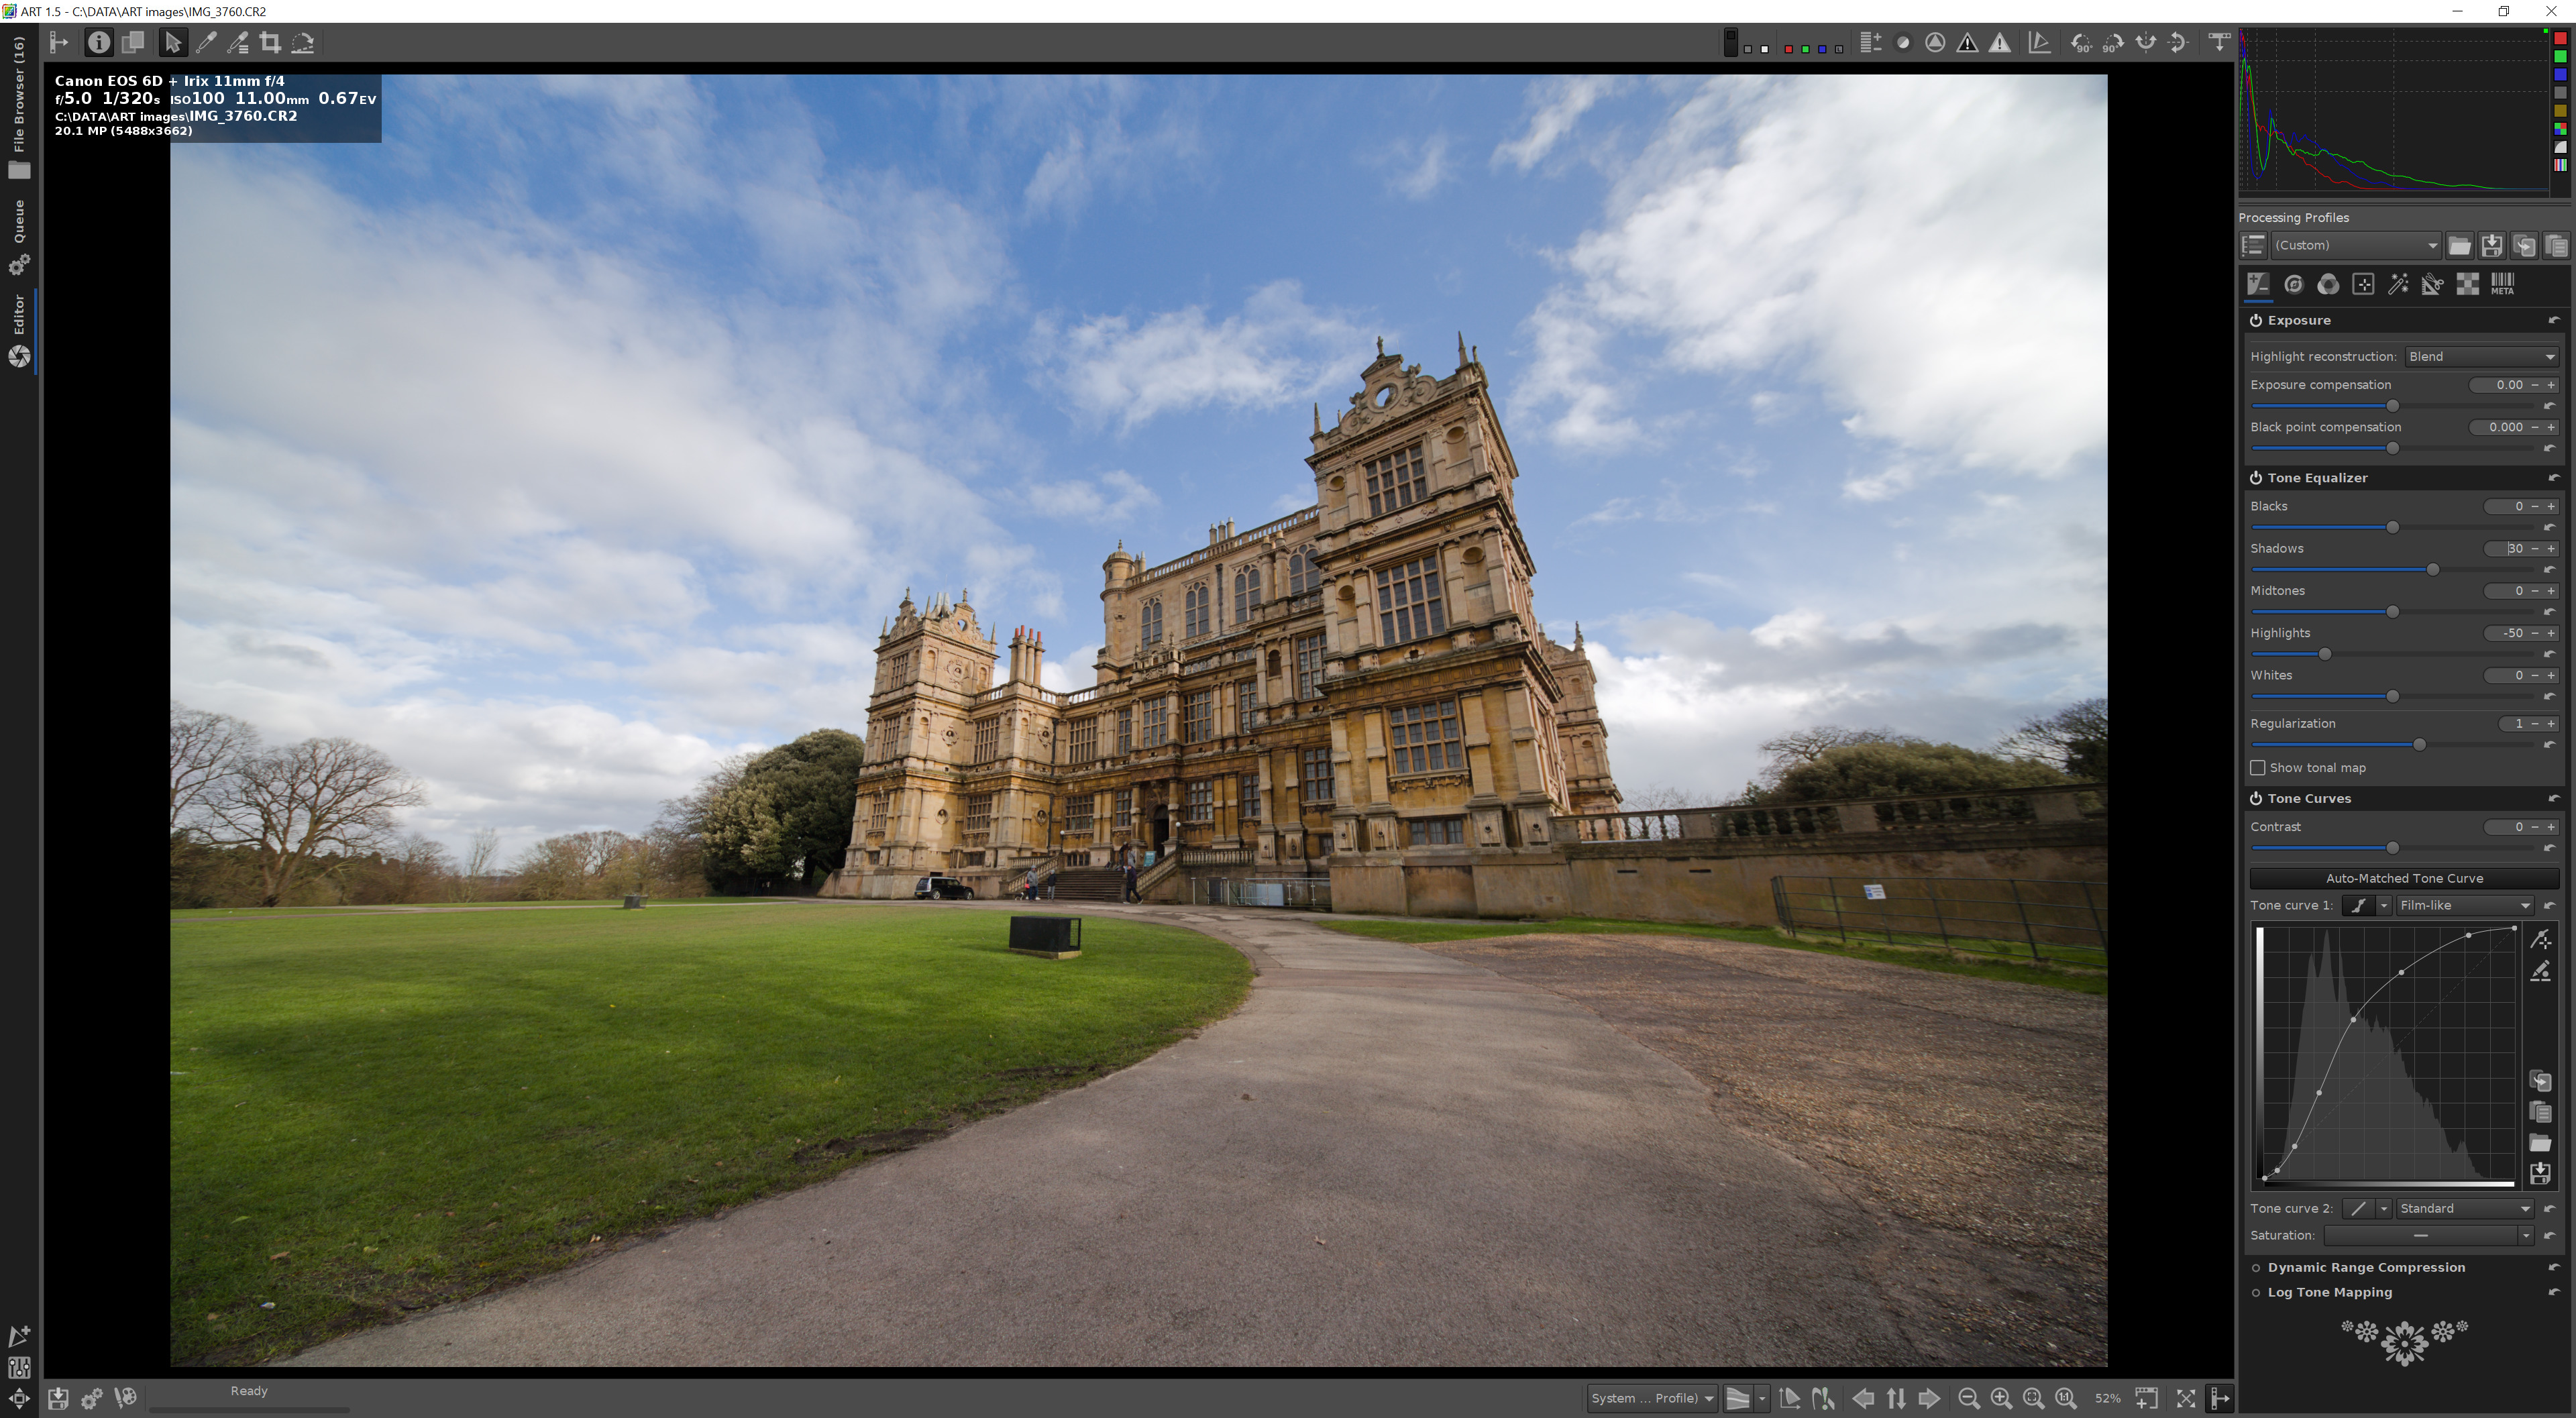
Switch on the Tone Equalizer sub-group, so it looks like this:
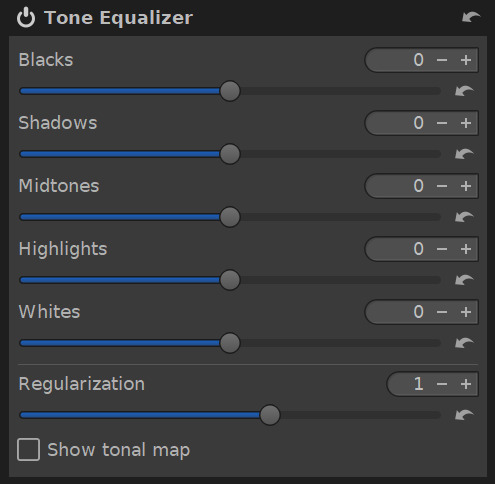
The image of the building is reasonably well exposed, but the near face is in shade, so we'll lighten the shadows a little.
Click and drag the Shadows control to the left and right to see the effect. There is a slight lag as the computer processes the image from the camera's RAW data. The bottom left of the screen shows a progress bar:

I settled on +30 as a good value to lift the shadows in the image.
The clouds at the top right are a little over-exposed, so we can pull that brightness down by sliding the Highlights control to the left. I settled on a value of -50 for the highlights, so we can see some detail in the lightest part of the clouds. The screen now looks like this:
The second processing tool group is Detail:

The tool subgroups are:
- Spot Removal
- Sharpening
- Noise Reduction
- Impulse Noise Reduction
- Defringe
We'll use the Sharpening tool to sharpen this image. Click on the On/Off switch next to the name of the Sharpening subgroup to enable this tool.
To make the screen less busy, click on the names of the other subgroups to collapse them, leaving just Sharpening open. (Tip: Right click on the name of a subgroup and that one is opened, while all other subgroups are closed):
The tool panel looks like this:
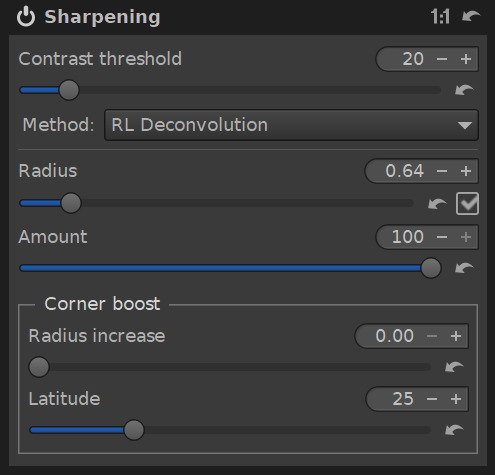
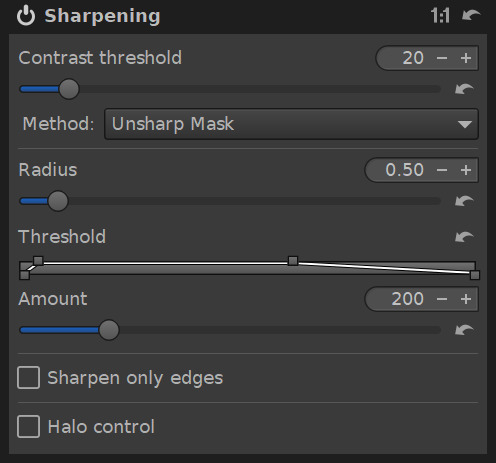
There are two methods for sharpening the image, RL Deconvolution and Unsharp Mask. I'll use Unsharp Mask for this image, so click the Method dropdown and select Unsharp Mask, so the tool panel looks like this:
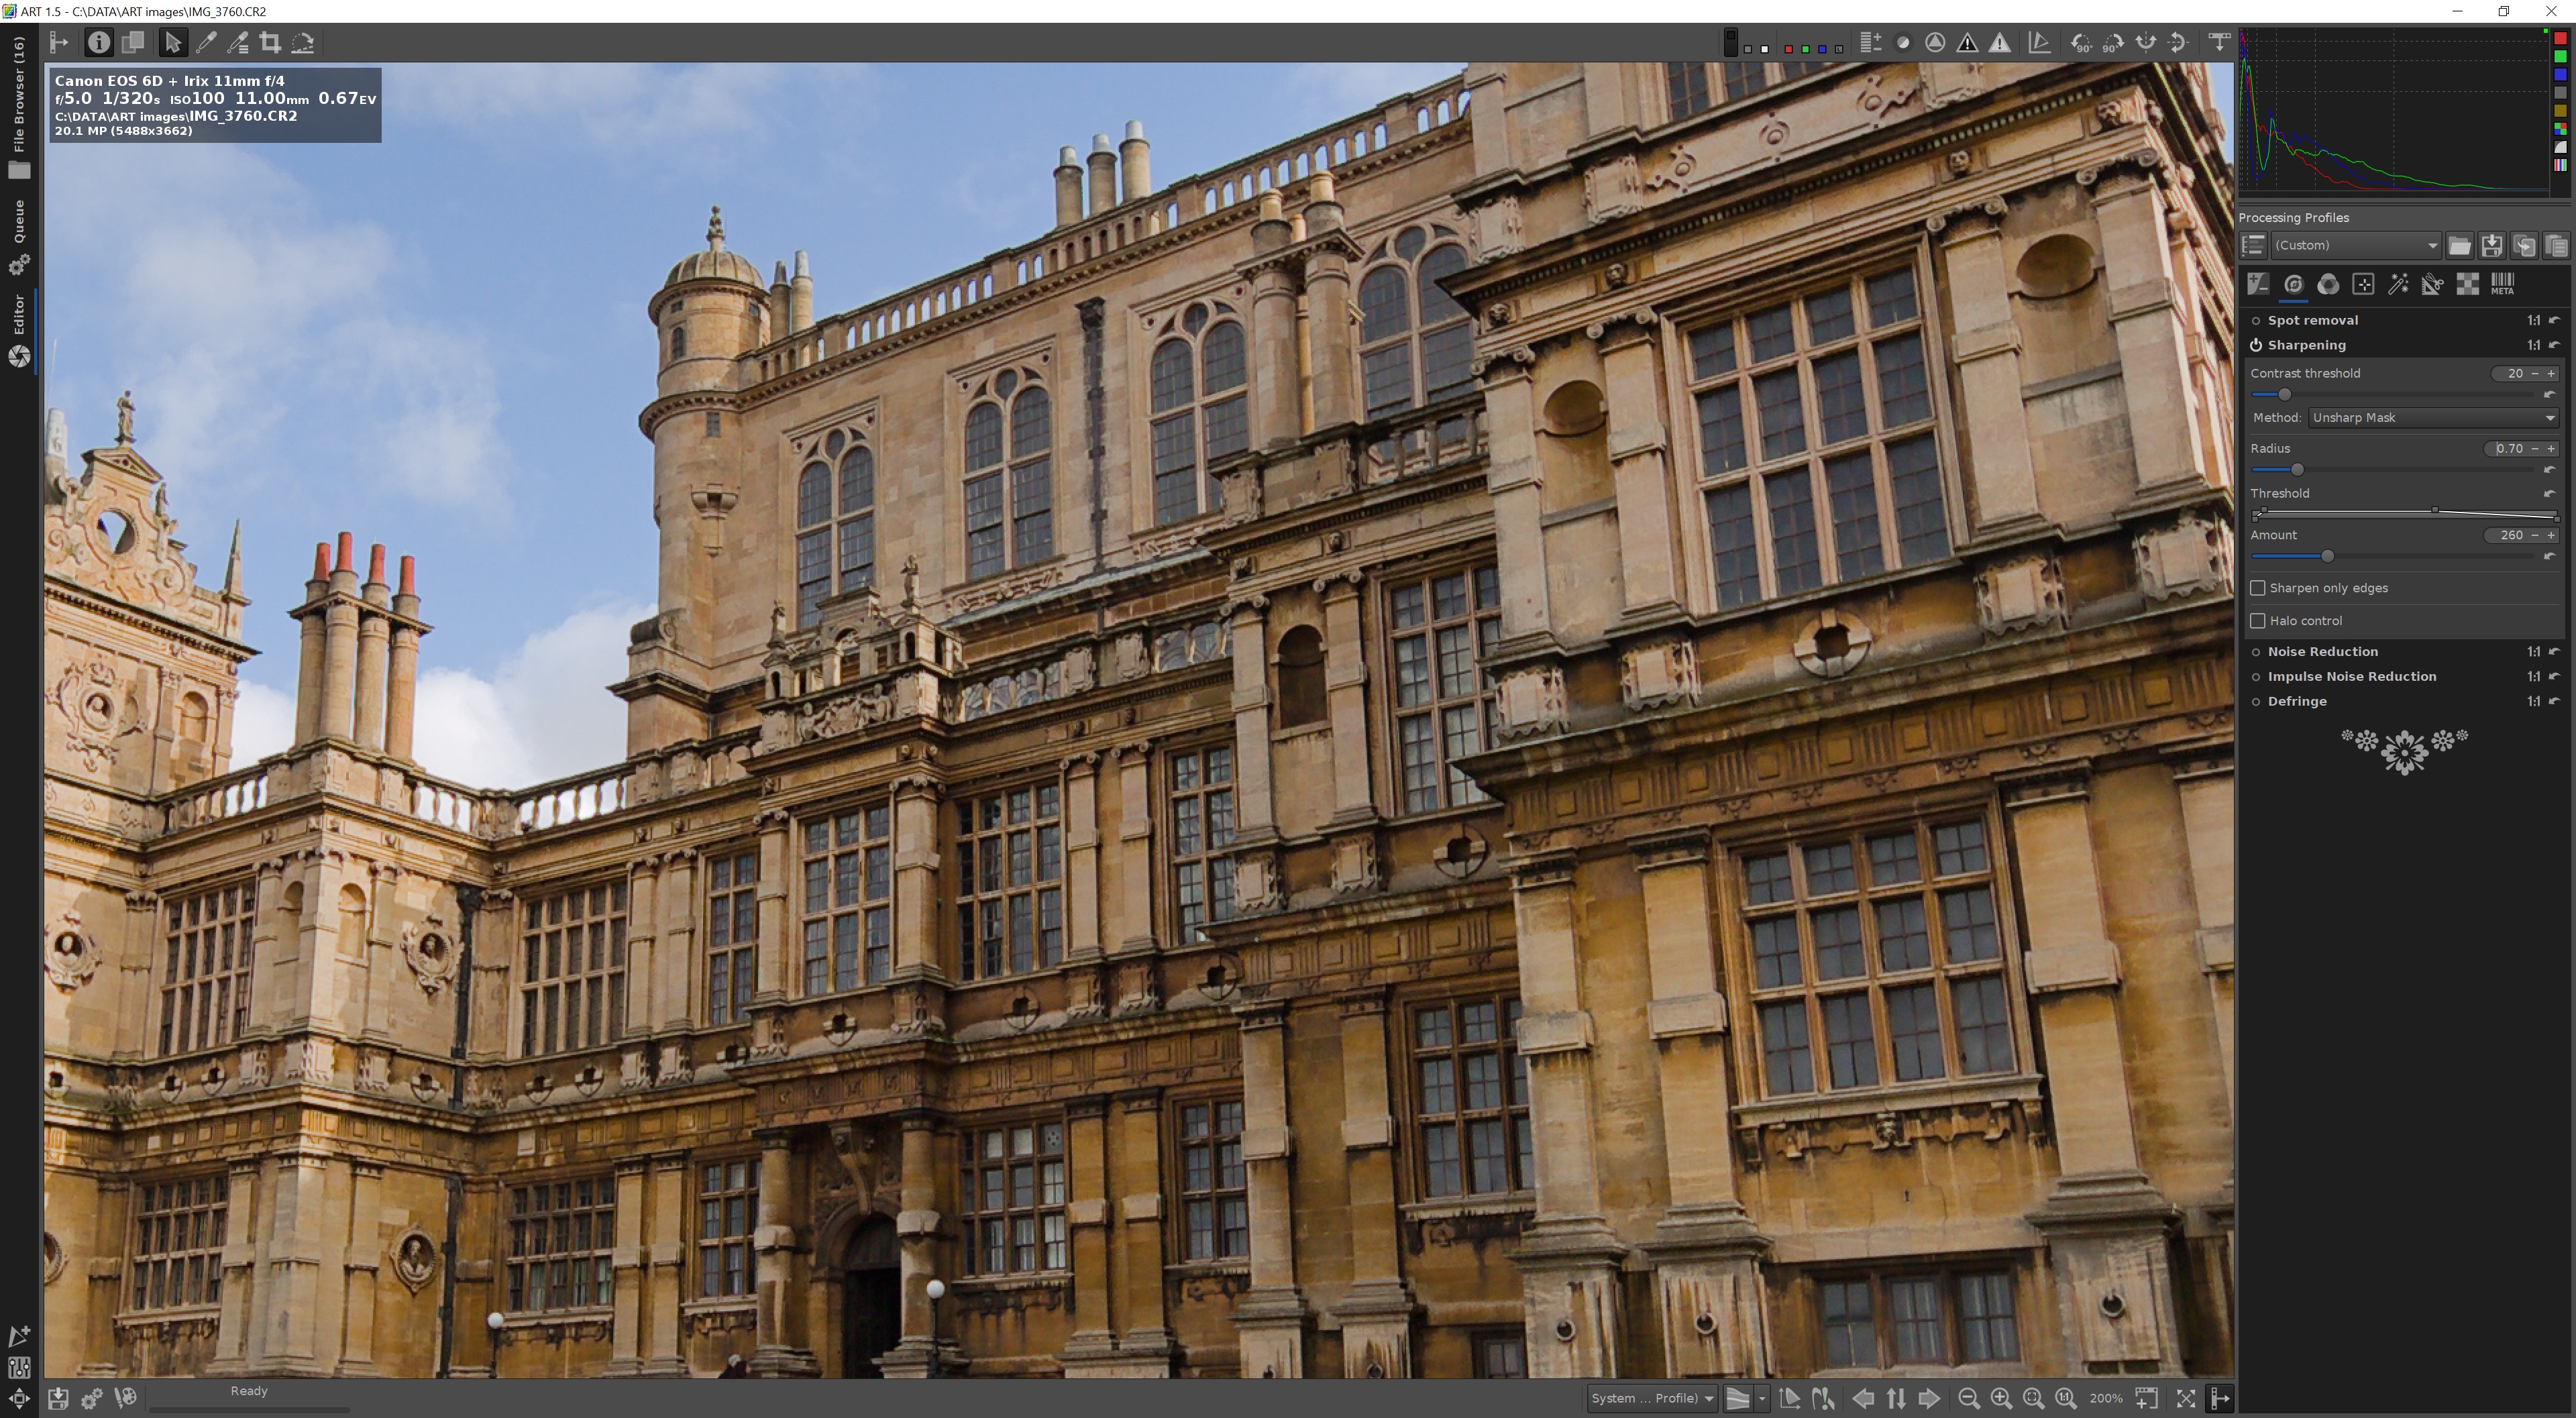
So we can see in detail the effects of the Sharpening tool, we'll zoom in. Click on the 1:1 button at the bottom right of the screen so we see actual 1:1 pixels, or 100% zoom:
Depending on the resolution of your monitor you'll see more or less of the image. If you have a lower resolution screen you might see just the middle of the front of the building.
When we switched on the Sharpening tool, some default values were set, so the image you see now has had some sharpening applied. I'd like to increase the effect though, to really pull out the detail in the ornate stone work, so I'll change the Radius value to 0.70 and the Amount value to 260:

Here is a zoomed in view of the middle of the image:
Transform tools
Zooming back out to fit the image to the screen (Shortcut [f]), we can see that because the image was taken with a very wide angle lens, the verticals converge heavily towards the top.
We can adjust that to make the building look less distorted and then crop the image a little to remove some of the foreground and sky.
The sixth processing tool group is Transform:
![]()
Click on the Transform button to open that tool group. The tool subgroups are:
- Crop
- Resize
- Post-Resize Sharpening
- Lens / Geometry
Adjust the verticals
First we'll adjust the verticals in the image using the Lens / Geometry subgroup. Right click on the name of the Lens / Geometry subgroup to open it and close all the others. This subgroup is always On so there is no On/Off switch at the left of the name, just a drop-down arrow to open the subgroup.
We'll use the second pane down, Perspective Correction:

These are default values when the tool is switched on - no correction is applied using these values.
We want to make the image appear wider at the top, so we will use the Vertical perspective slider. Try sliding the control to the right to a value of around +30:
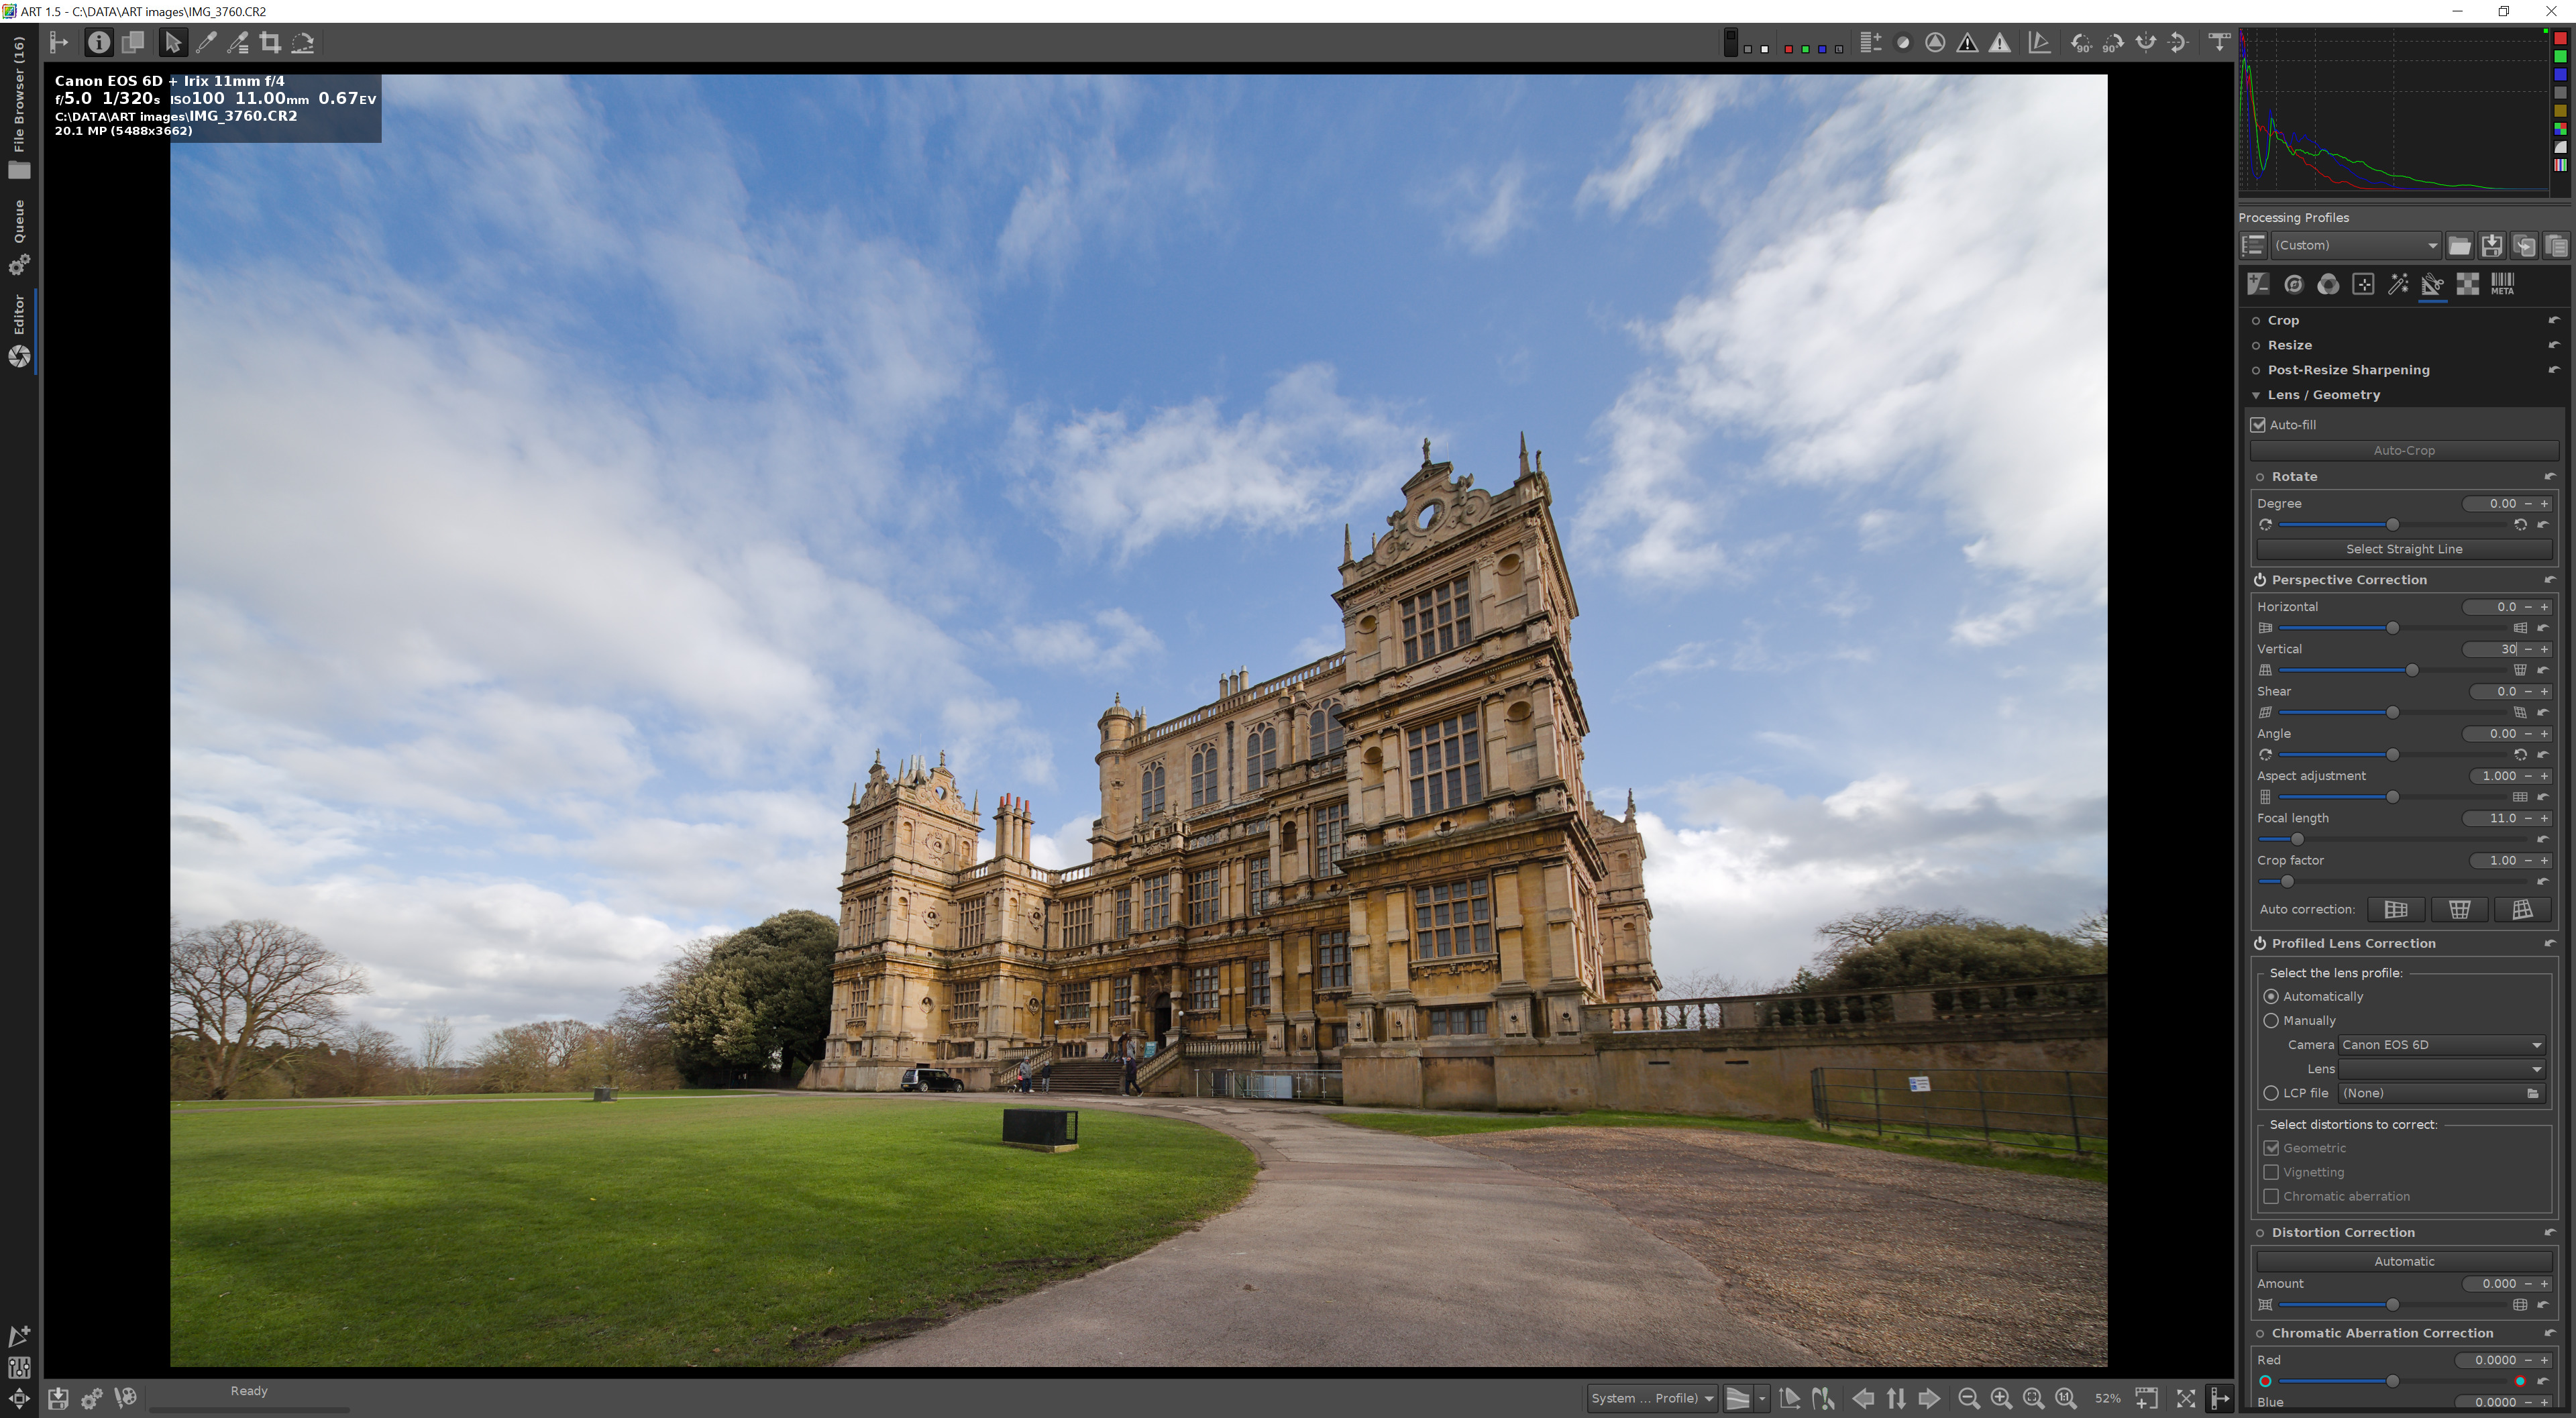
This reduces the converging verticals a little. You might like to use more or less of this correction, according to taste.
At the top of the Lens / Geometry tool subgroup, there is a checkbox for Auto-fill, which by default is checked. This automatically crops the image to remove the edges where the change to the geometry becomes visible. Try unchecking this box and re-checking it to see the effect.
Crop the image
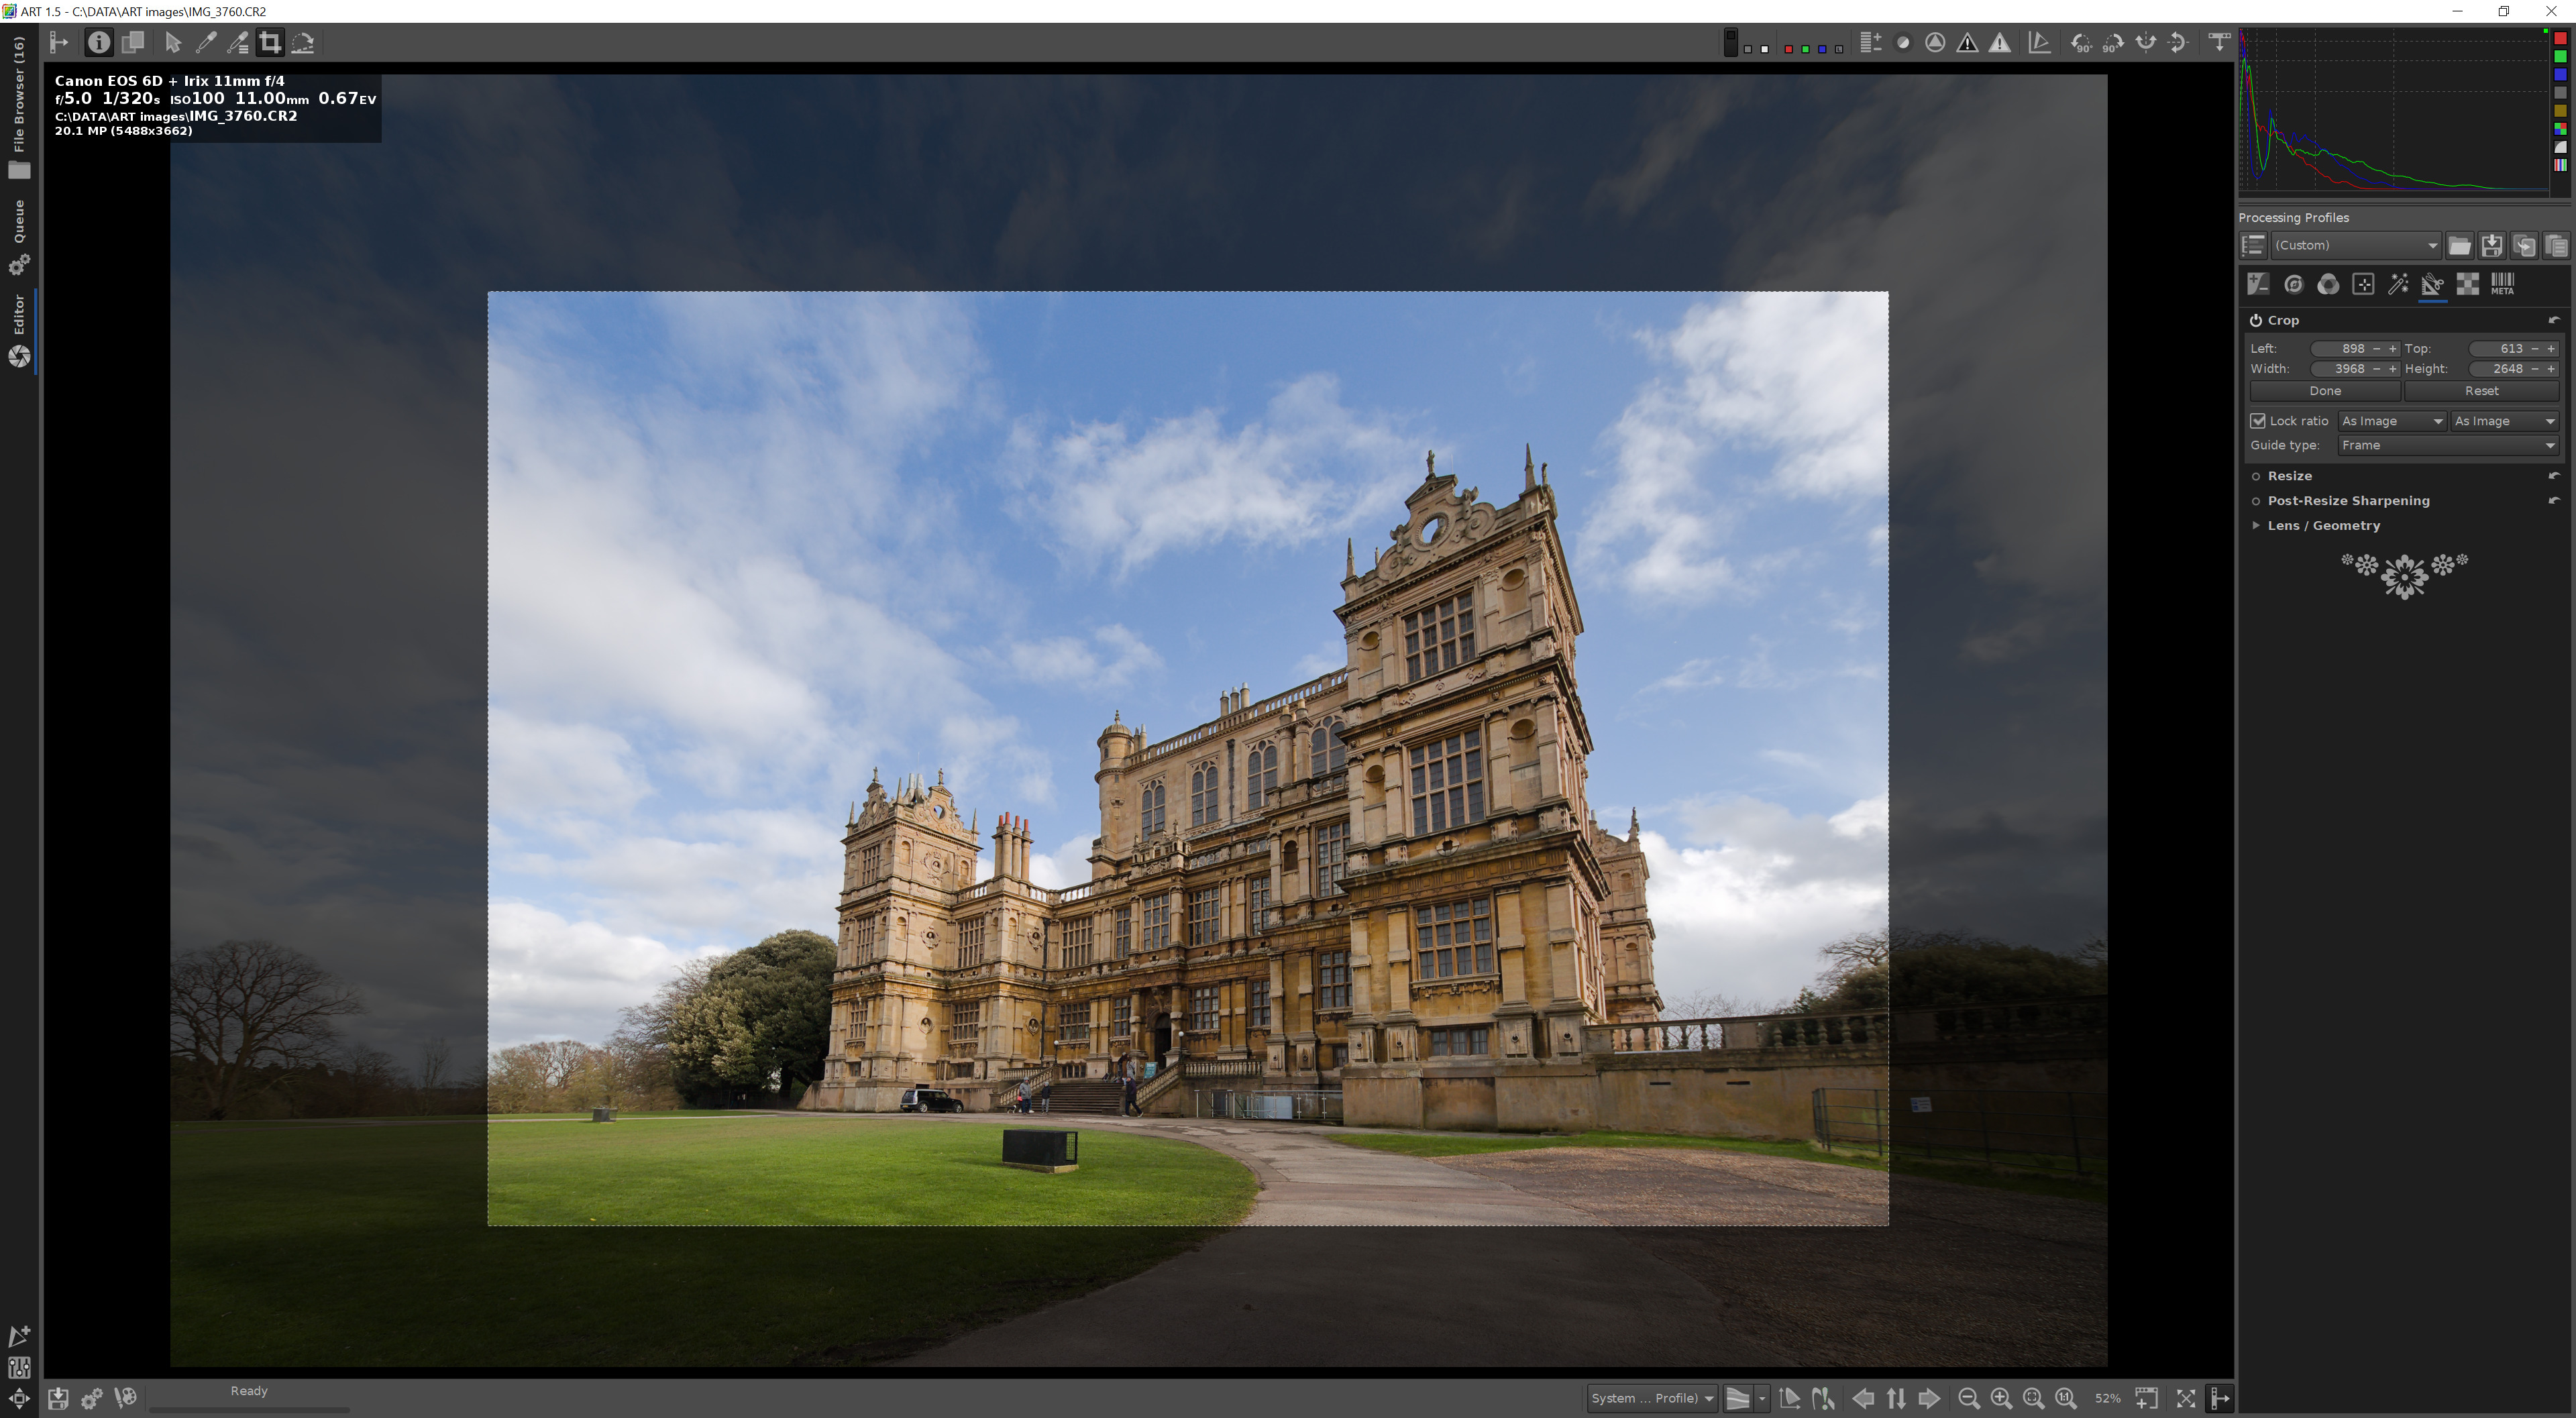
At the top of the Transform tool group, right click on the Crop tool to open it and close the other tools, but don't switch the tool on yet.
The Crop tool group looks like this:

The control shows the start of the cropped area by the left/top corner - by default, 0, 0 - and the width and height of the crop - by default the full width and height of the image – so no cropping has taken place yet.
There are two ways to change this and start to crop the image – switch the tool on and use the +/- controls to change those numbers, which is highly accurate but quite slow, or use click and drag on the image.
At the top left of the screen is a row of tool buttons:

We are just going to look at two of these for now. The first is the arrow button, which allows you to drag the image around the screen, whatever the current zoom level.
The button we will use now is the Crop button, second from the right:

Click on the Crop button, the Crop tool is switched on and you can click and drag slowly across the image to select an area for the crop, something like this:
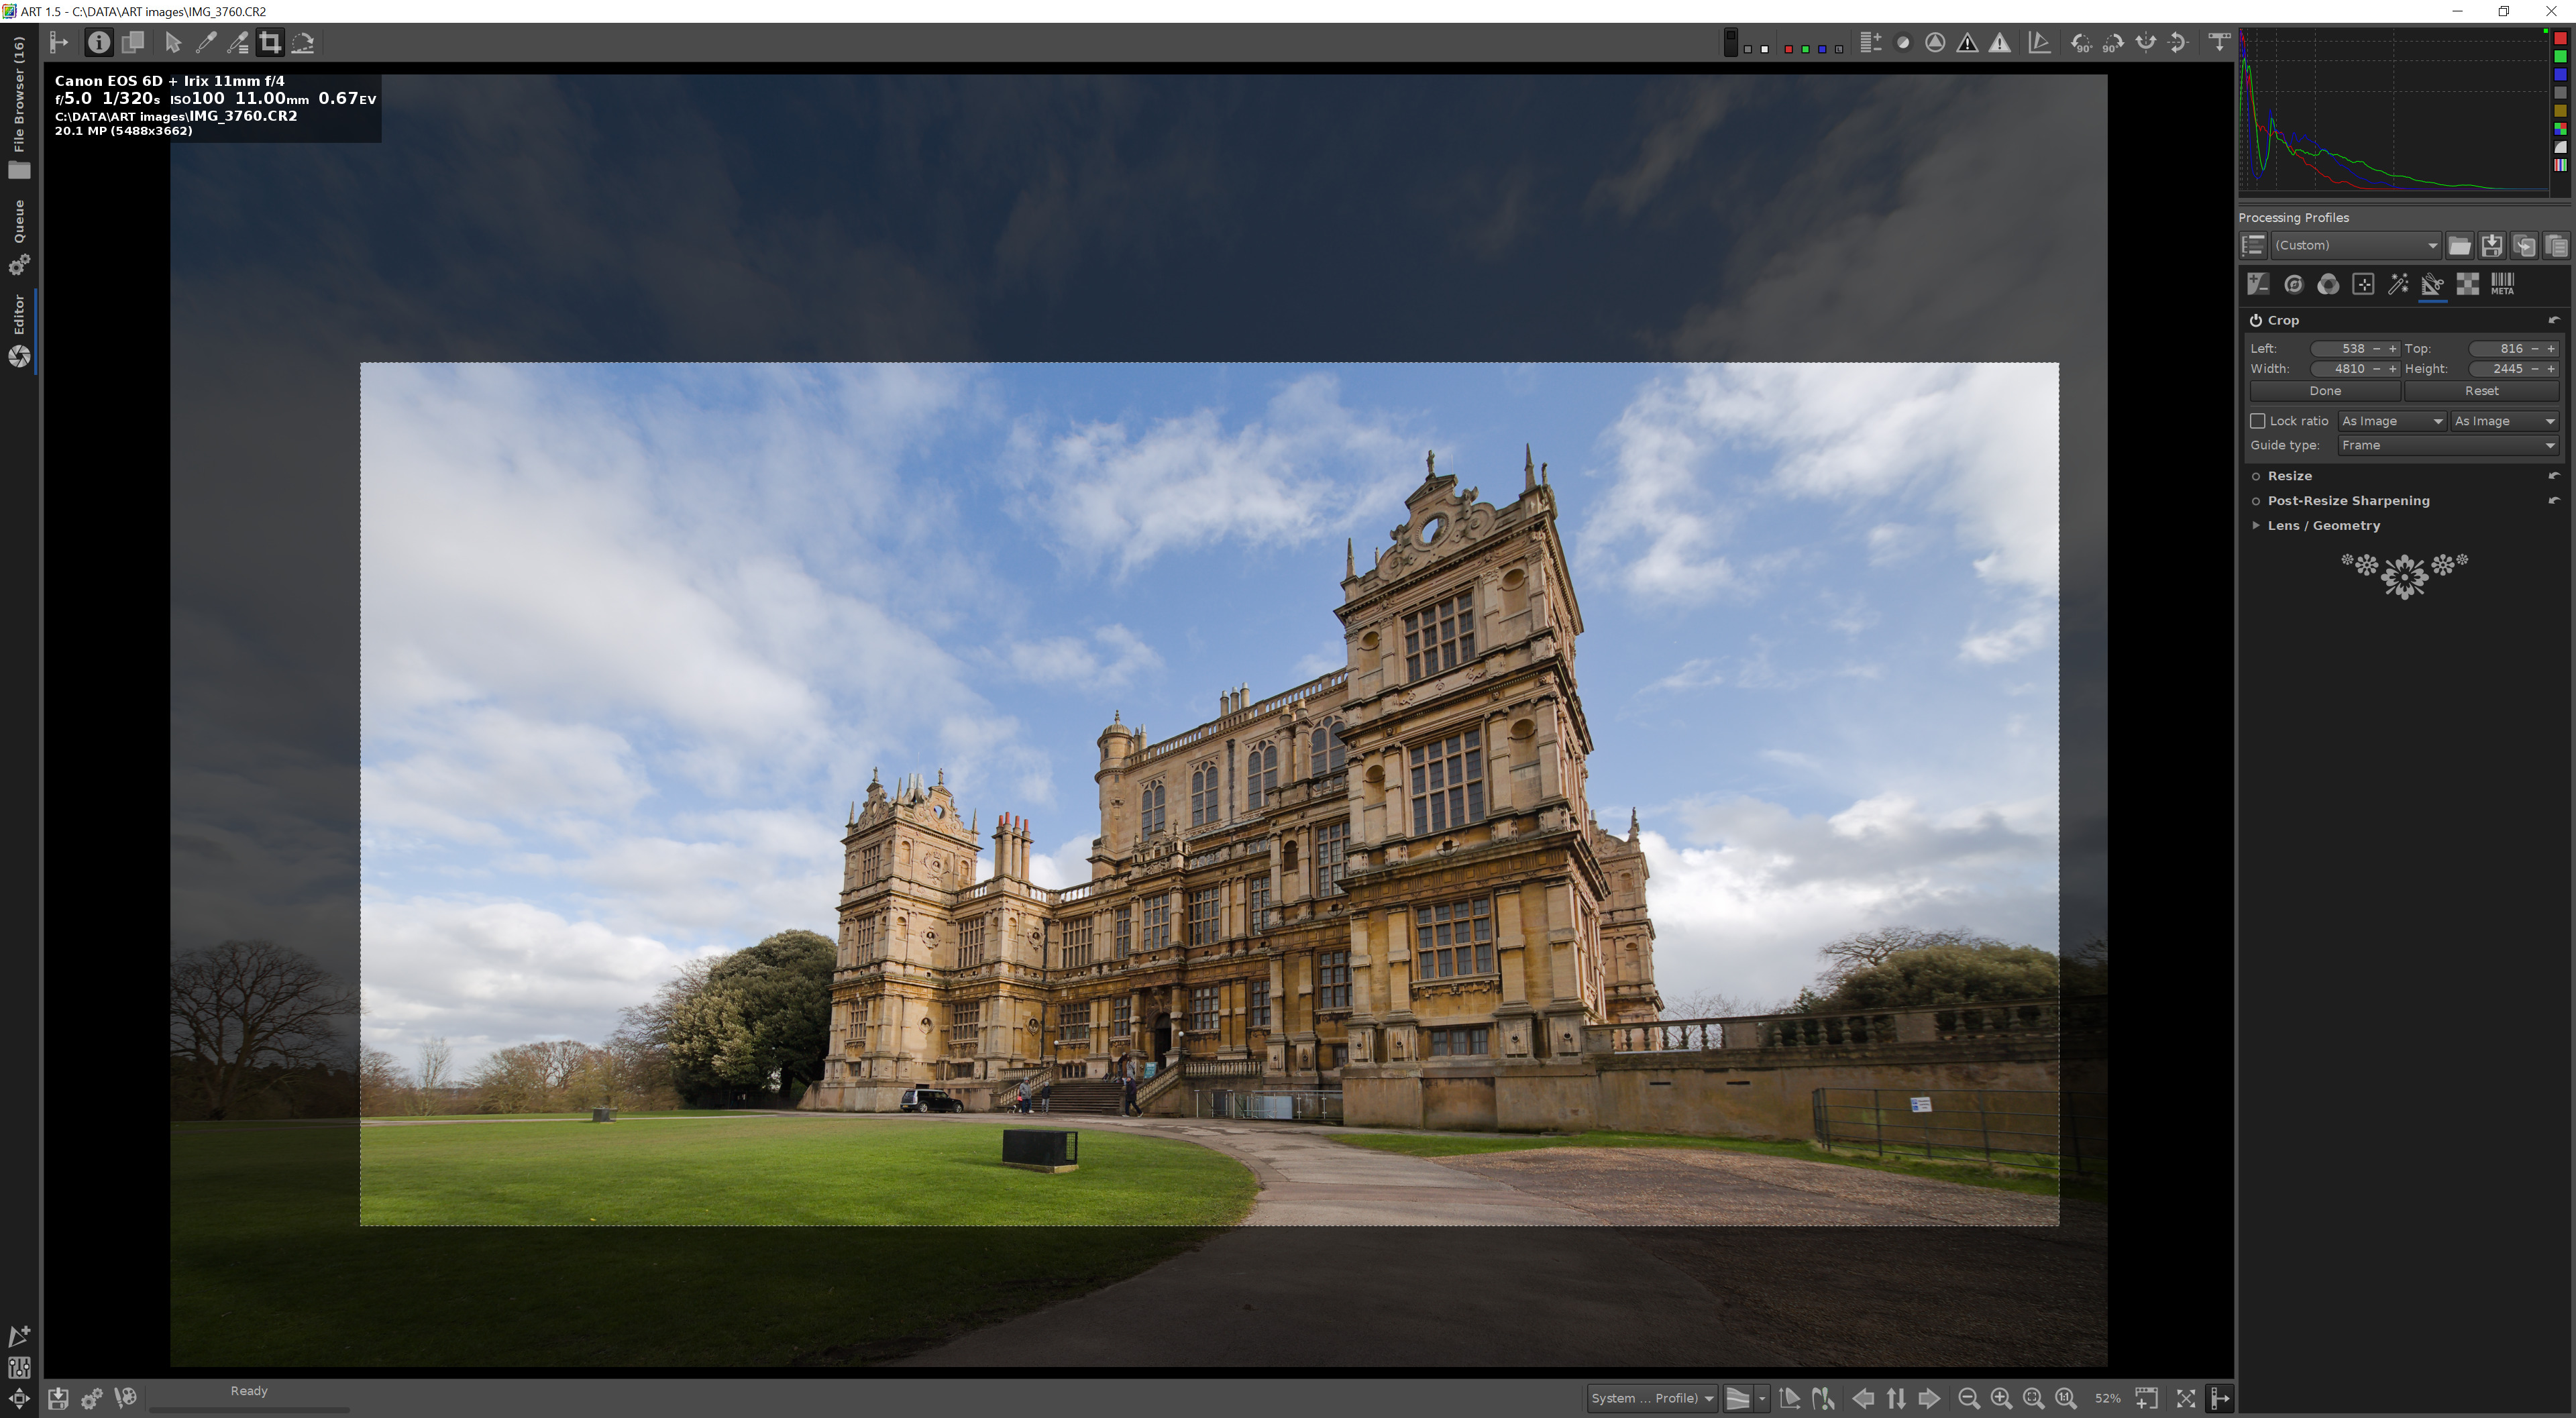
You will notice that the area of the crop is constrained to the proportions of the original image, but we can change this.
In the Crop tool there is a checkbox labelled Lock ratio. Uncheck this box and now you can change the shape of the cropped area by clicking and dragging an edge or a corner, perhaps to something like this:
We have now made some simple edits to the image, so we can now carry out the conversion from our original RAW file, using these changes, to make a JPEG file.
Conversion to JPEG
 At the top left of the screen are three tabs, File
Browser, Queue and Editor.
At the top left of the screen are three tabs, File
Browser, Queue and Editor.
We started in the File Browser tab where we selected the file to edit. This dropped us into the Editor tab where we made the changes described above. Now we'll have a quick look at the Queue tab.
ART is a non-destructive RAW processor, so your RAW files are unchanged by the edits you make. The program takes the RAW file, records the edits as a list of commands in a ‘side-car' file, stored alongside the RAW file, and when you are ready, you can export an edited version of the original as a JPEG file.
You can edit several files one after the other, close the program, come back later, carry on editing the same files or others – and all of these edits are saved automatically in sidecar files.
When you are ready to export your images to JPEG files you can do one at a time or several together. When you start the export process, the files are processed in turn in a queue.
Click on the Queue tab at the top left and take a look at the queue:
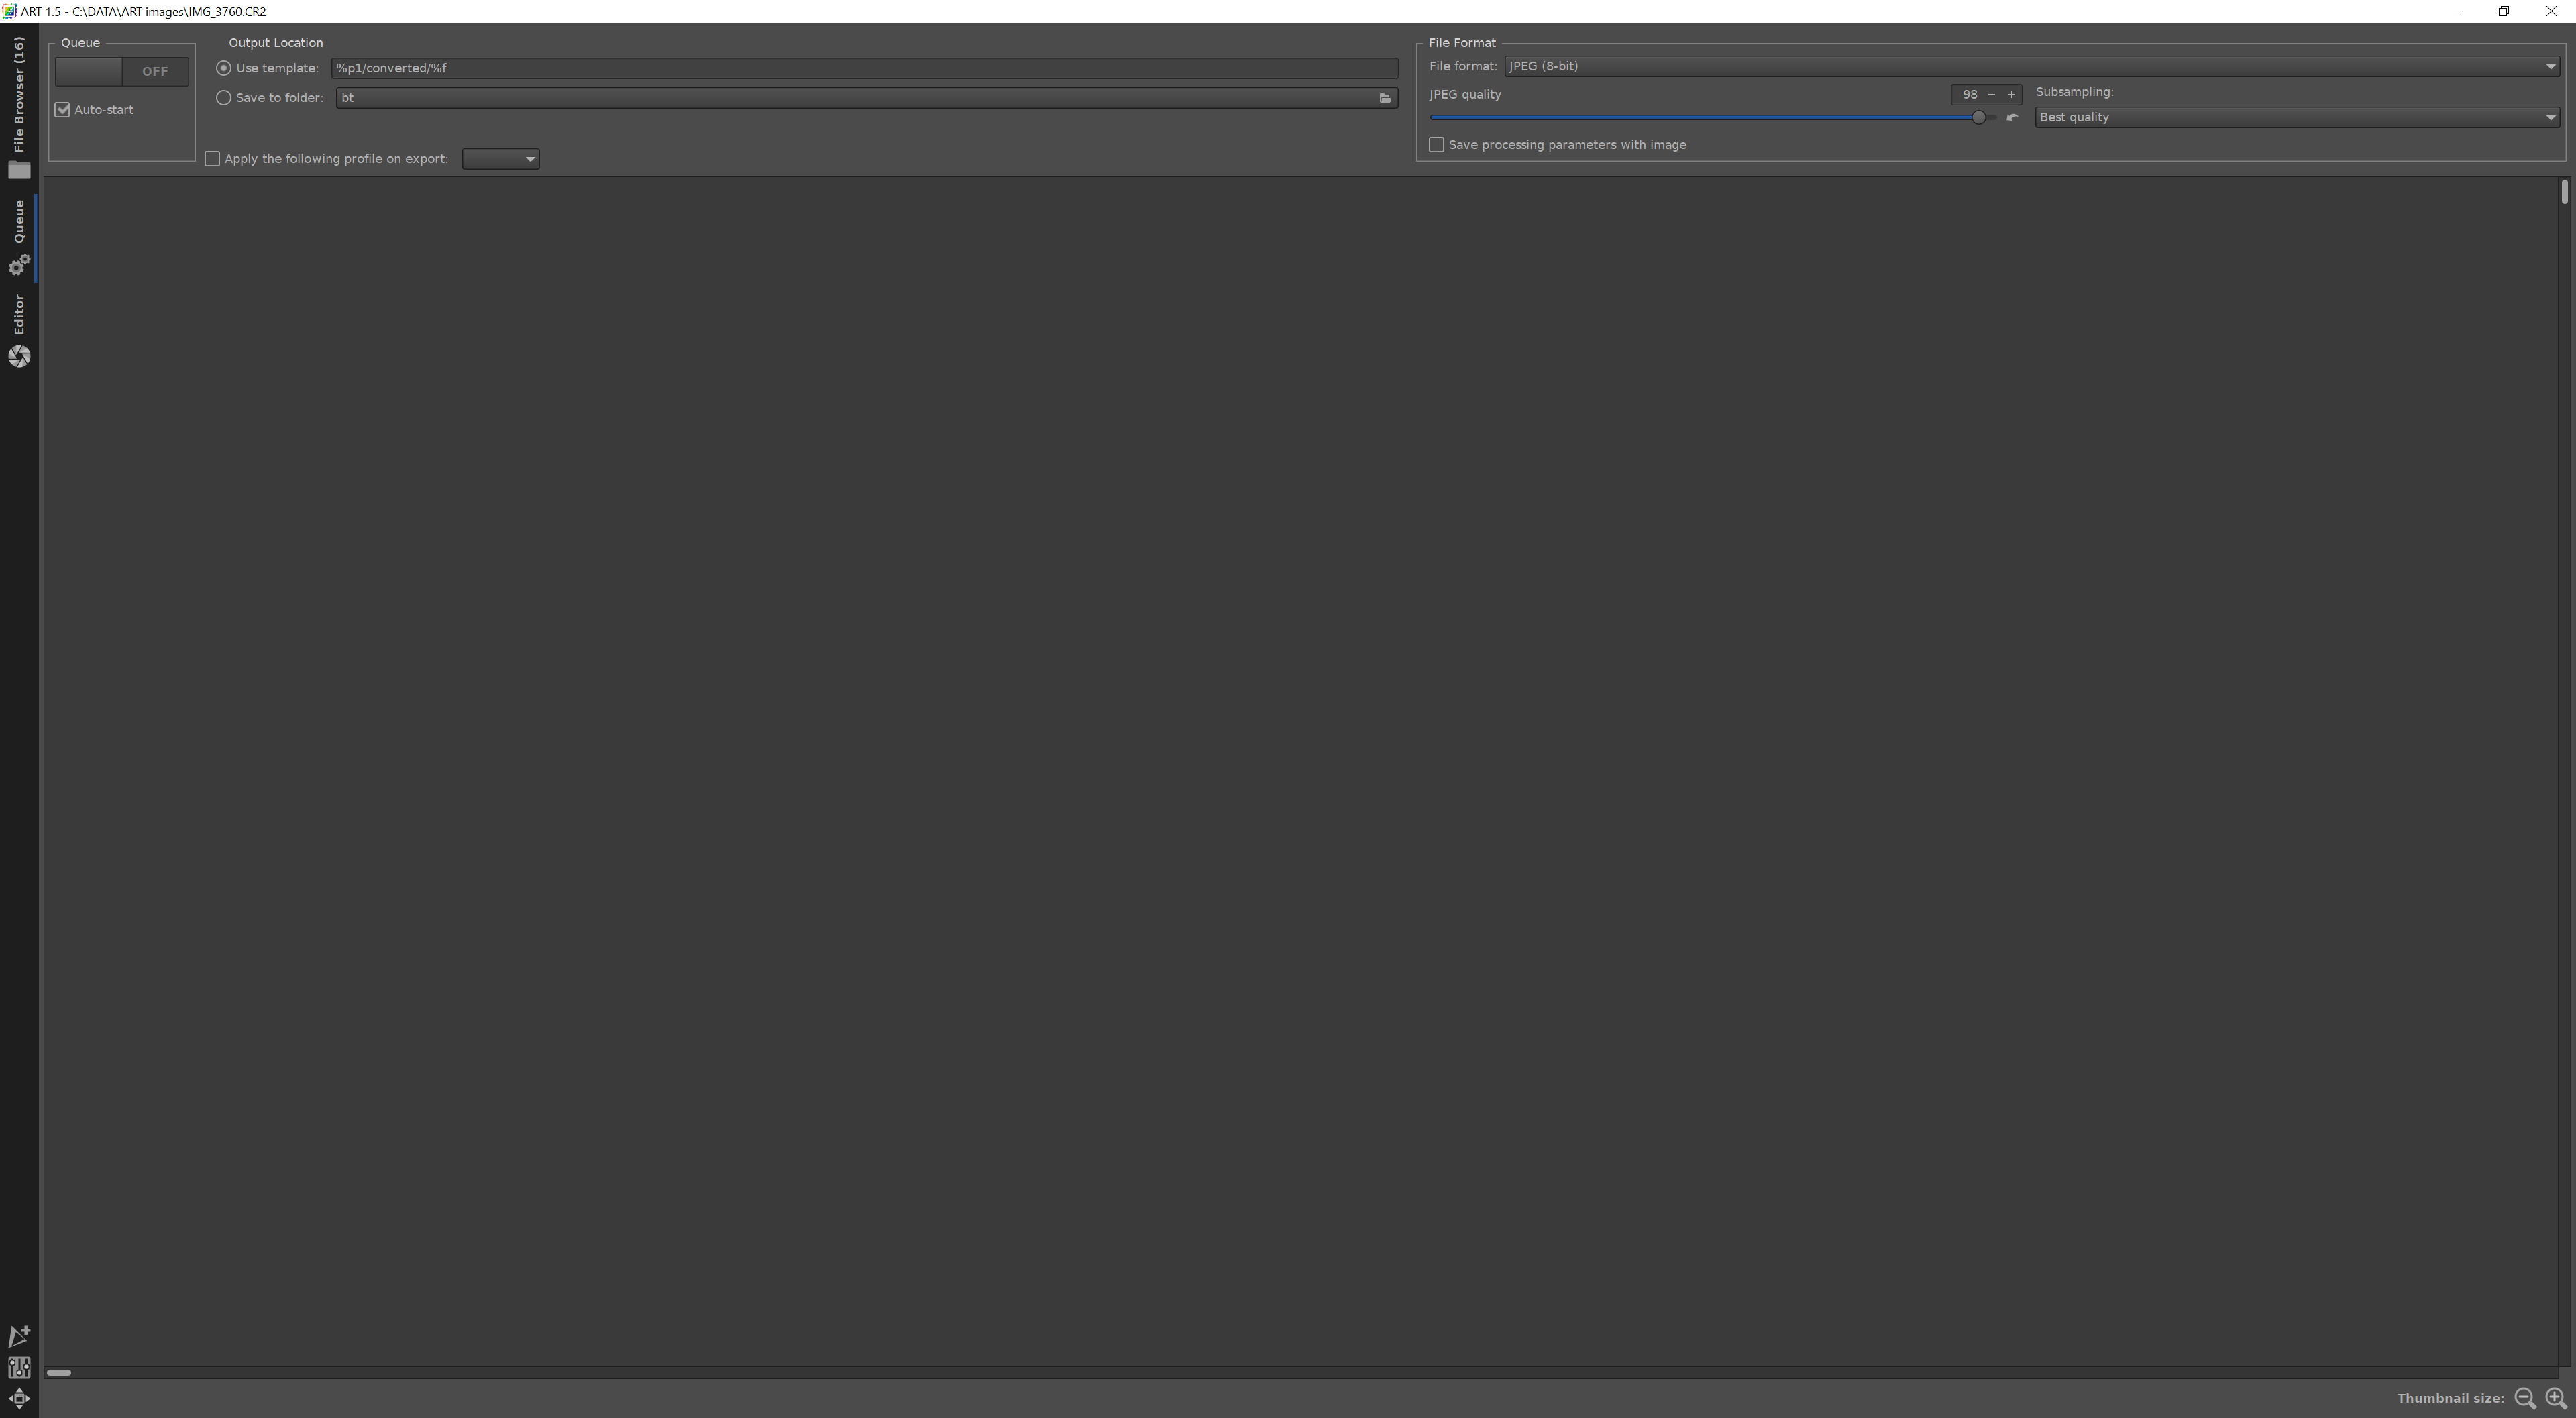
There are some controls at the top, but the queue itself is empty – we have not sent any files to the queue yet.
For now we will use the default settings for the queue, which means the exported JPEG file will be created in a new sub-folder in the folder where the original RAW file is saved.
Click on the Editor tab at the top left to return to the image:
At the bottom left of the screen are three buttons, which allow you to Save (export) the current image right now, to add the current image to the queue and to edit the current image in an external image editor:

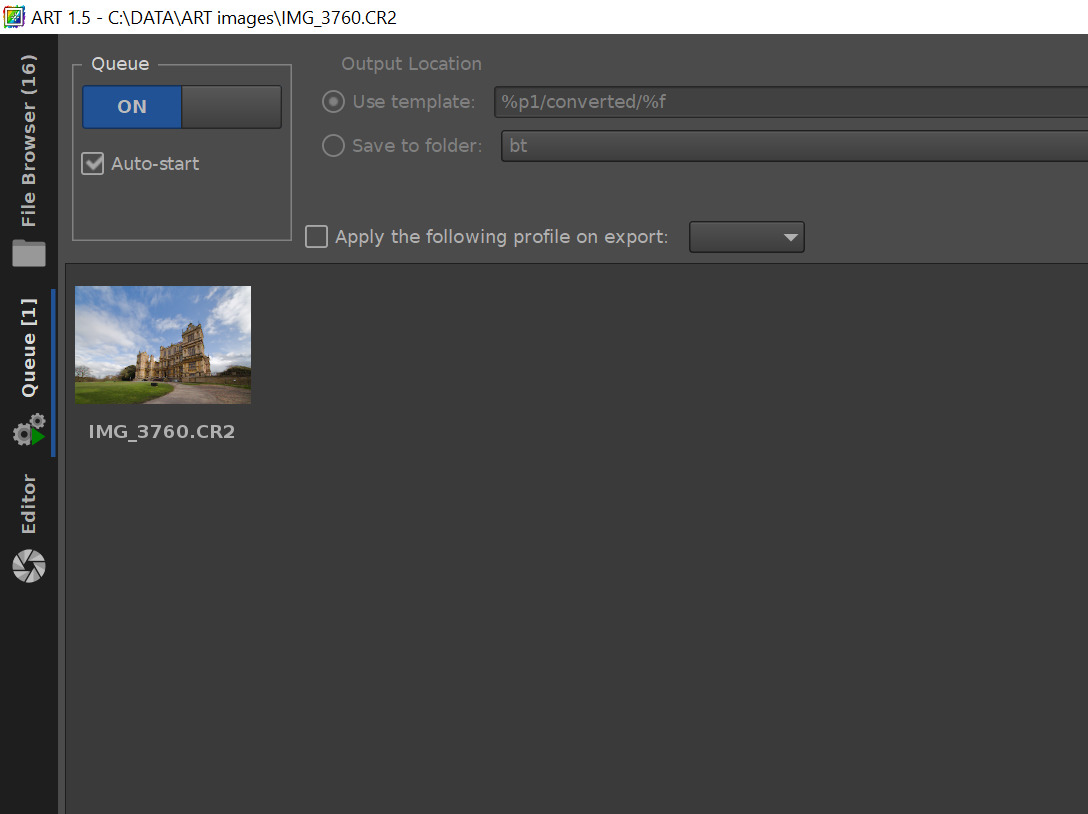
Click the middle button to add the current image to the queue, then immediately click on the Queue tab at the top left of the screen and you should see the thumbnail of the image as the one and only item in the queue:
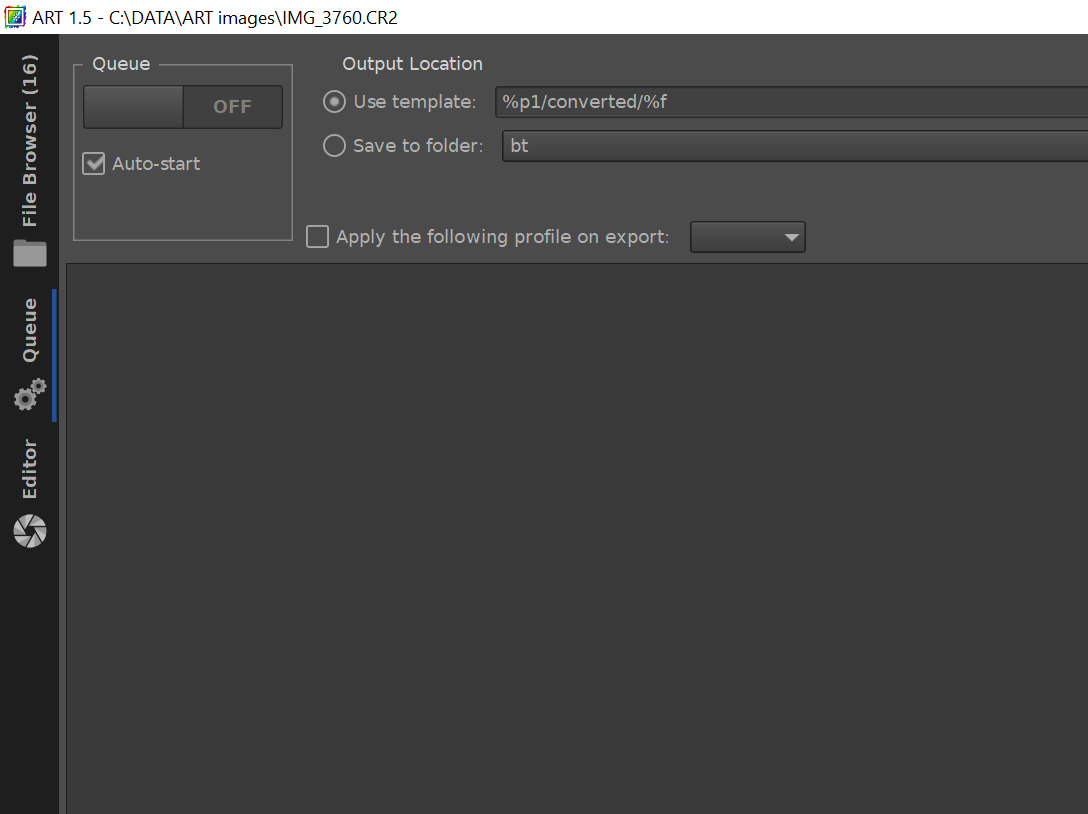
When processing is complete, the thumbnail disappears and the queue is empty again:
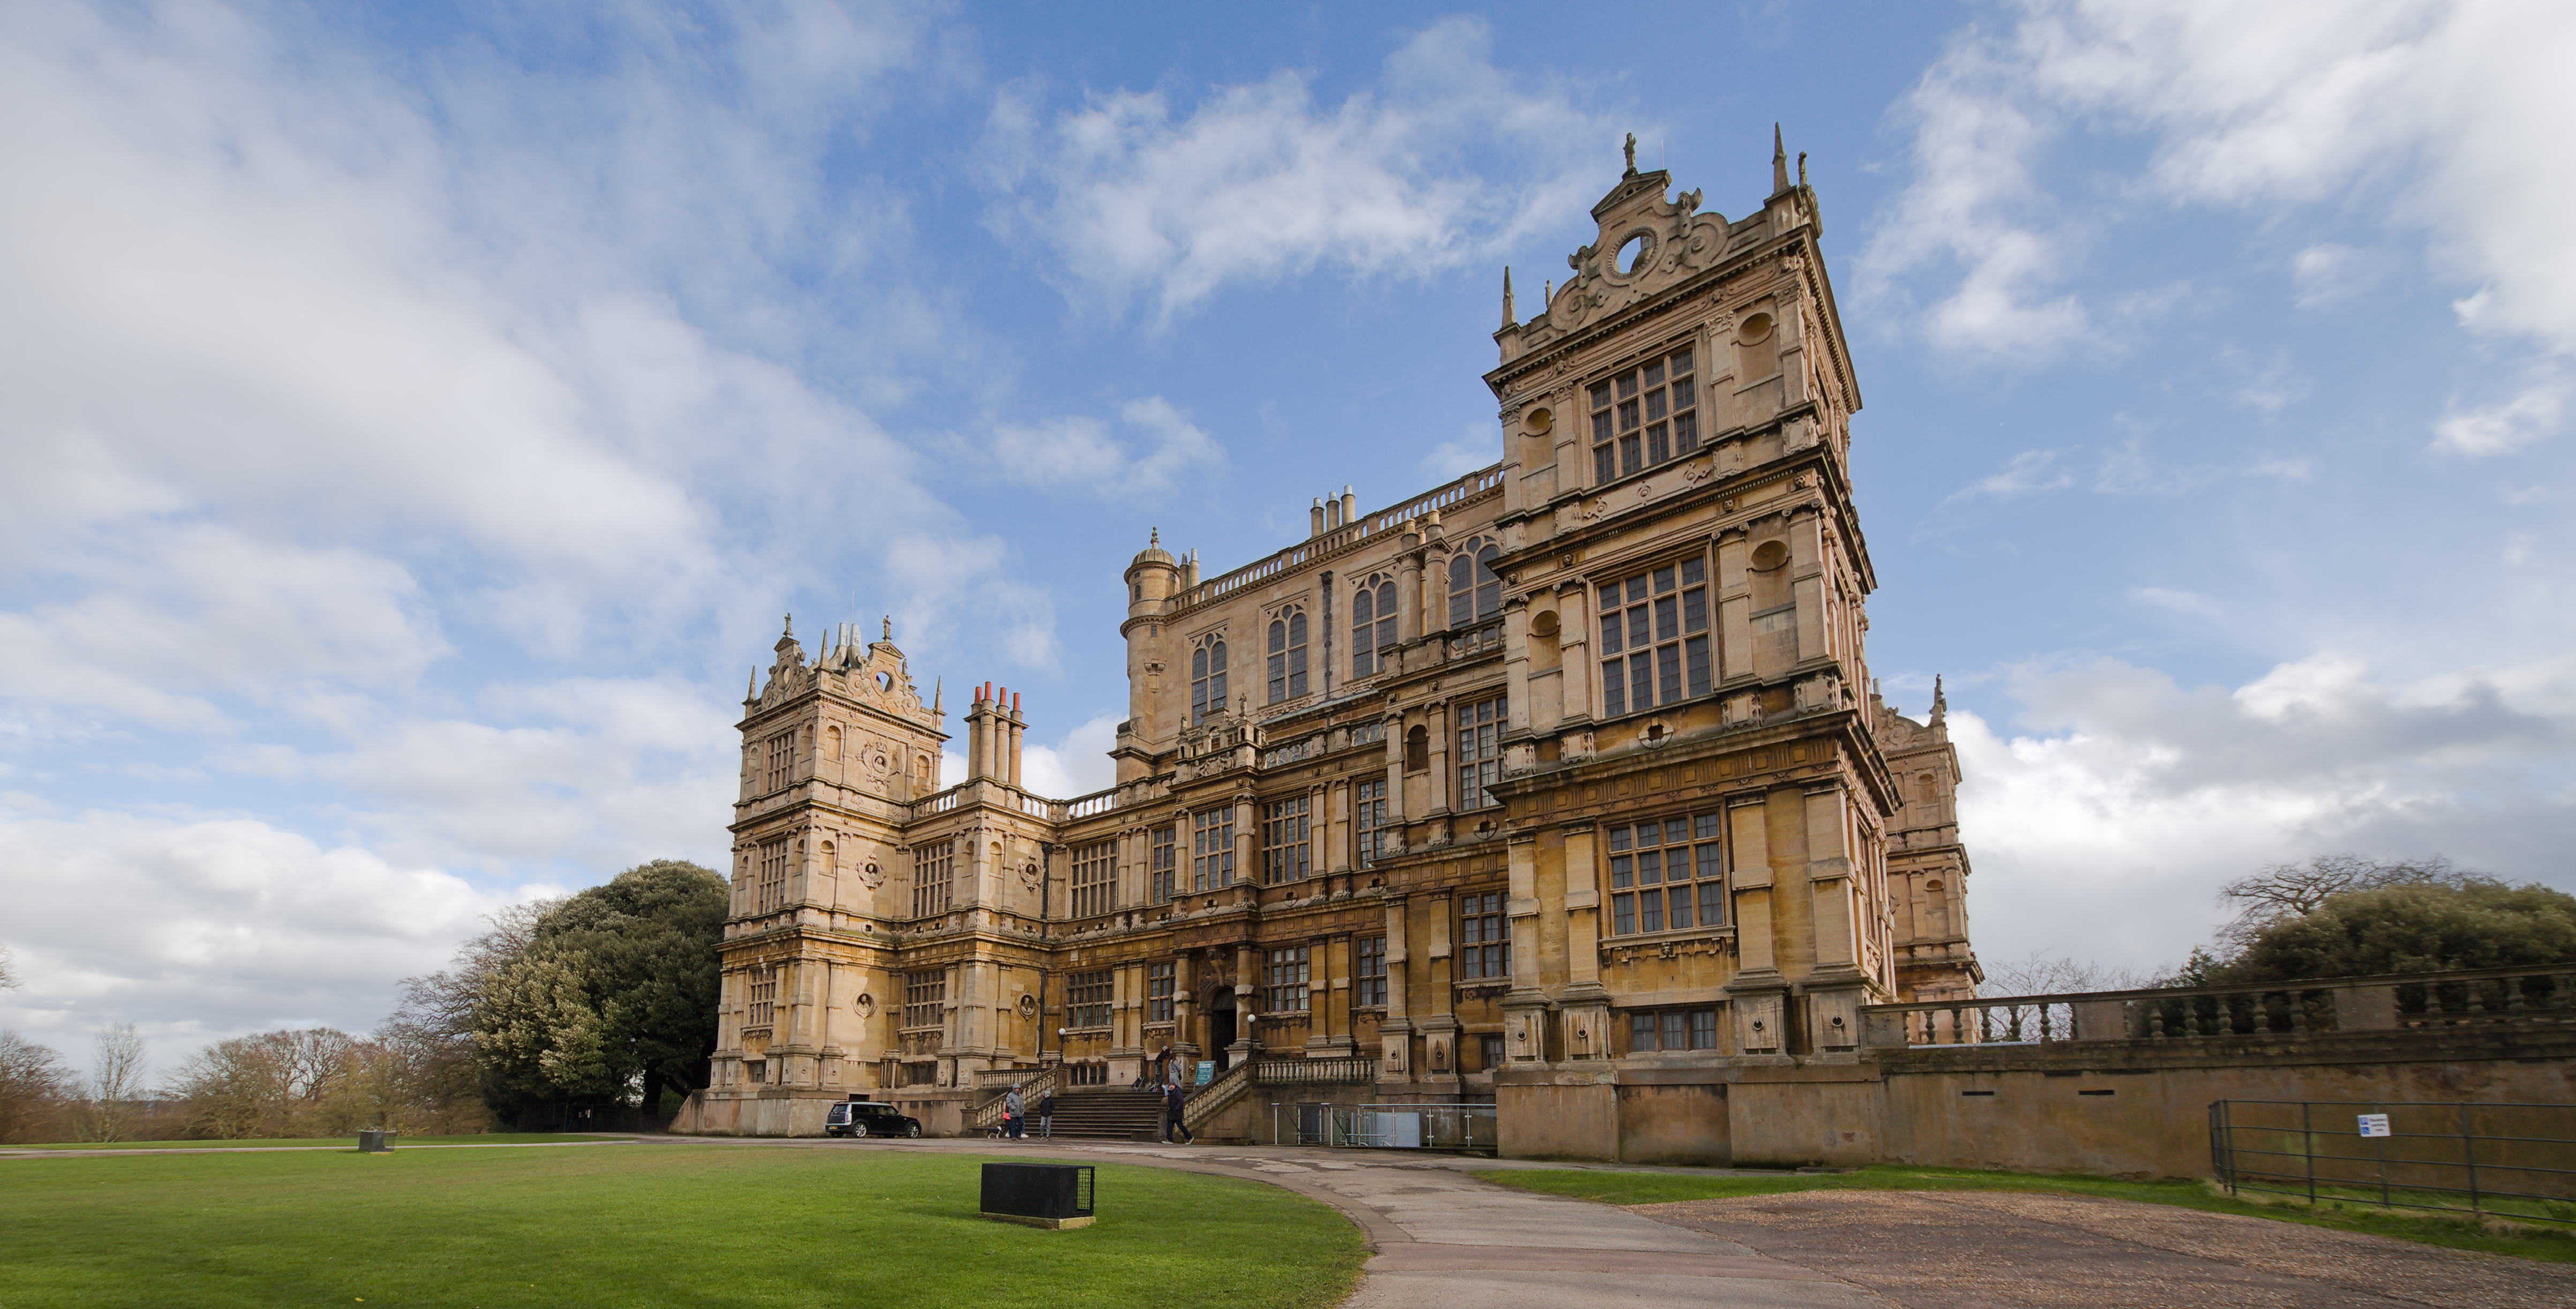
The JPEG has been created in the folder below the source image's location, and it should look something like this:
Updated