Wiki
Clone wikiBibSonomy / development / Setup
Information [worth reading before you start]
- Wikipedia: Maven What
is Maven? What is Artifactory? What is the
targetfolder? - Maven: install What is an "install"?
- Maven: war What does
war:inplacedo? - Wikipedia: Tomcat Open source web server
- Wikipedia: Log4j Java-based logging utility - Why not
using
System.err?
Installation and adjustment of the required tools
Step 1: Java SDK
Install Java SDK if nonexistent. Please install Java 1.8.
For the encryption of Spring Security we need the Java Cryptography Extensions (more precise: Java Cryptography Extension (JCE) Unlimited Strength Jurisdiction Policy Files). Download here (scroll to the very bottom) and install. If you are using OpenJDK, JCE should already be installed. You can test whether JCE is correctly installed with
$JAVA_HOME/bin/jrunscript -e 'print (javax.crypto.Cipher.getMaxAllowedKeyLength("RC5") >= 256);'
which should output "true".
Step 2: Eclipse
Download the most recent version of Eclipse JEE
Please note: JEE!!!
Extract, set up a new workspace and install the following plug-ins
IntelliJ IDEA can be used instead. If chosen, there are some extra steps to follow during setup (see below).
Plugins
In Eclipse via Help>Install New Software... (just copy the link of the plugin) or via update site:
- Git Plugin
- ResourceBundleEditor
- Use exactly the settings as described here! Do not go on before that!
- Eclipse Tomcat Launcher
optional
- Spring IDE Plugin (optional; Do not install dependencies!) (migrated here for Neon & Oxygen)
IntelliJ
All necessary plugins are pre-installed, optionally Smart Tomcat can be installed to simplify the configuration.
Settings (recommended)
Disable the validation of web resources.
Step 3: Git
If nonexistent install Git.
Step 4: Tomcat
A preconfigured tomcat can be found here:
(Password: bibsonomy123)
Please download the zip and unpack it.
Step 5: Eclipse-Tomcat Settings
Once you got your Tomcat go to Eclipse and check Settings>Tomcat, set the Tomcat version to 9 and provide the path to the location of your Tomcat directory. Set Context Declaration Mode to Context Files and make sure that Contexts directory is TOMCAT_DIR/conf/Catalina/localhost.
Click the subitem Tomcat Manager App and change the username to 'manager' and the password to 'password', if you use the preconfigured version of Tomcat.
IntelliJ-Tomcat
In IntelliJ navigate to Preferences > Build, Execution, Deployment>Application Servers > + > Tomcat Server and provide the path to the location of your Tomcat directory.
If the Smart Tomcat plugin is being used, provide the Tomcat via Preferences > Other Settings > Tomcat Server > + instead.
BibSonomy workspace
On first setup of the project Maven will automatically download all dependencies needed.
Connecting to KDE network
Kassel
If you are connected locally via LAN you have to do nothing. Otherwise (e.g. at home) please connect via VPN.
Hannover & Würzburg
If you are connected locally you have to do nothing. Otherwise please connect to KDE using the VPN of Kassel.
Check out the source code
For main developers with write access to the repository
Note: This includes Hiwis!
In Eclipse select File > Import > Projects from Git.
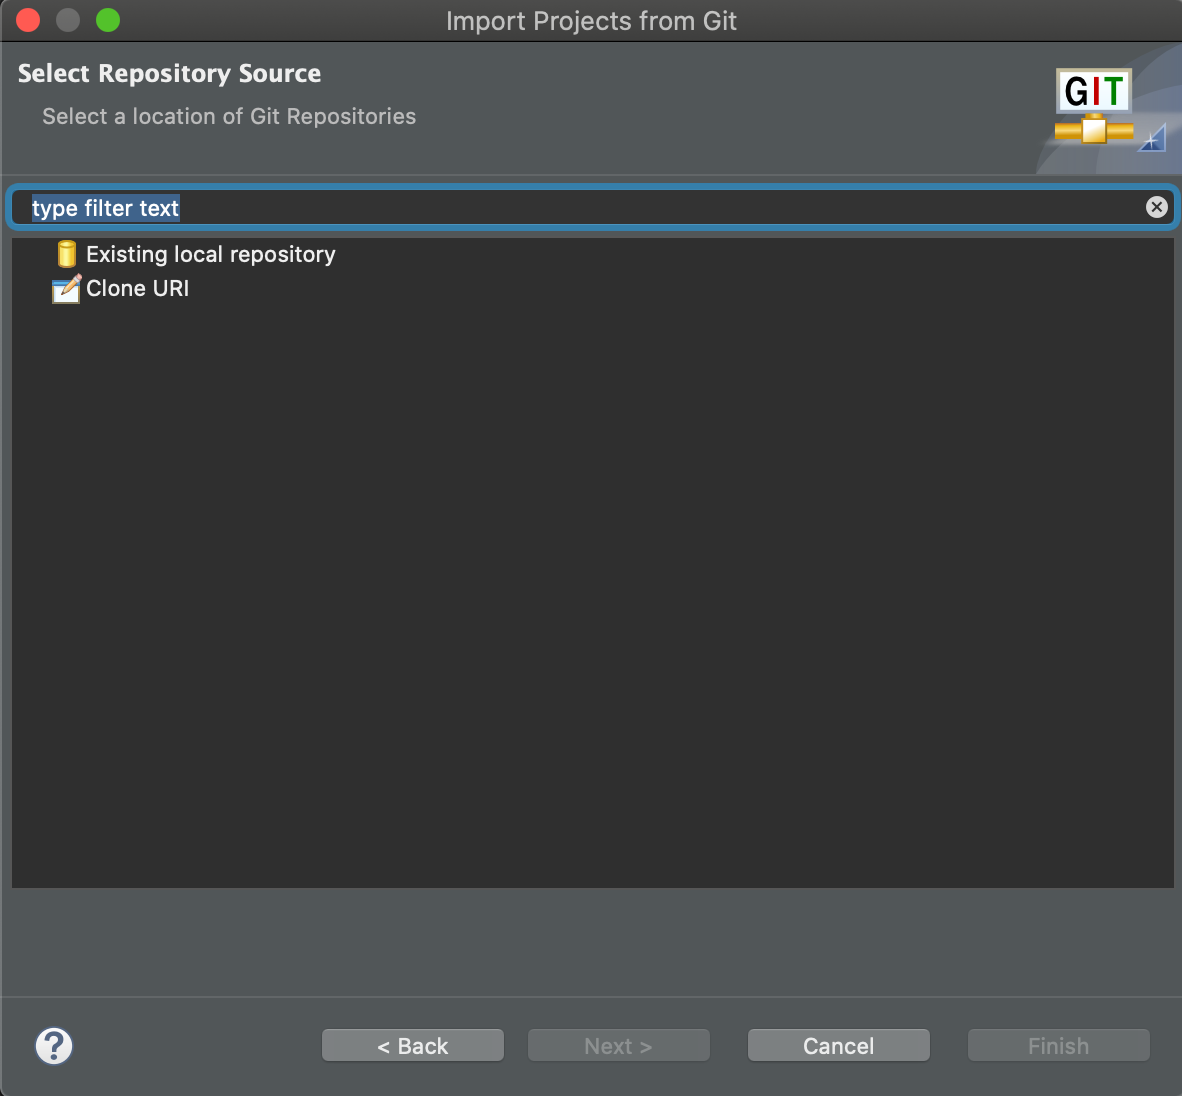
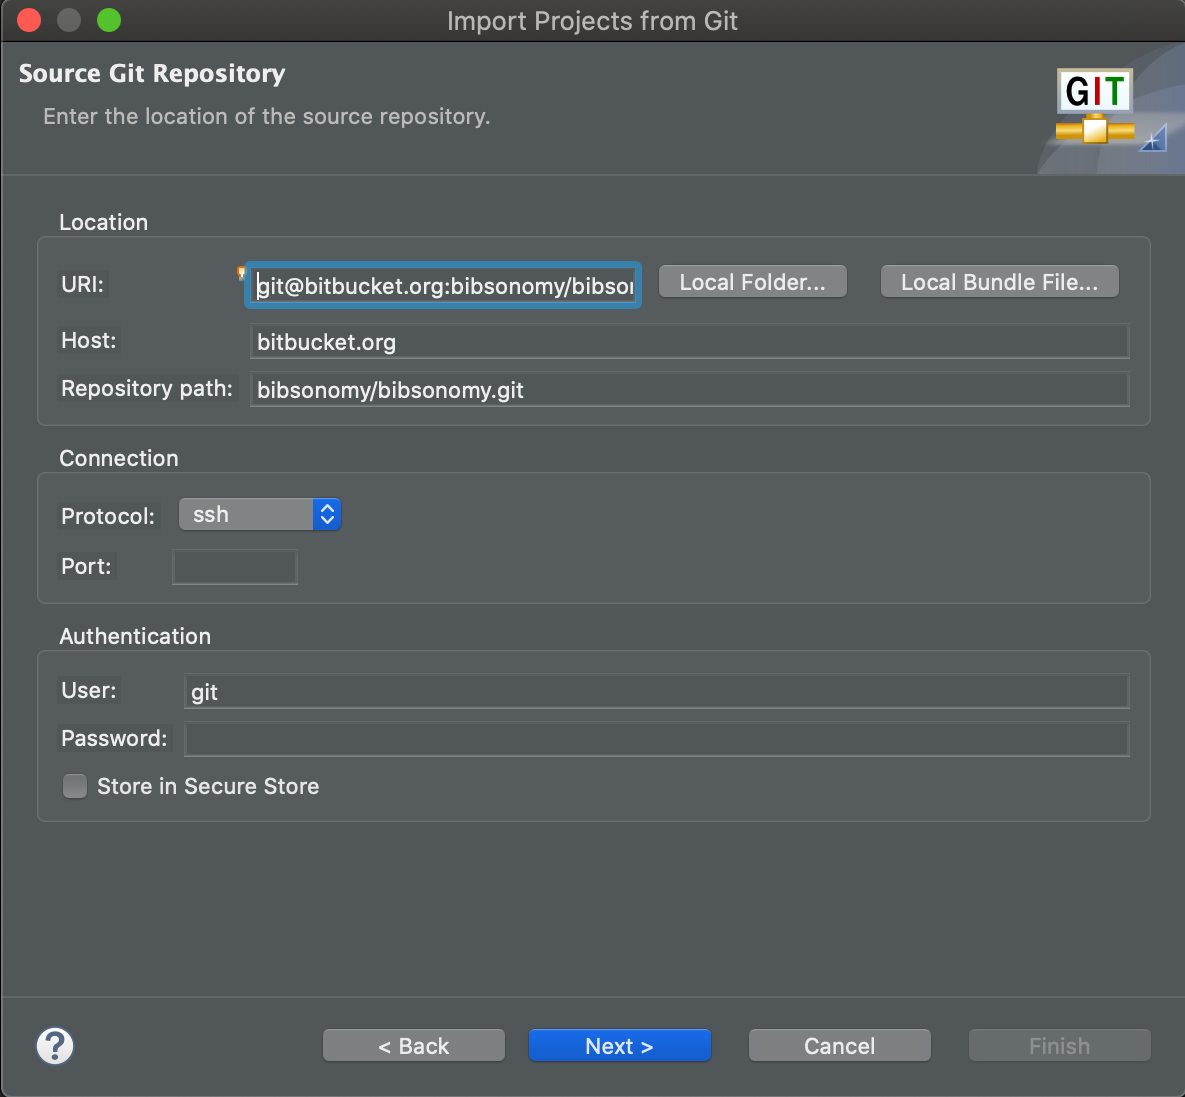
Use the repository location git@bitbucket.org:bibsonomy/bibsonomy.git. We recommend to use ssh and not HTTPS since ssh should be faster.
(Windows users should use HTTPS, since ssh is cumbersome to install.)
Note: you must use your public key for authorization. If you use ssh please do not change the username (git):
Select the master branch (for now):
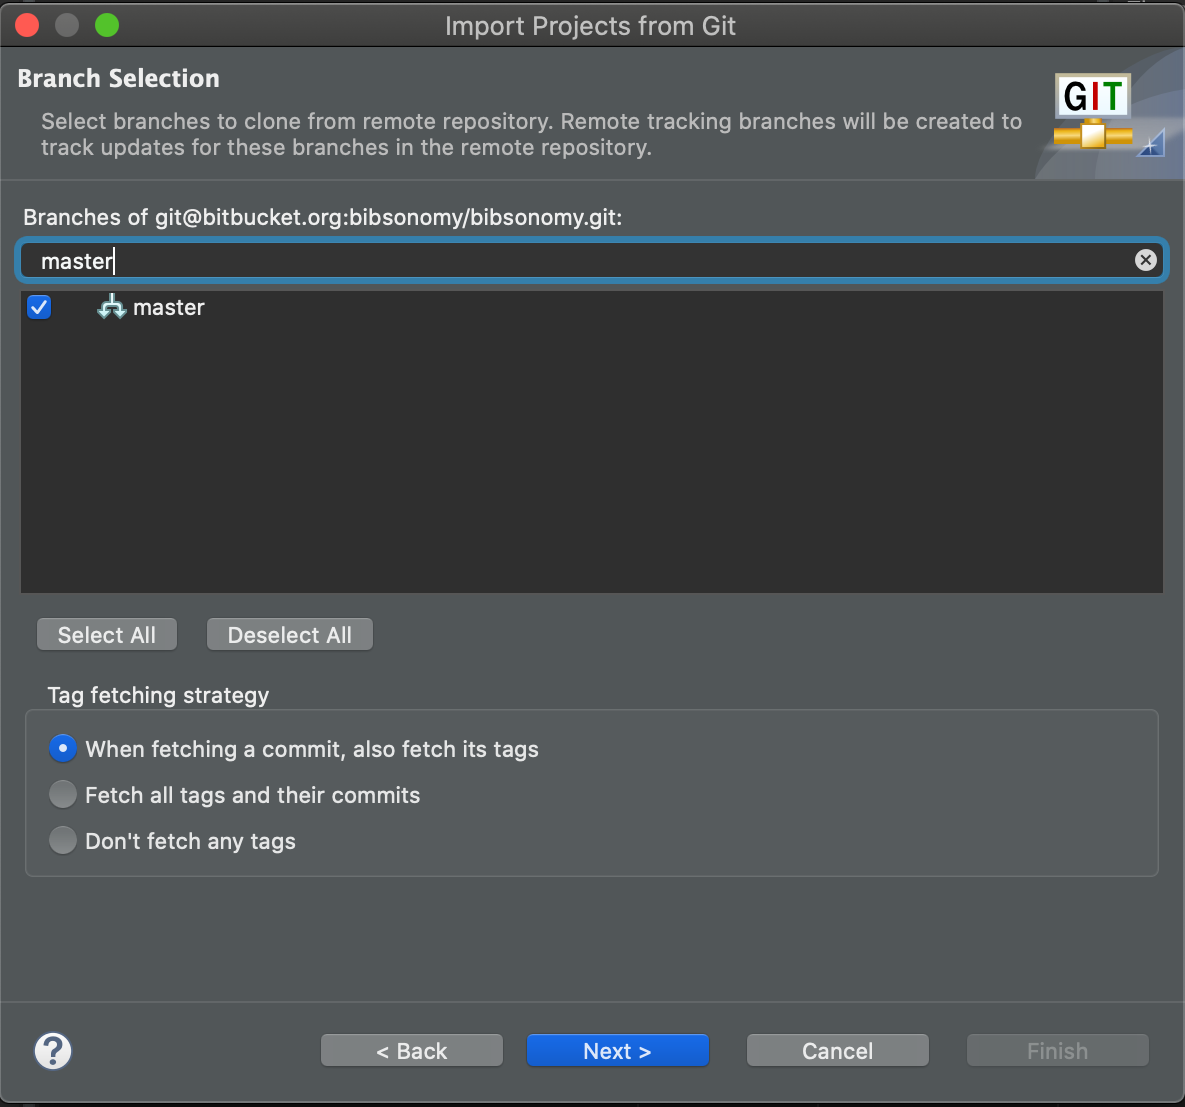
Click on "next" and wait some time (the checkout should take some time), afterwards click on "finish". Please import the project as a new general project.
IntelliJ check out
In IntelliJ select File > New > Project from Version Control...

For URL use the repository location git@bitbucket.org:bibsonomy/bibsonomy.git. Remember that SSH must already be configured in your bitbucket account and IntelliJ (Preferences > Tools > SSH Configurations)!
After selecting the directory click Clone and wait for some time, while the checkout is being processed.
For all other developers
Before you start, you must fork the project and than use your forked project for setup, see above for more details, just replace the repository location.
Eclipse: Configuration
Settings
Under bibsonomy > misc/eclipse/bibsonomy_settings.epf you can find a Eclipse settings file with predefined Compiler and Code Format settings. Please import the file using Import > Preferences.
Installing the root POM
Now it's time to run a Maven-install via right-click on the main project bibsonomy then Run As>Maven build.. with goal install -N and check the RadioButton Skip Tests then Run.
This keeps the submodules from being built and only the root POM of the main project will be set up locally.
IntelliJ installation
In IntelliJ this options can be found in the Maven control panel (View > Tool Windows > Maven). Here the Button m allows the execution of the install -N maven goal and the Skip Tests Button is right next to it.
To successfully install the project in IntelliJ a couple more steps are necessary:
- In the maven control panel right click the
BibSonomy-Modelmodule and selectGenerate Sources and Update Folders. - In the maven control panel open the
BibSonomy-Openaccessmodule and install it (Lifecycle > install). After the install is finished, right click the module and selectReload project. If the installation fails, a full install on the main module may help. - Navigate to bibsonomy-webapp/pom.xml and comment out this line.
General steps on how to import a submodule from BibSonomy
To successfully run your version of BibSonomy you must only import the bibsonomy-webapp submodule.
(Later on you might work with other submodules aswell, however the import steps remain the same)
- In Eclipse File / Import / Maven / Existing Maven Projects
- Choose the corresponding module from your main project
bibsonomyas root directory - Finish
- Wait until Eclipse is finished building the workspace
If the project does not look as expected, e.g. the source folder
/src/main/javais missing, update your configuration by Right-click > Maven > Update Project .... Wait until Maven has downloaded all dependencies.
In IntelliJ a submodule can be imported by simply opening it via File > Open.
Setting up the webapp submodule
After the module is as error-free as possible, execute a Run As > Maven build... and type 'install war:inplace' in the 'goals' input field and check the radio button 'Skip Tests'.
Right-click the 'bibsonomy-webapp' module and go to 'Properties > Tomcat'.
- Check 'Is a Tomcat project' / 'Ist ein Tomcat Projekt'
- Set 'Context-name' / 'Anwendungs-URI' to
/ - Set 'Subdirectory to set as web application root' / 'Unterverzeichnis, das als root der Webapplikation gesetzt werden soll' to
/src/main/webapp
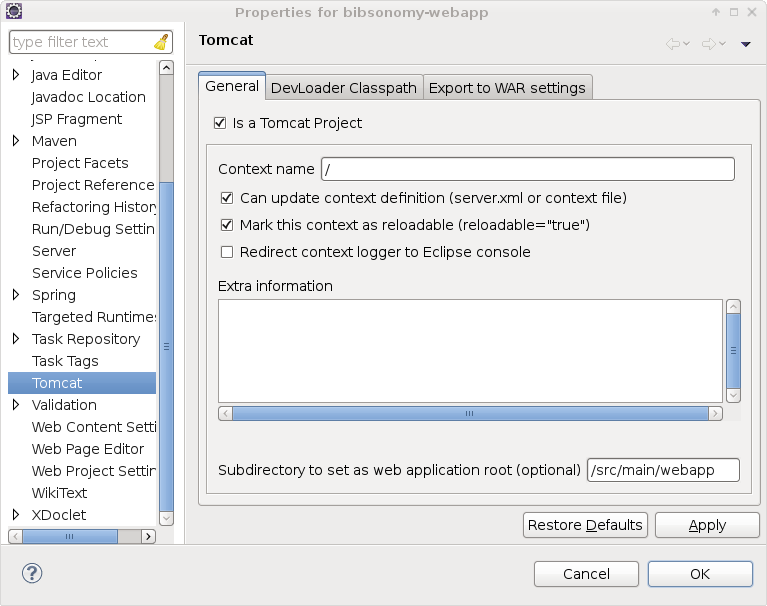
Click 'Apply' and then 'OK'.
Please check that the path in the .xml (location: config directory of the tomcat) contains the correct path ending with src/main/webapp.
IntelliJ installation
Via the maven control panel install the module with the goal install war:inplace (via the m-Button) and skipped tests.
Now the run configuration must be set up. To do this, navigate to Run > Edit Configurations ... > + and select Tomcat Server Local.
* Make sure the right Application server and Java version are selected
* Set 'URL' to http://localhost:8080/
* Select bibsonomy-webapp:war as the build artifact
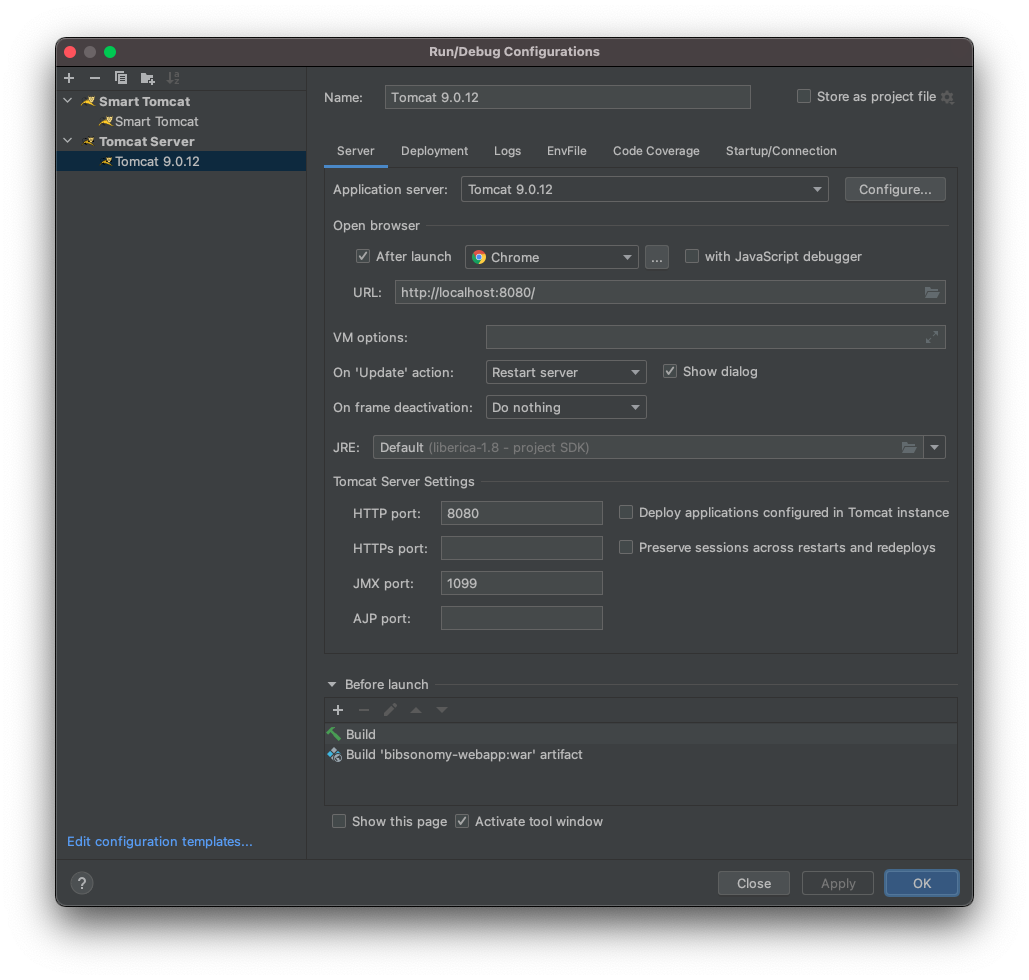
Click 'Apply' and then 'OK'.
Alternatively in Run > Edit Configurations ... > + 'Smart Tomcat' can be selected.
* Make sure the right Application server is selected
* Make sure the 'Deployment Directory' contains the right path ending with /bibsonomy-webapp/src/main/webapp
* Set 'Context Path' to /
* Add -Xmx4g in the 'VM options'
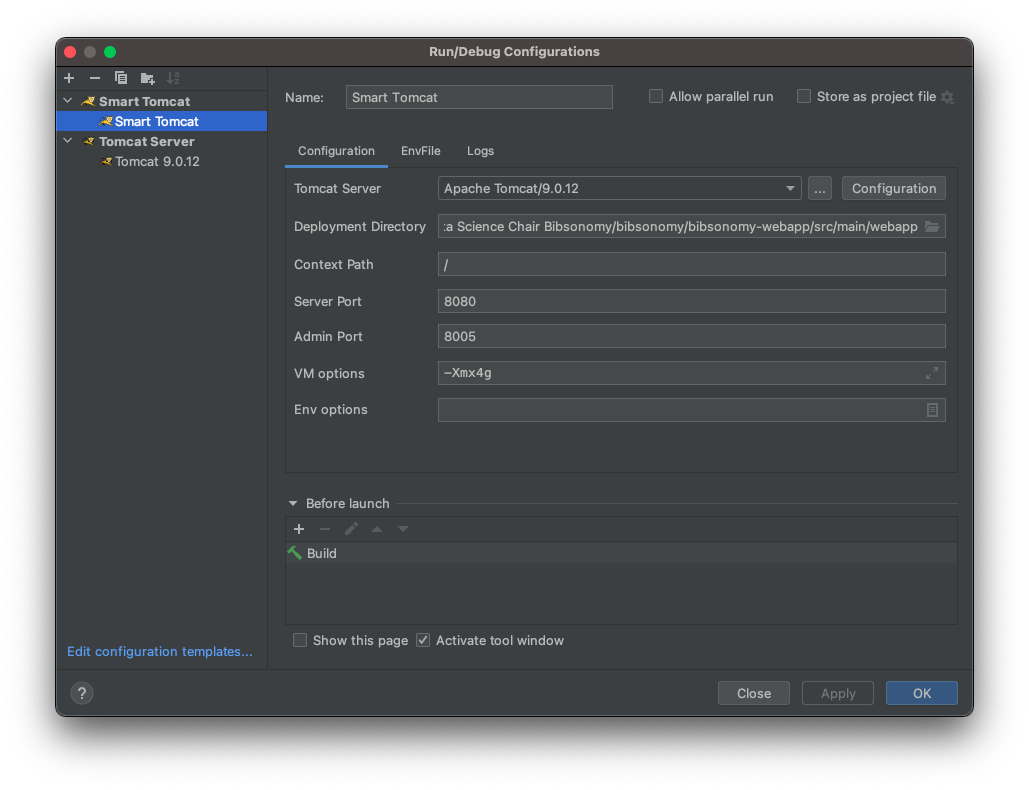
Click 'Apply' and then 'OK'.
bibsonomy.properties file
Create a bibsonomy.properties file in your disks home dir. Add the following two lines to the file:
#!

database.main.password = **PASSWORD**
database.recommender.tag.password = **PASSWORD**
For the **PASSWORD** please ask your supervisor.
- You can start / terminate / restart Tomcat via the three buttons in the toolbar
Finally! - Now your BibLicious aka BibSonomy should be available via http://localhost:8080/. If you have to change different modules, please follow these instructions for every submodule.
Tips und Tricks
- Other error messages (and ways how to fixed them) are described '''on this wiki page.'''
- Tests may also be skipped. See Maven RunConfig dialog or execute
mvn install -Dmaven.test.skip - If you change a module you have to execute a
mvn installand amvn war:inplacein the webapp module afterwards. Otherwise changes in the webapp will not be visible. The alternative is to use the SysDeo Dev Loader (see below).
Submodule tests
Some submodules require a running MySQL database. It is sufficient to install a new plain mysql server, add an empty database called 'bibsonomy_unit_test' and a user who has access (including DROP and CREATE rights). The TEstcases will automatically drop and re-create the database tables. Ask your supervisor if you do not want to install your own MySQL server. To configure the connection (host, username, password) we use Maven profiles. You should add a new profile to your Maven settings.xml (~/.m2/settings.xml) (:
#!xml <settings> [...] <profiles> [...] <profile> <id>bibsonomy-test-settings</id> <properties> <database.main.url>jdbc:mysql://localhost/bibsonomy_unit_test?useUnicode=true&characterEncoding=utf-8&mysqlEncoding=utf8</database.main.url> <database.main.username>YOUR_USER_NAME</database.main.username><!-- change! --> <database.main.password>YOUR_PASSWORD</database.main.password><!-- change! --> </properties> </profile> </profiles> <activeProfiles> [...] <activeProfile>bibsonomy-test-settings</activeProfile> </activeProfiles> [...] </settings>
Currently the following modules require database configuration (with their required property keys):
- bibsonomy-database:
database.main.* - bibsonomy-lucene:
database.main.* - bibsonomy-entityresolver:
database.main.* - bibsonomy-recommender-connector:
database.recommender.tag.*anddatabase.recommender.item.*
Good to know
- We use a Jenkins-service at https://jenkins.cs.uni-kassel.de which rebuilds the BibSonomy-project on commits and runs all the tests. If a problem occurs an email will be sent to the developer address. If everything passes, the new version will be published on gromit)
Version Control System
We use a distributed version control system which is slightly more complex to use than CVS or SVN. Therefore, please read How to use the version control system carefully!
Tomcat plug-in
There are two plug-ins which simplify the interaction between Eclipse and Tomcat
Both have advantages and disadvantages. Rule of thumb: if you mainly develop in the webapp module (JSP, JavaScript, CSS), use the Sysdeo Tomcat Launcher. Everyone else can use the WTP plug-in.
Sysdeo Tomcat Launcher
http://www.eclipsetotale.com/tomcatPlugin.html
Disadvantages:
- Has to be installed individually
- Is quite old and only loosely coupled with Eclipse
Advantages:
- Startet nicht bei jeder kleinen Änderung an der Webapp den Tomcat
neu und triggert daher unser Memory Leak nicht so
schnell. Erst nach einem
mvn install war:inplacegibt es ein Redeploy. Does not restart the Tomcat server on every small change and thus will take longer to trigger the MemoryLeak - The last version is from 2007 and still works. The plug-in is thus pretty simple.
Works with the following versions of Tomcat:
- 6.0.26
- 7...?
Does not work with the following versions of Tomcat:
- 6.0.32
WTP plug-in
Disadvantages:
- Reloads the webapp on every small change of a file (including JSP, JavaScript ...) which takes time and requires a restart of the server after ~3-4 redeploys, since it freezes because of the MemoryLeak
Advantages:
- Comes with WTP which has to be installed anyway.
- Provides excellent Eclipse integration.
Instruction: Install the adequate Server Runtime in Eclipse:
- Window > Preferences > Server > Installed Runtimes > Add...
- Select Apache Tomcat 7 and provide its installation directory
Misc
Read Eclipse Tips and Tricks.
This setup guide only covered the basic setup of the development environment, for more advanced setup see this page.
Updated