
This post is written by Kristin Davis from 42Crunch.
The transition to cloud-native, microservice-based, and serverless architectures has led to the proliferation of APIs. Applications now have components talking to each other via hundreds of APIs over the network. And as applications evolve, developers keep changing APIs and spinning up new ones each time a new component gets added to the system.
APIs have become the new application attack surface and the one that is extremely hard to control considering its constant change.
With the ever-rising privacy and cybersecurity requirements and the potential catastrophic consequences of a breach, companies are turning to DevSecOps approaches to enable automated static analysis and security testing as part of their CI/CD pipelines.
The new 42Crunch extension for Bitbucket Pipelines enables developers to add REST API static security testing (SAST) right into their CI/CD pipeline.
Getting Started with the 42Crunch integration for Bitbucket Pipelines
Step 1: Register with 42Crunch
Make sure you have a 42Crunch API Security Platform account. You can register here: https://platform.42crunch.com/register
Step 2: Generate an API token
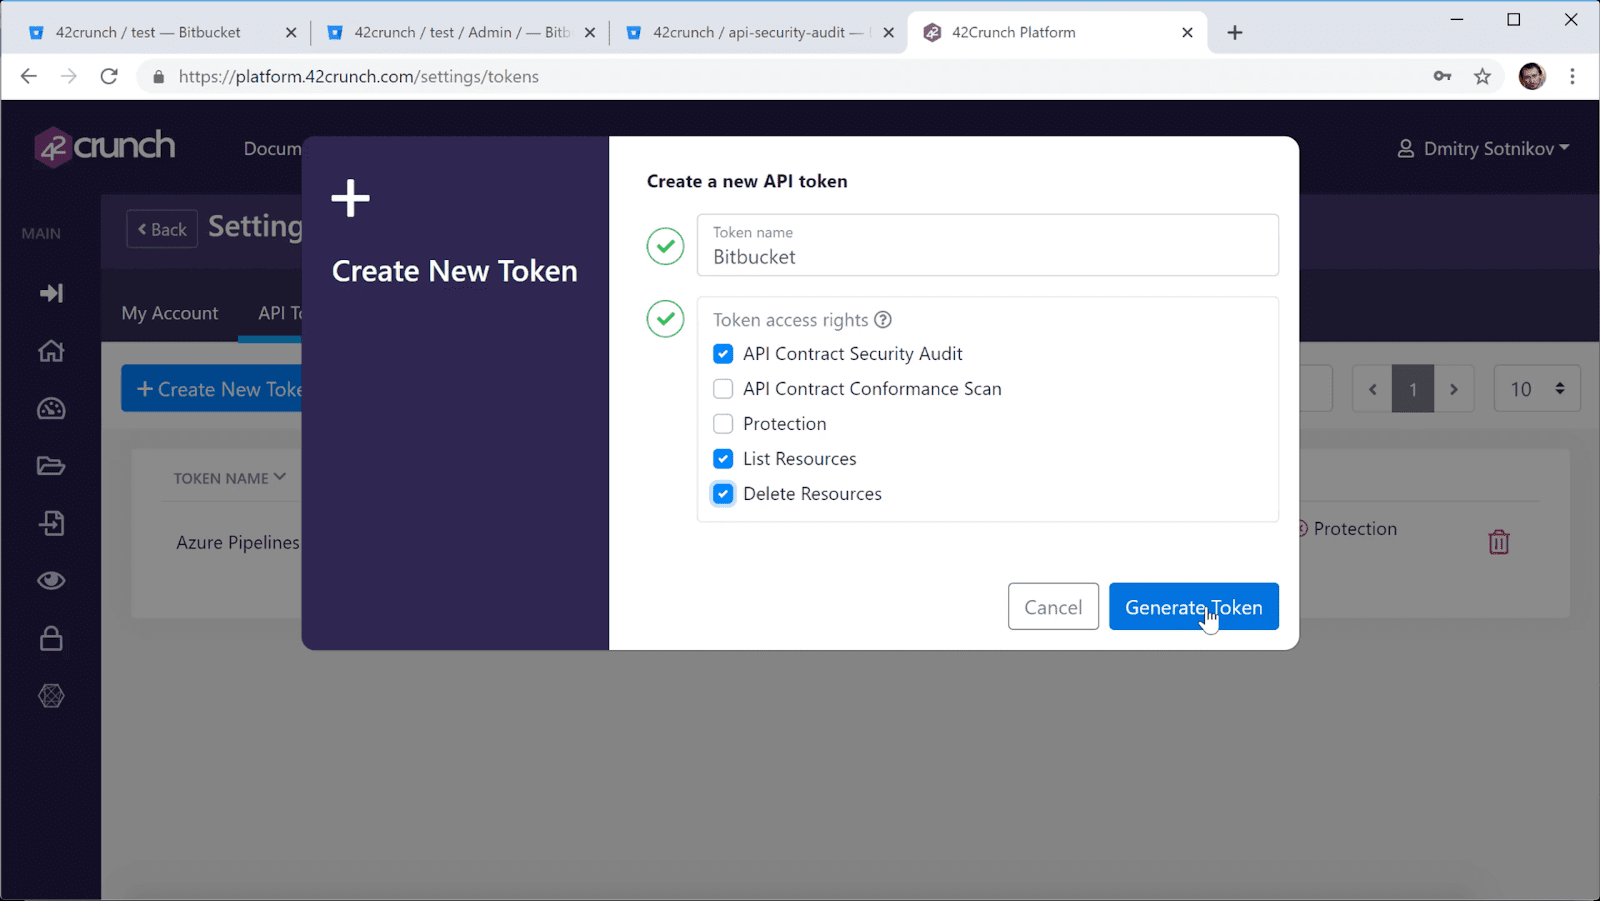
- Log in to 42Crunch Platform, and click your profile.
- Click Settings > API Tokens, and click Create New Token.
- Enter a unique and descriptive name for the token, such as CI_CD token.
- Under token access rights, select API Contract Security Audit, List Resources, and Delete Resources.
- Click Generate Token.
- Copy the token value, you will need it when you configure the task on the pipeline.
STEP 3: Add a Bitbucket variable for the API token
Before you add the pipe to your Bitbucket pipeline, you must add the API token you created as a secured repository variable.

- Log in to your Bitbucket account, and go to your repository.
- Click ⚙ > Repository settings > Repository variables.
- Enter the following:
- Name: SECURED_42C_API_TOKEN
- Value: The value of the API token you created
- Make sure Secured is selected, and click Add.
You have now created the variable that your pipeline can use to authenticate to Security Audit.
Step 4: Add the pipe to your Bitbucket pipeline
To run the pipe, you must add it to your Bitbucket pipeline.

- Log in to your Bitbucket account and go to the pipeline you want.
- Open the pipeline configuration file bitbucket-pipelines.yml for editing
- Under script, add the following line where you want to add the pipe:
- – pipe: 42crunch/bitbucket-api-security-audit-pipe:1.0.5
- Enter the minimum API score that the audited OpenAPI definitions must get from the audit for the pipe to succeed. If any API definitions scores lower than the minimum score you set, the pipe will fail. The default is 75.
- Click commit!
Step 5: REST API Static Security Audit


The pipe will either succeed or fail depending on the minimum score. The summary of the run in the pipeline reports provides you further details on how the job went.
The pipe uploads all discovered OpenAPI definitions to the specified API collection in 42Crunch Platform.
The report of the run includes a link to each discovered API. You can click on the link to view the detailed audit report of the corresponding API in 42Crunch Platform.
Get started with 42Crunch:
- 42Crunch Platform registration: https://platform.42crunch.com/register
- Bitbucket SAST extension: https://bitbucket.org/product/features/pipelines/integrations?p=42crunch/api-security-audit
- Video tutorial of extension: https://42crunch.com/tutorial-bitbucket-api-static-security-audit/
- Documentation: https://docs.42crunch.com/latest/content/tasks/integrate_bitbucket_pipelines.htm
Want to learn more? Join 42Crunch on a live webinar demonstration on June 25th, 2020: https://42crunch.com/webinar-lets-shift-api-security-left/